Showing posts with label cracker recipes. Show all posts

Wednesday, May 4, 2022

Homemade Cheese Cracker TIE Fighters

These homemade cheese cracker TIE fighters are cartoonish compared to the real thing but they are so delicious that I hope you will be willing to forgive my artistic license. 

Food Lust People Love: These homemade cheese cracker tie fighters are cartoonish compared to the real thing but they are so delicious that I hope you will be willing to forgive my artistic license.

For today’s Foodie Extravaganza party, our host chose a Star Wars theme since it’s May the Fourth and all day long folks will be saying "May the Fourth be with you" and memes will abound. 

I must confess that I’m not a big Star Wars fan. In fact, the only movie of the series I have seen in its entirety is Episode VII: The Force Awakens. That said, the whole franchise is such a huge part of popular culture that there is no way to avoid knowing the characters and general story. Unless you live under a rock. 

In case you don’t know what a TIE fighter is, here’s a photo for you. They are star fighters in the Star Wars universe usually piloted by the Imperial force. TIE stands for "Twin Ion Engine.” This is what I tried to make out of cheese crackers and little cheese balls. 

Star Wars tie fighter - two flat hexagonal sides connected by a sphere in between. They are star fighters in the Star Wars universe usually piloted by the Imperial force, i.e. the good guys.


I think mine are pretty cute but I also understand that “cute” is probably not supposed to be an adjective pertinent to TIE fighters. So sue me! At least I tried. 

Homemade Cheese Cracker TIE Fighters

The chilling time is essential to make sure the crackers hold their shape. Because everyone knows that TIE fighters are hexagonal. I bought this hexagon cookie cutter on Amazon: Hexagon Cookie Cutters <affiliate link. It was a bit smaller than I was hoping for but it was simple to use and wasted very little dough. I got about 48 crackers out of this dough recipe. So 24 TIE fighters. 

Ingredients
For the crackers:
1/2 cup or 63g all-purpose flour
1 teaspoon cornstarch
1/4 teaspoon smoked paprika
pinch fine sea salt
3 oz or 84g extra sharp cheddar cheese
3 tablespoons or 43g unsalted butter, cold and cut into cubes
1 tablespoon cold water

For assembling the TIE fighters:
2 oz or 56g extra sharp cheddar cheese
2 oz or 56g cream cheese, softened
1/4 teaspoon smoked paprika

Method
In a large mixing bowl, whisk together the flour, cornstarch, smoked paprika and pinch of salt. 


Grate the cheddar cheese for the crackers finely into the flour bowl. Toss till well combined. Add the mixture to your food processor along with the cold bits of butter. 


Process about 20 seconds, until the mixture looks like damp sand. 


Add the cold water and pulse until the mixture looks like clumps of dough. 


Transfer the dough to a large square of cling film. Fold the sides over and press the dough down into a neat square about 6 in or 15cm across. 


Fold the ends of the cling film over to keep the dough from drying out. Refrigerate for at least 45 minutes (or up to two days.)

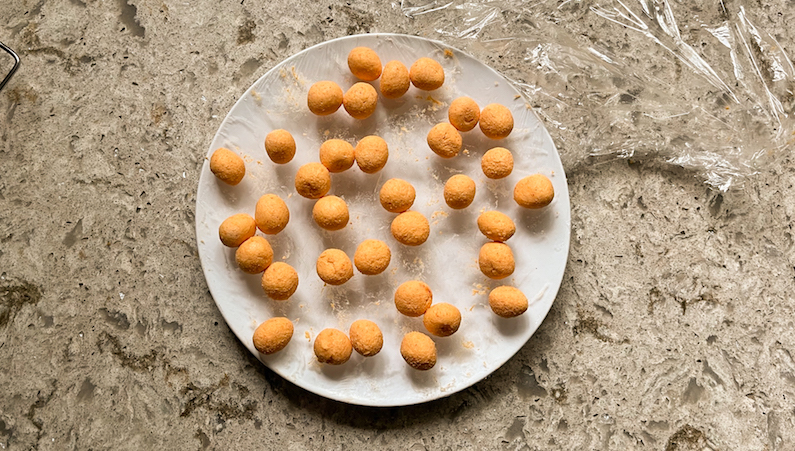
Meanwhile, grate the cheddar for the TIE fighters and combine it thoroughly in the food processor with the cream cheese and paprika. 


Divide it into 1/2 teaspoon portions and roll them in balls. Cover with cling film and refrigerate with the cracker dough. You are going to end up with a few leftover cheese balls but they are delicious on their own so no worries. 


Preheat oven to 350°F or 180°C and prepare your baking pan by lining it with baking parchment or a silicone liner.  (I couldn’t quite fit all my crackers on one pan so I baked them in two lots, one after the other.)

Remove the dough and the cheese ball from the refrigerator. Open the cling film around the dough, lay another piece of cling film on top, and use a rolling pin to roll it into a rectangle 8x9 in or 20x23cm.   

Use the hexagon cutter to cut the dough into crackers. 


Re-roll out any remaining dough to make the rest. If the dough feels too soft to transfer easily to the baking pan, chill it in the freezer for 5-10 minutes before attempting the move. It is already so hot here in Texas that the extra chill time was essential in my warm kitchen. 

Place the hexagons on your prepared baking pan. Use a skewer or chopstick to poke a hole through the center of each. The first batch was 35. The second batch was only 13 for a total of 48.


Bake until golden brown around the edges, about 18-20 minutes, rotating the baking pan halfway through baking.

Remove from the oven and leave to cool completely before assembling the TIE fighters. 


I was impatient so I transferred mine to a wire rack so they'd cool faster. 

To assemble the TIE fighters, gently press one cheese ball onto one cracker. Top with another cracker and press gently. Turn it sideways to balance on the crackers. Repeat until all the TIE fighters are assembled. 


Enjoy! And may the force be with you.

Food Lust People Love: These homemade cheese cracker tie fighters are cartoonish compared to the real thing but they are so delicious that I hope you will be willing to forgive my artistic license.

As I mentioned above, the theme for today's Foodie Extravaganza party is Star Wars! Many thanks to our host, Camilla of Culinary Adventures with Camilla. Check out all the fun Star Wars recipes below. 


Foodie Extravaganza is where we celebrate obscure food holidays by cooking and baking together with the same ingredient or theme each month. Posting day is always the first Wednesday of each month. If you are a blogger and would like to join our group and blog along with us, come join our Facebook page Foodie Extravaganza. We would love to have you! If you're a spectator looking for delicious tid-bits check out our Foodie Extravaganza Pinterest Board.


Pin these Homemade Cheese Cracker TIE Fighters! 

Food Lust People Love: These homemade cheese cracker TIE fighters are cartoonish compared to the real thing but they are so delicious that I hope you will be willing to forgive my artistic license.

 .


Tuesday, March 10, 2020

Homemade Senbei Rice Crackers #BreadBakers

Light and crispy, these homemade senbei rice crackers with sesame seeds are so crunchy and tasty that it’s hard to eat just one! Fortunately this recipe makes two dozen.

Food Lust People Love: Light and crispy, these homemade senbei rice crackers with sesame seeds are so crunchy and tasty that it’s hard to eat just one! Fortunately this recipe makes two dozen.
When we lived in Southeast Asia, one of my favorite snacks was senbei or rice crackers. There was one particular brand that came in various flavors like barbecue, seaweed, plain, and spicy. You know, if you’ve been reading here a while, that I always bought the spicy ones.

But honestly, I loved them all. Okay, the plain ones weren’t that exciting but I loved the rest of them.

When I decided to try making them myself for this month’s Bread Bakers event, I was tempted to make spicy senbei but it occurred to me that rice crackers would go perfectly with a dish I was making for Fish Friday Foodies, ginger sesame tuna tartare. So I give you senbei with black sesame seeds! (Check back next Friday to see the other recipe.)

Homemade Senbei Rice Crackers

As I made the crumbly dough for this recipe, the texture reminded me of shortbread I have made, both sweet and savory, even though it has very little oil or fat. The best way forward seemed to be to slice it like I did with the shortbread. Worked a treat! This recipe is adapted from one on the Japan Centre website.

Ingredients
For the senbei:
3/4 cup or 120g glutinous rice flour aka mochiko
1/3 cup, loosely packed, or 40g cooked white rice
1/4 teaspoon sea salt
2 tablespoons vegetable oil
5-6 tablespoons water
2 teaspoons black sesame seeds

For the glaze:
1 tablespoons soy sauce (I use low sodium Kikkoman)
2 teaspoons mirin

Method
Preheat the oven to 375°F or 190°C. Line two baking sheets with parchment paper or silicone liners.

In a small bowl combine the soy sauce and mirin for the glaze and set aside.

To make the dough, place the rice flour, cooked rice, salt, and oil in a food processor. Run until finely ground.


Next, slowly add the water through the feed tube a tablespoon at a time. After four tablespoons, scrape the sides and bottom of the food processor with a rubber spatula and pulse again. The mixture will look pretty dry still, but put a little the palm of your hand and see if you can form a small ball that hangs together tightly.


If it hangs together but is still really crumbly like mine, add the last tablespoon of water and process again. Scrape the sides and bottom of the processor down again and retest to see if a ball hangs together better. You should be good to go now. Depending on the humidity in your location and how much moisture was in your cooked rice, you might not need the last tablespoon of water.


Place mixture into a bowl and add the sesame seeds. Knead to combine everything into dough.


Roll the dough into a log. Cut the log into 24  1/4 in or 1/2cm slices.


Put the slices on your prepared baking pans and use your fingers to press them out into thin circles. The thinner, the better. If you leave them too thick, they'll still be crispy but they won't be light.


Bake the rice crackers, one baking pan at a time, for about 8-10 minutes. Flip the crackers with a spatula.


Bake again for another 10-12 minutes, or until the crackers start to brown around the edges.


Remove from the oven and allow to cool for a minute or two. Brush the tops with the soy sauce/mirin glaze.


Return to the oven and bake until lightly browned (about 3 to 4 minutes.) Keep a close eye on the crackers to make sure they do not burn.

Food Lust People Love: Light and crispy, these homemade senbei rice crackers with sesame seeds are so crunchy and tasty that it’s hard to eat just one! Fortunately this recipe makes two dozen.


Cool completely on a wire rack before serving. As they cool, they will get crispy.

Food Lust People Love: Light and crispy, these homemade senbei rice crackers with sesame seeds are so crunchy and tasty that it’s hard to eat just one! Fortunately this recipe makes two dozen.


Store in a dry, cool place.

Food Lust People Love: Light and crispy, these homemade senbei rice crackers with sesame seeds are so crunchy and tasty that it’s hard to eat just one! Fortunately this recipe makes two dozen.


Enjoy!

This month my Bread Baker friends are all sharing cracker recipes. Many thanks to our host, Sneha of Sneha's Recipe. Check out them out below:
#BreadBakers is a group of bread loving bakers who get together once a month to bake bread with a common ingredient or theme. You can see all our lovely bread by following our Pinterest board right here. Links are also updated after each event on the #BreadBakers home page. We take turns hosting each month and choosing the theme/ingredient.
BreadBakers

Pin these Homemade Senbei Rice Crackers!

Food Lust People Love: Light and crispy, these homemade senbei rice crackers with sesame seeds are so crunchy and tasty that it’s hard to eat just one! Fortunately this recipe makes two dozen.

 .

Tuesday, March 13, 2018

Easy Homemade Oyster Crackers #BreadBakers

Easy homemade oyster crackers are puffs of buttery, slightly salty dough, rolled thin and baked to crisp perfection. Float them in your favorite chowder!


Had it not been for this month’s Bread Bakers challenge, I don’t think it would ever have occurred to me to make my own crackers. Crackers are thin and crispy and light. And they come in a box.

But after just a little research, I found out that people all over the world are making homemade crackers! There are recipes for saltines, wheat thins, ritz crackers, water crackers and even homemade cheesy goldfish. I so wanted to make those but I couldn’t find a tiny fish cutter. Is it still a cheesy goldfish cracker if it’s round? No, nah, nope.

The decision was made when I ran across a recipe for homemade oyster crackers on Serious Eats because crab and scallop chowder was already on my menu. And everybody knows that a good seafood chowder needs some light and crunchy oyster crackers floating on the top. Maybe someone in Dubai sells them but I haven't found them yet.

Easy Homemade Oyster Crackers

No oysters were harmed in the making of these crackers. The story goes that these delightful little round crackers were first eaten with oyster stew so that is how they got their name. If you don’t feel like fiddling with a round cutter, by all means use a sharp knife or pizza cutter to make small squares instead.

Ingredients
1 1/8 cup or 140g all-purpose flour
1/2 teaspoon fine sea salt
1 teaspoon sugar
1 teaspoon baking powder
2 tablespoons or 28g cold unsalted butter, cut into 1/4 in or 1/2cm cubes
1/3 cup or 80ml cold water, plus additional as needed

Method
Whisk your flour, salt, sugar, and baking powder together in a medium bowl.  Or sift them together into the bowl.

Add the bits of butter into the flour and use a pastry cutter or two knives to work the butter into the flour until it resembles slightly damp sand.


Add the cold water a little at a time and use a fork to mix it through the flour until it begins to stick together like a soft dough. You may not need it all or you may need just a little bit more. This is just like making pie crust, but with way less fat.


Knead the dough for a few turns on a lightly floured surface and then roll it into a ball. Cover it with the mixing bowl and leave it to rest for 15 minutes.

Meanwhile, adjust your oven rack to the middle position and preheat oven to 375°F or 190°C. Line two baking pans with baking parchment or silicone liners.

Once the dough has rested, cut it into two equal pieces and wrap the second one in cling film. Set aside.

Lightly flour your rolling pin and work surface and roll the dough out to a thickness of about 1/8th inch or 3mm. This is about the same thickness as two US quarters stacked on one another or a single UK one pound coin, if you have either of those handy to compare.

Use a large decorating tip (I used a Wilton 124) or a small fondant cutter to cut the dough into small circles. Transfer to your prepared baking sheet. You can put them fairly close together because they don't really puff out from the sides.


You can also use a sharp knife or pizza cutter to cut the dough into small squares instead of using a decorating tip, although putting a Q-tip through the tip does make it very easy to poke the dough out should it get stuck.

Form a ball out of the leftover dough and roll it out and cut shapes again. Repeat the process with the other half of the dough until all the little oyster crackers have been cut out.

Bake the crackers one pan at a time on that middle shelf, until the crackers are golden brown.

Remove from the oven and leave to cool completely before storing in an airtight container.

This makes about 2 1/2 cups or 175g of easy homemade oyster crackers.

Enjoy as a crunchy snack or float some in your favorite chowder or soup.


Check out all the other creative crackers we have for you this month! Many thanks to our host, Sue of Palatable Pastime for this great theme.


BreadBakers
#BreadBakers is a group of bread loving bakers who get together once a month to bake bread with a common ingredient or theme. Follow our Pinterest board right here. Links are also updated each month on this home page.

We take turns hosting each month and choosing the theme/ingredient.

Pin it!

 .