Showing posts with label gluten free recipes. Show all posts

Monday, July 12, 2021

Toasted Eggplant Crust Mini Pizzas

These Toasted Eggplant Crust Mini Pizzas are as delicious as they are adorable with quick tomato sauce and toppings baked on toasted eggplant slices.

Food Lust People Love: These Toasted Eggplant Crust Mini Pizzas are as delicious as they are adorable with quick tomato sauce and toppings baked on toasted eggplant slices.

We went through a phase a while back of attempting to eat keto, that is to say, without carbs or very low carb. It did not go well. I didn’t lose any weight, for one, and I can’t imagine the increased fat in the cheese, meat and bacon I consumed did my cholesterol any good. Nevertheless, I did create a couple of recipes we loved so I’ll call that part of the experiment a win. 

The first used leftover pork roast slices and eggplant to make stuffed cheesy rolls covered in a rich tomato sauce then baked. Seriously, so good! Most canned tomatoes are not considered keto because of the added sugar so the secret appears to be making your sauce from scratch with fresh tomatoes. 

The second recipe was for rice-free cabbage rolls made with both beef and smoked sausage. I don't know that I'll ever make traditional cabbage rolls again because the smoked sausage adds so much flavor and who needs the rice really?

These toasted eggplant mini pizzas were the third keeper. They kind of remind us of our favorite eggplant Parmigiana but with a lot less trouble. Also: pepperoni - always a welcome addition in my book. 

Toasted Eggplant Crust Mini Pizzas

These would be a great appetizer for any crowd, with the added bonus of being naturally gluten free and keto-friendly.

Ingredients
1 large eggplant (about 19 oz or 535g, but a little bigger or smaller won't matter too much.)
fine sea salt

For the fresh tomato sauce:
2 ripe medium sized tomatoes
2 cloves garlic, minced
1 teaspoon dried oregano
1/4 teaspoon baking soda
1/8 teaspoon fine sea salt 

Suggested toppings:
Mozzarella or your favorite pizza cheese, shredded
Pepperoni (get the mini ones if you can, so cute!)
Black olives, pitted and sliced
Sliced jalapeños
Anchovies
Crushed red pepper 

To garnish after baking: fresh basil

Method
Trim the stem of your eggplant and cut it into 1/2 in or 1 cm slices (I got 16.) If you look closely, you'll see the little pokes of the knife I made at the appropriate intervals using a measuring tape because I'm anal like that. Eyeball it if you want to. 


Sprinkle the eggplant slices lightly with salt and stack them in a colander and set aside in your sink or on a plate to catch any liquid that drips out so it doesn't make a big mess.


Peel your tomatoes. I find the easiest way to peel tomatoes is to cut a cross in the skin with a sharp knife and then use a fork to dip the tomato into just boiled water for about 10-15 seconds. The skin will then slip off easily. 


Core and finely chop the peeled tomatoes.


Combine them in a pan with the minced garlic, oregano, baking soda and salt. 


Cook over medium heat for about 17-20 minutes, or until the tomatoes and garlic are softened and most of the liquid has evaporated. Set aside to cool. 


By this time, your eggplant should have released some juice. Dry the slices off with a tea cloth or paper towels. 

Toast them on a non-stick griddle pan over a medium high heat until they are browned on both sides. This takes just 4-5 minutes a side. Unless you’ve got a really large pan, this is going to have to be done in batches. 

Keep a careful eye on the eggplant slices so they don’t burn, especially if you’ve cut some of them a bit unevenly and some edges are thinner than others. I use a spatula to press them down occasionally, to make sure the eggplant and the pan are making a good connection and shift them around the griddle so they brown evenly. 

When one batch is golden on both sides, remove it to a dry tea cloth or layer of paper towels on a clean work surface. The slices should be laid on in a single layer. If you stack the eggplant slices, they’ll continue cooking and steaming. We want them to cool off once they are toasted. 


At this point, if you are ready to bake the mini pizzas, preheat your oven to 400°F or 200°C.

Place your toasted eggplant circles on a baking pan lined with baking parchment or a silicone liner and top them with a small spoon of the tomato sauce, cheese and your favorite other toppings. I made one pan of 12 and the other of four.

Food Lust People Love: These Toasted Eggplant Crust Mini Pizzas are as delicious as they are adorable with quick tomato sauce and toppings baked on toasted eggplant slices.

Bake in the preheated oven until the cheese is melted and bubbling, just 6 -7 minutes. 

Food Lust People Love: These Toasted Eggplant Crust Mini Pizzas are as delicious as they are adorable with quick tomato sauce and toppings baked on toasted eggplant slices.

Garnish with fresh basil leaves and serve with extra crushed red pepper, if desired. Enjoy!

Food Lust People Love: These Toasted Eggplant Crust Mini Pizzas are as delicious as they are adorable with quick tomato sauce and toppings baked on toasted eggplant slices.

It’s high summer now in the northern hemisphere so tomatoes and basil are flourishing in gardens everywhere. To celebrate the season, my Baking Blogger group has chosen to showcase tomatoes and basil for today’s theme. Check out all the recipes below. Many thanks to our organizer and host, Sue of Palatable Pastime

Baking Bloggers is a friendly group of food bloggers who vote on a shared theme and then post recipes to fit that theme one the second Monday of each month. If you are a food blogger interested in joining in, inquire at our Baking Bloggers Facebook group. We'd be honored if you would join us in our baking adventures.

Pin these Toasted Eggplant Crust Mini Pizzas!

Food Lust People Love: These Toasted Eggplant Crust Mini Pizzas are as delicious as they are adorable with quick tomato sauce and toppings baked on toasted eggplant slices.
 .


Monday, March 30, 2020

Flourless Banana Peanut Butter Muffins #MuffinMonday

If you are looking for a tasty gluten-free snack that that can be made in ONE BOWL, these flourless banana peanut butter muffins fit the bill perfectly. They are surprisingly fluffy inside and just the right amount of sweet.

Food Lust People Love: If you are looking for a tasty gluten-free snack that that can be made in ONE BOWL, these flourless banana peanut butter muffins fit the bill perfectly. They are surprisingly fluffy inside and just the right amount of sweet.


When the coronavirus pandemic reached US shores, I wasn’t surprised when paper goods and staples disappeared off of grocery store shelves. What I didn’t expect was the run on flour and sugar! Last week I managed to score a bag of all-purpose flour, one of the last on the shelf, but bread flour is still AWOL.

Bread flour tip: While bread flour is hard to come by, even online, if you have all-purpose flour, you can order vital wheat gluten to add in for bread. I just got mine delivered yesterday and almost high-fived the Amazon delivery guy. Instead, I offer him a sparkling water, wrapped in a disinfectant wipe. And I thanked him copiously for being out there and doing his job. So grateful!

If you’ve been reading this space for the last couple of weeks, you know that I have ripe bananas in my freezer that were originally earmarked for banana cream pie. If you do too, then you have all the ingredients to make these muffins with staples like peanut butter, eggs, honey and spices.

Even better, this recipe requires only one bowl! Baking muffins could not be easier.

Flourless Peanut Butter Banana Muffins 

This recipe is adapted from one on detoxinista.com. The original author used all natural peanut butter with no added sugar or oil. I buy Jif peanut butter – extra crunchy and reduced fat smooth, both of which have added sugar and/or corn syrup – so my muffins are probably a little sweeter than the originals, which was just sweet enough for us.

Ingredients
1 cup or 250g peanut butter (crunchy or smooth – I used a combo)
2 very ripe bananas, mashed (about 1 cup mashed)
3 whole eggs
1/4 cup or 60ml honey
1 teaspoon vanilla extract
1 teaspoon cinnamon
1 teaspoon baking soda
1/2 teaspoon double acting baking powder
1/2 teaspoon fine sea salt

Method
Preheat your oven to 350ºF or 180°C and prepare a 12-cup muffin pan by lining it with paper muffin liners.

In a medium bowl, combine the peanut butter, mashed banana, baking soda, vanilla, eggs, honey, cinnamon and salt.

Beat well with a balloon whisk until smooth and glossy.  This is going to be a very runny batter but don’t stress. It’s all good.

Divide the batter between the 12 muffin cups.


Bake in your preheated oven for about 20-25 minutes. They puff right up into rounded tops and then will sink a bit. This is normal. Deep breathes. The muffins are done when they are well-colored and springy to the touch.


Remove the muffin pan to a wire rack and leave them to cool for about 10 minutes. Remove the muffins from the pan and cool completely on the wire rack. It's amazing how light they are.

Food Lust People Love: If you are looking for a tasty gluten-free snack that that can be made in ONE BOWL, these flourless banana peanut butter muffins fit the bill perfectly. They are surprisingly fluffy inside and just the right amount of sweet.


Enjoy!

Food Lust People Love: If you are looking for a tasty gluten-free snack that that can be made in ONE BOWL, these flourless banana peanut butter muffins fit the bill perfectly. They are surprisingly fluffy inside and just the right amount of sweet.


Check out all of the other great Muffin Monday recipes my friends are sharing today!
Muffin Monday

#MuffinMonday is a group of muffin loving bakers who get together once a month to bake muffins. You can see all of our lovely muffins by following our Pinterest board. Updated links for all of our past events and more information about Muffin Monday can be found on our home page.

Pin these flourless banana peanut butter muffins! 

Food Lust People Love: If you are looking for a tasty gluten-free snack that that can be made in ONE BOWL, these flourless banana peanut butter muffins fit the bill perfectly. They are surprisingly fluffy inside and just the right amount of sweet.
 .

Tuesday, July 10, 2018

Pão de Queijo - Brazilian Cheese Bread #BreadBakers

Chewy and cheesy inside with a slightly crunchy outside, Pão de Queijo is a traditional baked snack served in Brazil. They are terribly more-ish. You cannot eat just one!

Food Lust People Love: Chewy and cheesy inside with a slightly crunchy outside, Pão de Queijo is a traditional baked snack served in Brazil. They are terribly more-ish. You cannot eat just one!


Everywhere I’ve lived over the past 55 years (13 countries and counting!) I’ve learned how to make favorite dishes and added them to our family repertoire, from spicy curries to homemade falafels. Brazil was not only one of our favorite places to live but it also introduced us to many of our favorite recipes including zesty caipirinha cocktails, black beans and sausage, bolinhos de bacalhau, garlicky collards greens, chocolatey brigadeiros and these delicious pão de queijo or Brazilian cheese breads.
Pão de queijo made an appearance at the local churrascarias (grilled meat restaurants) as well as lanchonetes (snack counters) across Brazil. When folks baked them at home, even in Brazil, they typically used Yoki package mixes, as did we. If you look online, there are places in the US you can order Yoki, but it’s just as easy, honestly, to make them from scratch. If you have to order something online anyway, go for the tapioca starch.


Pão de Queijo or Brazilian Cheese Bread

Naturally gluten free! I used the Goya brand tapioca starch for these, readily available in many supermarkets for a reasonable cost. Bob’s Red Mill also makes sells it. This recipe is adapted from one on Sonia Portuguese.

Ingredients - makes about 70
1 cup or 240ml water
1 cup or 240ml milk
1/2 cup or 120ml canola or other light oil, plus more for greasing the pans
1 teaspoon salt
3 1/2 cups or 450g tapioca starch
2  large eggs
7 oz or 200g Parmesan cheese, grated finely

Method
Pour the water, milk, oil and salt into a large pot and bring it to the boil.

Remove the pan from the heat and add the tapioca starch.

Mix well with a wooden spoon until all of the tapioca starch is mixed in then set it aside to cool down till just warm.


Preheat your oven to 375°F or 190°C and grease two large baking pans with oil.

Beat the eggs and add them in to the warm dough.

Knead well until the eggs are fully incorporated. This is going to stick to your hands. Keep kneading and scrape the dough off with a spatula from time to time.


Add the grated cheese and keep kneading until the dough is smooth.


Scoop out 1 tablespoon pieces of dough and drop them on your prepared pan.


Roll the dough pieces into small balls, dampening your hands with water to stop the dough from sticking to you, dropping the balls back onto the baking pan. Wet your hands again as necessary during the rolling.


Bake the pão de queijo in your preheated oven for about 20-22 minutes or until golden brown and speckled in places.

Food Lust People Love: Chewy and cheesy inside with a slightly crunchy outside, Pão de Queijo is a traditional baked snack served in Brazil. They are terribly more-ish. You cannot eat just one!


Ideally, serve them warm. (But we'll also eat them the next day at room temperature.) Enjoy!

Food Lust People Love: Chewy and cheesy inside with a slightly crunchy outside, Pão de Queijo is a traditional baked snack served in Brazil. They are terribly more-ish. You cannot eat just one!
Check out that spongy interior! These guys are so chewy and cheesy. 


This month my Bread Bakers are all sharing gluten free recipes and I am taking my turn as host. Check out all of their great recipes!
BreadBakers
#BreadBakers is a group of bread loving bakers who get together once a month to bake bread with a common ingredient or theme. Follow our Pinterest board right here. Links are also updated each month on this home page.

We take turns hosting each month and choosing the theme/ingredient.

Pin it! 


Food Lust People Love: Chewy and cheesy inside with a slightly crunchy outside, Pão de Queijo is a traditional baked snack served in Brazil. They are terribly more-ish. You cannot eat just one!
.

Tuesday, April 17, 2018

Buckwheat Toffee Cookies #CreativeCookieExchange

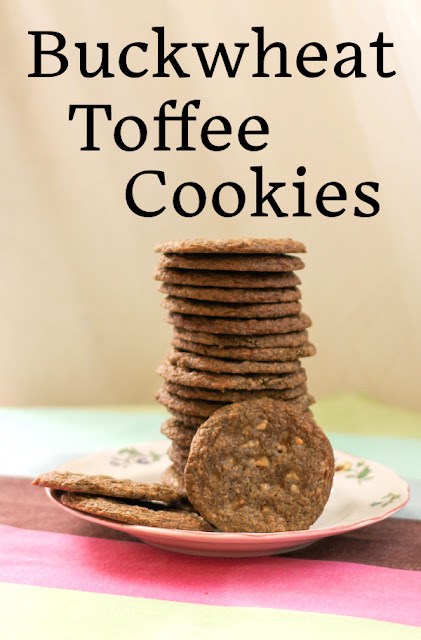
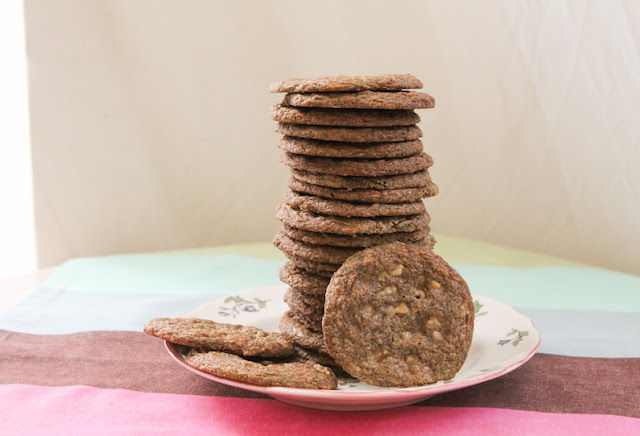
Buckwheat toffee cookies are chewy, sweet and delicious. As an added bonus, if such a thing matters to you, they are naturally gluten free.

Food Lust People Love: Buckwheat toffee cookies are chewy, sweet and delicious. As an added bonus, if such a thing matters to you, they are naturally gluten free.


This month my Creative Cookie Exchange friends are all baking with whole grains. I chose buckwheat because it makes a hearty flour that bakes up light, despite its darker color and I just happen to have some in my freezer.

Buckwheat, despite its name, is not related to wheat at all, but comes from the same family as rhubarb, sorrel and dock. It’s the main ingredient in Japanese soba noodles and the Brittany favorite galette des sarrasin, a large filled crepe, among other regional recipes. It can also be substituted for regular flour in most recipes.

Buckwheat Toffee Cookies   

If you can’t find toffee bits for making these buckwheat toffee cookies, take a small hammer to your favorite hard toffee, like Wether’s candies.

Ingredients
1 1/8 cup or 155g buckwheat flour
1/4 teaspoon baking soda
1/4 teaspoon baking powder
1/2 teaspoon salt
1/2 cup or 113g butter, softened
1/2 cup or 100g brown sugar
1/4 cup or 50g white sugar
1 large egg
1 teaspoon vanilla
1/2 cup or 90g English toffee bits plus extra for sprinkling, if desired.

Tip: Unless you go through a bag quickly, do store any extra buckwheat flour in the freezer. This hearty grain can get stale when stored at room temperature.

Method
Measure your buckwheat flour, baking powder, baking soda and salt into a bowl and whisk to combine. Set aside.


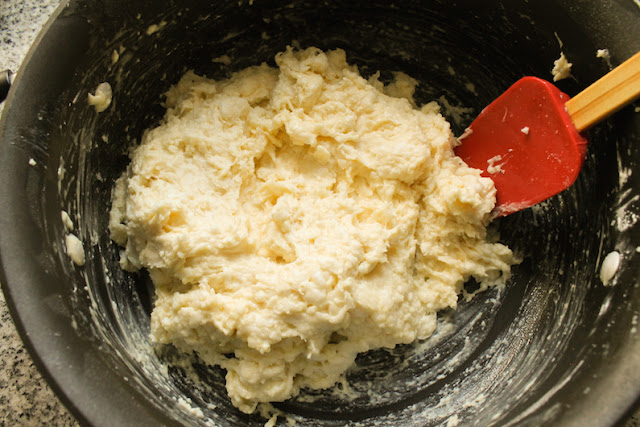
In a mixing bowl, cream together the butter, brown sugar, and white sugar. Scrape down the bowl with a rubber spatula, then add the egg and vanilla.  Blend until fully incorporated.


Add the buckwheat flour, baking soda, and salt. Mix to thoroughly combine. Fold in the toffee bits.


Shape into a log about 1 1/2" in or 13.8cm diameter and roll up in cling film. Refrigerate the dough for at least 1 hour, or overnight so that it firms up.


When you are ready to bake, preheat the oven to 350°F or 180°C and line two baking pans with baking parchment or silicone liners.

Cut the dough log into 24 even slices.


Place them evenly spaced on the lined baking pans. Do not crowd them as, even after chilling, this dough spreads out a lot. Top the circles, if desired, with more toffee bits and gentle press them down.

Food Lust People Love: Buckwheat toffee cookies are chewy, sweet and delicious. As an added bonus, if such a thing matters to you, they are naturally gluten free.


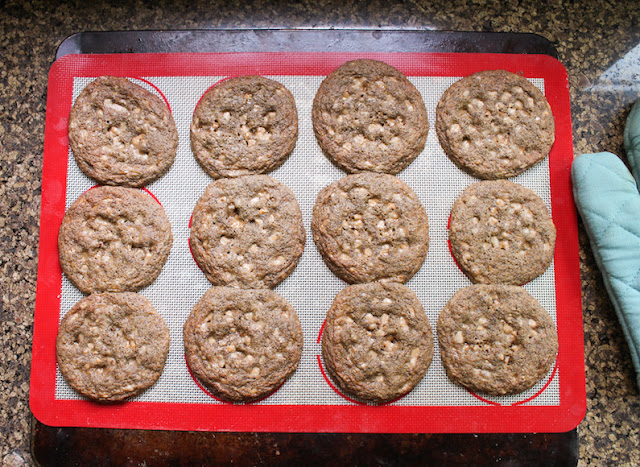
Bake for about 8-10 minutes or until the cookies puff up and look cooked, except perhaps for the very middle.

Food Lust People Love: Buckwheat toffee cookies are chewy, sweet and delicious. As an added bonus, if such a thing matters to you, they are naturally gluten free.
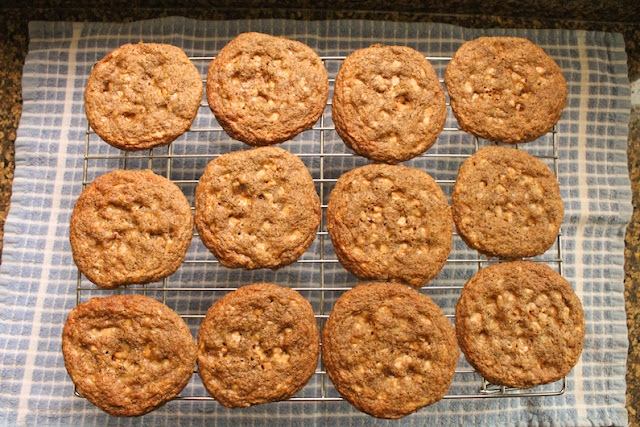
They will still be quite soft so let them cool for 10 minutes on the baking pan, then transfer the cookies to a wire rack to cool completely.

Food Lust People Love: Buckwheat toffee cookies are chewy, sweet and delicious. As an added bonus, if such a thing matters to you, they are naturally gluten free.


Enjoy!

Food Lust People Love: Buckwheat toffee cookies are chewy, sweet and delicious. As an added bonus, if such a thing matters to you, they are naturally gluten free.


Like buckwheat? Try this great blackberry date muffin recipe also.


Check out the rest of the whole grain cookies we’ve baked up for you today. Many thanks to Holly from A Baker’s House for hosting this month.


Creative Cookie Exchange is hosted by Laura of The Spiced Life. We get together once a month to bake cookies with a common theme or ingredient so Creative Cookie Exchange is a great resource for cookie recipes. Be sure to check out our Pinterest Board. We post the first Tuesday after the 15th of each month!

Pin it!

Food Lust People Love: Buckwheat toffee cookies are chewy, sweet and delicious. As an added bonus, if such a thing matters to you, they are naturally gluten free.
.

Thursday, February 15, 2018

Clementine Almond Bundt #BundtBakers

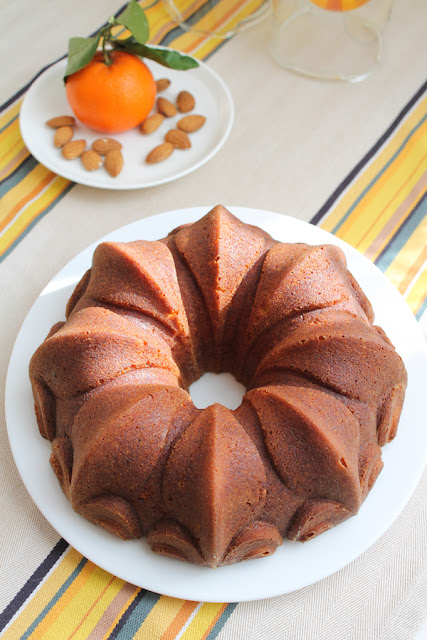
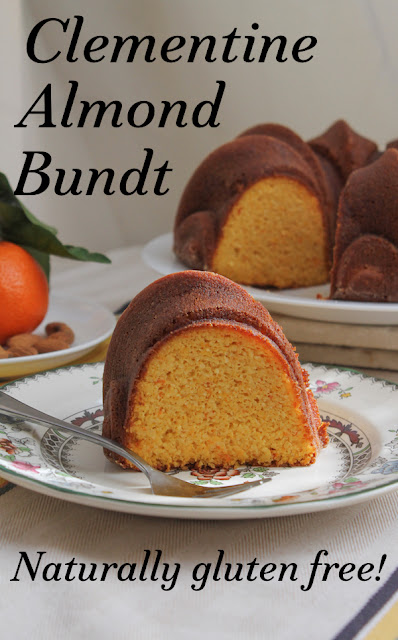
Naturally gluten-free, this clementine almond Bundt is melt-in-your-mouth tender with a wonderful crumb that tastes buttery and rich, with the sweet and sharp flavors of tangy marmalade.

Food Lust People Love: Naturally gluten-free, this clementine almond Bundt is melt-in-your-mouth tender with a wonderful crumb that tastes buttery and rich, with the sweet and sharp flavors of tangy marmalade.


The first time I made this cake was probably 14 years ago, seduced by Nigella Lawson’s description, not of the cake itself, but how fabulous the house smells in the two hours it takes to cook the clementines, and then later, as the cake bakes. And, oh, my goodness, is she right! But even if she were not, the cake is delicious too.

I don’t think I’d ever heard of gluten-free baking so that aspect of the recipe didn’t even occur to me. I have no doubt, in fact, that I probably buttered and floured the pan with my normal all-purpose flour, essentially negating the gluten-free-ness. Not that it mattered back then. Now I know a few people who are unable to eat gluten or wheat, or just feel better when they don’t.

This month my Bundt Bakers are all sharing gluten-free recipes so this recipe is perfect, naturally gluten free.

Clementine Almond Bundt


Nigella Lawson calls this the easiest cake she knows and I have to agree. Aside from the hands-off two hours the clementines need to cook and the quick removal of the seeds, the pureeing and mixing is done in your food processor. Baking the clementine almond batter in a Bundt pan shortens the baking time.

Ingredients
3-4 clementines (about 13 1/4 oz or 375g total weight)
6 eggs
1 cup or 200g sugar
2 1/3 cups or 250g ground almonds
1 heaping teaspoon baking powder
1/4 teaspoon salt

Method
Cover the clementines with cool water in a small pot and bring them to the boil. Lower the fire until the water is at a very low rolling boil and cook for two hours. Check the water level occasionally and add more as needed during the cooking.

Drain the pot and set the clementines aside to cool. Once they are cool enough to handle, cut them open and remove any seeds. Puree them in a food processor, peels and all, until smooth.


Preheat your oven to 350°F or 180°C and prepare your 10-cup Bundt pan by buttering and flouring it with a gluten free flour mix. Set aside.


Add in the eggs, almond flour, sugar, baking powder and salt to the food process and blitz for a minute or so until completely combined.

Pour the batter into your prepared Bundt pan. Bake for 45-50 minutes in the preheated oven or until a wooden skewer comes out clean.


Check the color of the cake as it bakes and cover it with foil if it starts browning before it is cooked through.

Food Lust People Love: Naturally gluten-free, this clementine almond Bundt is melt-in-your-mouth tender with a wonderful crumb that tastes buttery and rich, with the sweet and sharp flavors of tangy marmalade.


Remove the Bundt cake from the oven and leave to cool in the pan for about 10 minutes then turn it out onto a wire rack to cool completely.

Food Lust People Love: Naturally gluten-free, this clementine almond Bundt is melt-in-your-mouth tender with a wonderful crumb that tastes buttery and rich, with the sweet and sharp flavors of tangy marmalade.

Enjoy!

Check out all of the gluten free cakes we've baked for you today!


BundtBakers

#BundtBakers is a group of Bundt loving bakers who get together once a month to bake Bundts with a common ingredient or theme. Follow our Pinterest board right here. Links are also updated each month on the BundtBakers home page.

Pin it!

Food Lust People Love: Naturally gluten-free, this clementine almond Bundt is melt-in-your-mouth tender with a wonderful crumb that tastes buttery and rich, with the sweet and sharp flavors of tangy marmalade.
 .