Showing posts with label homemade gifts. Show all posts

Tuesday, December 15, 2015

Gingerbread Biscotti #CreativeCookieExchange

All the spicy flavors of gingerbread, ramped up a notch or two with the addition of chewy crystallized ginger and crunchy toasted almonds, are represented in these very dunk-able biscotti, decorated with the requisite royal icing. They are perfect to enjoy on a winter morning with a hot cup of something special, or to wrap up as gifts. 

When my girls were growing up and we neared Christmas on the calendar – we lived far too near the equator for the other usual harbingers of the season like falling leaves or a nip in the air – I often baked gingerbread for their after school snacks. And we always made some gingerbread men together as a weekend project, decorating them lavishly with royal icing. The smell as the gingerbread bakes is heavenly!

Yes, somehow gingerbread and the Christmas season just go together. How could I resist turning gingerbread into biscotti for this month’s Creative Cookie Exchange? And don't forget, being twice baked and crunchy, biscotti are very good travelers, in case you need a homemade gift for someone far away.

Many thanks to Laura from The Spiced Life for organizing us each month and for coming up with this great theme!

This recipe is adapted from one at Christmas Cookies.

Ingredients for about 55-60 biscotti
For the biscotti dough:
1 cup or 150g almonds, blanched
3/4 cup or 150g sugar
1/2 cup or 113g butter, at room temperature
1/2 cup or 120ml dark molasses
3 eggs
3 cups or 375g flour
2 teaspoons baking powder
1 tablespoon ground cinnamon
2 teaspoons ground ginger
1 teaspoon ground nutmeg
1/2 teaspoon ground allspice
1/2 teaspoon ground cloves
1/2 teaspoon salt
1/2 cup or 75g candied ginger, coarsely chopped

For the royal icing:
1 1/2 cups or 190g icing sugar
1 egg white (Do not serve raw unpasteurized eggs to persons with compromised immune systems.)
1/2 teaspoon lemon juice
Pinch salt

Method
Preheat your oven to 350°F or 180°C and line two cookies sheets with baking parchment or silicone baking mats.

Toast your almonds for about 10-15 minutes in the preheated oven using a small baking pan where they can fit in one layer. Keep an eye on the almonds and shake or stir the pan at about the five-minute mark to make sure they aren’t scorching on one side. You are looking for a nice golden color.

Let the almonds cool, chop them very coarsely, and set aside. Turn your oven temperature down to 300°F or 149°C.

In large bowl of an electric mixer, cream together the sugar, butter and molasses until smooth.

Add the eggs, one at a time, beating after each addition. Your batter may look a little curdled at this point but it's nothing to worry about.


In another mixing bowl, sift together your flour, baking powder, cinnamon, ginger, nutmeg, cloves, allspice and salt.

Add the candied ginger to the dry ingredient bowl and use your fingers to separate the pieces and coat them with the dry ingredients so they don’t stick together again.


Add in the almonds to the dry bowl and mix well.


Tip the dry ingredients into the egg mixture; mix well to combine. The dough is going to be quite sticky.

Divide your dough up into four equal pieces and wrap each in a large piece of cling film. Use the cling film to shape the dough into four flat loaves, about a 1/2 in or 1 1/4cm thick and 2 inches or 5 1/2 cm wide.


Turn your dough loaves out on to your prepared pans, leaving plenty of room between them for expansion as they bake.


Dampen your hands with water so they won't stick to the dough and to pat the loaves into shape, if necessary.


Bake in your preheated oven until browned at edges and springy to touch, about 25 minutes. Depending on how well your oven circulates, you might need to rotate the pans midway though the baking time so everything gets evenly browned.

Leave the loaves to cool for about 15-20 minutes on the baking sheets.


Remove the loaves to a cutting board and use a serrated bread knife to cut them into long, 1/2-inch or 1 1/4cm thick diagonal slices.


Return the slices to the baking sheets, with one of the cut sides down.


Return to the oven and bake about 15 to 18 minutes longer, turning the biscotti over once halfway through the baking. Once again, rotate the pans if necessary to get an even bake. They should be slightly more brown around the edges.


Transfer biscotti to racks and let cool completely.

To make the royal icing, sift your sugar into a small bowl, then add the pinch of salt, the lemon juice and the egg white. Mix together until smooth.


Spoon the icing into a piping bag and use a small tip to decorate the biscotti.


Serve, or store in an airtight container of up to 1 month; wrap well and freeze for longer storage.

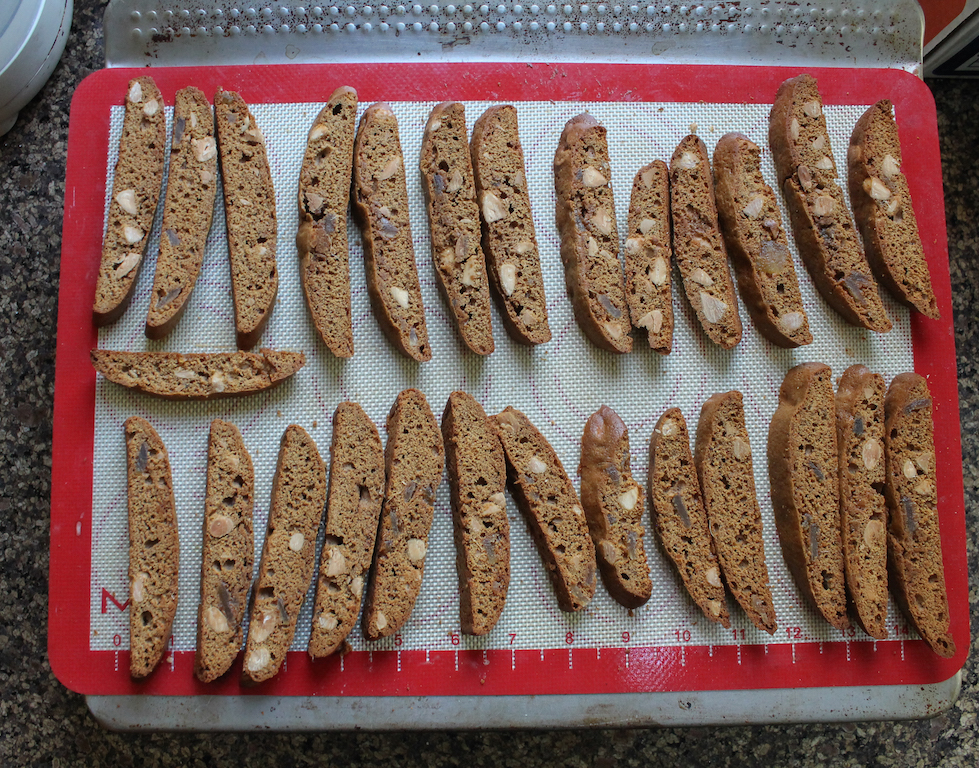
So much gingerbread biscotti! 
Enjoy!


Biscotti (or mandelbrot or any other twice baked cookie by any other name) are one of the perfect Holiday tin cookies! They last forever, and there are so many ways to make them festive. So Creative Cookie Exchange has got you covered--sweet, savory, low fat, loaded with decadence, you name it, we’ve got it! Happy Holidays!


Creative Cookie Exchange is  a great resource for cookie recipes! Be sure to check out our Pinterest Board and our monthly posts (you can find all of them at The Spiced Life). We post together the first Tuesday after the 15th of each month!


Looking for more gingerbread deliciousness?

Check out my Rich Gingerbread Muffins with Honey Ginger Glaze

Or my Dark Chocolate Gingerbread Muffins. Both perfect for a special tea or breakfast!

.


Friday, December 19, 2014

Holiday Mint M&M Chocolate Fudge

This quick and easy Holiday Mint M&M Fudge recipe has two layers of both chocolate fudginess and holiday mint M&Ms. Change it up to add the chips or M&Ms of your choice. It's easy to make but hard to give away. You'll want to eat it all yourself.

Food Lust People Love: This quick and easy Holiday Mint M&M Fudge recipe has two layers of both chocolate fudginess and holiday mint M&Ms. Change it up to add the chips or M&Ms of your choice. It's easy to make but hard to give away. You'll want to eat it all yourself.


So, Christmas Week comes to a close with this fifth and final day. Now the actual holiday baking of pecan pies and roast turkeys begins! I told a friend jokingly today that our Christmas dinner was already cooked. All organized! And she took me seriously. Truth is, I don’t have one thing done. Oh, sure! I’ve been making candy and baking cakes and muffins but those are just welcome extras. At our house, there’s got to be turkey and stuffing. Or baked Christmas ham with pineapple, brown-sugar-mustard glaze and those weird cherries that look so cool but that no one eats. Does anybody anywhere eat those?!

The first year I started this blog, I wrote about my grandmother who always made a variety of fudges for presents at Christmas time. It was kind of a competition between her and her sisters to see who made the best.  The two I remember best were a snow white divinity fudge and a chocolate pecan fudge, both of which I’ve tried to replicate.

I think my grandmother would have been thrilled at the ease of the fudge I've made for you today. No thermometers or tricks. Just boil, simmer, mix and pour.

Make sure you scroll on down to see all the Day 5 treats my fellow Christmas Week bloggers have made for you.

Ingredients
3 cups or 600g granulated sugar
2/3 cup or 150ml evaporated milk
3/4 cup or 170g butter
7 oz or 200g marshmallow creme
12 oz or 340g semi-sweet chocolate chips
1 teaspoon vanilla
1/2 teaspoon salt
1 1/4 cup or 9.9oz or 280g Holiday Mint M&Ms, divided in half

Method
Line a 9x13 in or 23x33cm pan with parchment paper and spray with non-stick spray, below to help it stay in place and on top to help the fudge turn loose later.

In a large pot, combine your sugar, evaporated milk and butter over medium-high heat. Bring to a boil, stirring often.


Reduce heat and simmer for 5 minutes, stirring constantly. It’s still going to bubble gently the whole time since that is the nature of sugary candy.

Remove the pot from the heat; add the marshmallow creme and chocolate chips, stirring until the mixture is smooth. Then stir in the vanilla and salt.


Pour half of the mixture into your prepared pan and spread it around.

Scatter half of the M&Ms over the fudge.

Food Lust People Love: This quick and easy Holiday Mint M&M Fudge recipe has two layers of both chocolate fudginess and holiday mint M&Ms. Change it up to add the chips or M&Ms of your choice. It's easy to make but hard to give away. You'll want to eat it all yourself.


Spread the remaining fudge over the top. Shake the pan to help the fudge spread out in the pan.

Sprinkle the remaining M&Ms into the fudge. Shake the pan gently again. The hot fudge will continue to spread. Tap the M&Ms gently to make sure they are stuck into the fudge.

Food Lust People Love: This quick and easy Holiday Mint M&M Fudge recipe has two layers of both chocolate fudginess and holiday mint M&Ms. Change it up to add the chips or M&Ms of your choice. It's easy to make but hard to give away. You'll want to eat it all yourself.


Allow the fudge to cool until firm. Cut into squares.

Food Lust People Love: This quick and easy Holiday Mint M&M Fudge recipe has two layers of both chocolate fudginess and holiday mint M&Ms. Change it up to add the chips or M&Ms of your choice. It's easy to make but hard to give away. You'll want to eat it all yourself.


Store in an airtight container. This stuff makes excellent gifts if you can bear to give it away.

Still looking for Christmas inspiration? We’ve got you covered!

Pin this Holiday Mint M&M Fudge!

Food Lust People Love: This quick and easy Holiday Mint M&M Fudge recipe has two layers of both chocolate fudginess and holiday mint M&Ms. Change it up to add the chips or M&Ms of your choice. It's easy to make but hard to give away. You'll want to eat it all yourself.

.

Sunday, November 30, 2014

Brandy Truffles

Deep, dark and chocolatey, these easy-to-make truffles are spiked with heady brandy and rolled in cocoa. The addition of digestive biscuit crumbs makes them less sticky so they are easier to roll. 

This week my Sunday Supper group is bringing you some great gifts from the kitchen and nothing says Have the Merriest of Christmases like a gift of chocolate and booze! These pretty little truffles have both in spades. Make sure to scroll down to the bottom of my recipe to see all the other great gifts from the kitchen. Many thanks to my friend, Renee from Magnolia Days for hosting this special event.

Ingredients
7oz or 200g semi-sweet chocolate chips
3/4 cup or 175ml whipping cream
5 tablespoons brandy
1 1/4 cups or 100g cocoa powder
 8 3/4 oz or 250g digestive biscuits (Graham crackers can be substituted but since they are drier, you might not need as many.)

To serve or gift: small paper muffin cups

Method
Tip the chocolate chips into a heatproof bowl.  Heat the cream in the microwave or in a pot on the stove until it is just about to boil.

Pour the hot cream over the chocolate and stir until all the chips are melted.


Add in the brandy and stir well.


Pop the mixture in the refrigerator to cool. Set a timer for 20 minutes and stir the mixture when it goes off and put the bowl back in the refrigerator. Keep doing this until the mixture is completely cool.

Meanwhile, put your digestive biscuits in a plastic bag and use a rolling pin to crush them to a fine powder.


When the chocolate/cream mixture is cool, stir in the digestive biscuits a few spoonfuls at a time, until you reach a consistency firm enough to roll into balls and hold their shape. I used all the biscuit crumbs in mine.


Put your cocoa in a bowl and use a teaspoon to scoop out some of the truffle mixture. Roll it between your palms to create a smooth ball and set it in the cocoa. Shake the bowl gently to move the truffle around so it gets coated with the cocoa.


Remove the cocoa-coated truffle from the bowl and place in a small paper muffin cup. Continue rolling and coating until all the truffles are made.

A friend was helping me so she insisted on using gloves.


These are a great gift to take along for a holiday party, especially if arranged on a pretty Christmas plate.


Enjoy!


Do you need inspiration for more gifts from the kitchen? We’ve got you covered!

Beverages
Bread
Appetizers and Snacks
Condiments and Sauces
Savory and Sweet Mixes
Desserts and Sweets

.

Saturday, December 14, 2013

Gram's Favorite Peanut Brittle

Peanut brittle is a classic homemade gift for the Christmas season. It’s one of those recipes where the ingredients become way greater than the sum of their parts. Who would think that sugar, syrup and peanuts could be transformed into something so divine?

Food Lust People Love: Who doesn't like to get a small box of homemade peanut brittle for Christmas?! This easy recipe for Gram's Favorite Peanut Brittle makes one pound for giving away or eating by yourself. It can be easily doubled.


Earlier this year, in June to be exact, we drove from Houston to New Iberia, Louisiana to spend a couple of days with my grandmother. She was in a rehab center, working on getting strong enough to go home again, after surgery to repair her broken femur.

Just before we left, I called my Aunt Nonnie. What can we bring for Gram? Her answer was all candy:  Peanut brittle, licorice and orange slices.  Never mind that Gram had been diabetic for years, she loved her sweets. When you reach the ripe old age of 99, screw the diabetes!

So, off we went on a candy hunt.  My mother, an integral part of the search team, said that she always bought Gram a tin of peanut brittle from Costco, or maybe Sam’s, each Christmas because that’s the only time of the year it was available. I must admit I was shocked. I had no idea that peanut brittle was a Christmas-season-only thing!  I guess I’ve lived outside of the US for too long, in places where peanut brittle is never available. Sadly, she was right.

We brought Gram orange slices and licorice and substituted something else for the peanut brittle. But I always regretted that I couldn’t find any. As I said to Mom, if I had known ahead, I’d have made some. So, Gram, this batch is for you. I am imagining that your heaven includes a daily supply of peanut brittle but I still wanted to make you some.

Gram's Favorite Peanut Brittle


Ingredients to make 1 lb+ or 475g of peanut brittle
1 cup or 200g sugar
1/2 cup or 120ml light corn syrup
1/4 teaspoon salt
1/4 cup or 60ml water
1 cup or 150g shelled raw peanuts
2 tablespoons butter plus more for greasing foil.
1 teaspoon baking soda

Method
Line a baking pan with foil and then butter the foil liberally.  Set aside.

Put the sugar, corn syrup, water and salt in a heavy 2-quart pot, and stir until all the sugar is dissolved.  Add in the peanuts and stir again.


If you have a candy thermometer, attach it to the pot now.  Cook over a medium heat, stirring occasionally, until the thermometer reaches 300°F or 149°C or until a small amount dropped into a glass of very cold water turns into hard and brittle threads as it sinks.


Remove from heat and stir in the two tablespoons of butter and the baking soda.


Pour the now frothy mixture immediate into your prepared pan.

Food Lust People Love: Who doesn't like to get a small box of homemade peanut brittle for Christmas?! This easy recipe for Gram's Favorite Peanut Brittle makes one pound for giving away or eating by yourself. It can be easily doubled.
My original instructions from Good Housekeeping suggested that I use two forks to stretch and spread the mixture in the pan but I found that jiggling the pan vigorously did the trick.

Food Lust People Love: Who doesn't like to get a small box of homemade peanut brittle for Christmas?! This easy recipe for Gram's Favorite Peanut Brittle makes one pound for giving away or eating by yourself. It can be easily doubled.
See how it has spread almost to the corners now.


When the peanut brittle is cool enough to handle, use your hands to break the brittle into smaller pieces.  Share with someone you love.

Food Lust People Love: Who doesn't like to get a small box of homemade peanut brittle for Christmas?! This easy recipe for Gram's Favorite Peanut Brittle makes one pound for giving away or eating by yourself. It can be easily doubled.
Enjoy!


Visit all the other Christmas Week Peeps for more Holiday Baking Goodness:

Pin Gram's Favorite Peanut Brittle!

Food Lust People Love: Who doesn't like to get a small box of homemade peanut brittle for Christmas?! This easy recipe for Gram's Favorite Peanut Brittle makes one pound for giving away or eating by yourself. It can be easily doubled.
.

Wednesday, November 23, 2011

Toffee with Chocolate and Almond Slivers


Toasted almonds on the bottom, salted toffee in the middle and more almonds and semi-sweet chocolate on top. Break this apart like peanut brittle with a little hammer. Buttery, sweet and salty, and delicious. 

So, my house-hunting trip to Cairo was indeed canceled.  We had been blessed by an invitation to share Thanksgiving with a family there on Friday and I was planning to make this to bring, to share, since I wouldn’t have a proper kitchen in the serviced apartment.  I decided to make it anyway, because, so rich are my blessings, I have been graced with another invitation to share Thanksgiving here in Kuala Lumpur.  Since I have an actual kitchen and oven, I will also make an apple pie.  And green beans, just like my grandmothers used to make, to bring as well.

May you all be blessed richly with friends and family who love you this Thanksgiving.  I am firmly convinced there is no greater blessing than friends and family who love you!  I am more grateful than I can express.  Surely, I do not have my family with me, but they are safe and I hope that they also know how much they are loved by me and how much I wish we could be together. 

Ingredients
2 rounded cups or 300g of slivered almonds
2 cups or 450g unsalted butter
3/4 teaspoon fine sea salt
2 cups or 450g sugar
1/8 cup or 30ml light corn syrup
1/3 cup or 80ml water
1 1/2 rounded cups or 290g semi-sweet chocolate chips


Method
Toast the almond slivers in a dry non-stick frying pan over a medium heat.  Stir or toss them frequently to make sure they brown evenly. 


It's hard to see how toasted these are but they were darker than the photo makes them appear. 
Line a baking pan with sides  (minimum 15 1/2in x10 1/2in or 40cm x 27cm) with foil.  Butter the foil liberally.


Sprinkle half of the toasted almonds on the foil.

Ah, see! They look more toasted in the natural light.
In a heavy saucepan, add butter, salt, sugar, corn syrup, and water. Cook over medium-high heat.


Cook the mixture until it reaches 290-300 degrees using a candy thermometer, which is the soft crack stage. Be really careful at this step, at 280 it goes really fast, and can burn in mere seconds. 


Pour the mixture immediately over the almonds. Set a timer for five minutes and let it cool until it is firm but still hot.


Sprinkle the chocolate chips over the toffee.  Set your timer for two minutes and, when it rings, spread the chocolate all over the toffee.


Sprinkle with remaining toasted almond slivers.  Chill in the refrigerator until it hardens completely.


Peel the toffee off of the foil and turn it over.  Gently break it into pieces with a small hammer. 


Store in the refrigerator in an airtight container, with waxed or parchment paper between the layers.  Or serve immediately!

Happy Thanksgiving to everyone who is celebrating this weekend!


Adapted from this recipe, but originally from Pinterest and The Idea Room.  I tried to find the original post on Pinterest but I don’t really understand how it works, I guess.