Friday, October 23, 2015

Roasted Onions with Rosemary

There is something about the application of heat on onions that sweetens them as they roast, drizzled with olive oil, sprinkled with sea salt, freshly ground black pepper and rosemary. Simple, but delicious. 

Onions are vegetables so why is it we so often use them as a flavoring for less well-endowed dishes, instead of giving them their rightful place as the star in a side dish? It’s a question I’ve been asking myself for more than 14 years, which was the first time I made this Jamie Oliver recipe for cheesy stuffed onions with bacon. The main reason that many years ago was because my young daughters, still living at home, were not fans of cooked onions, although they both enjoyed them raw in salads. Perhaps your family is the same. Their father and I, on the other hand, love onions any way you’d like to prepare them but are particularly enamored when they are roasted.

A few years ago, when we were still living in Cairo, a friend was giving a dinner party and I was roped in to help. He would handle the starters and main course and I would bring the sides and desserts. One of the things I made was a huge pan of roasted onions that had been drizzled with olive oil and sprinkled with herbs. As they roast, the onion layers separate, some pieces breaking off entirely and becoming extra crispy in the heat of the oven, others softening sweetly into tenderness. I could have eaten the whole lot before it ever made it out of the kitchen.

We’ve been eulogizing those roasted onions for more than three years now. Last night I finally got around to making them again. I served them alongside some roasted chicken and they were sheer perfection. Just as good as we remembered. Which is somewhat of a relief.

Ingredients
2.2 lbs or 1kg small purple onions (Some people call them red onions but they sure look purple to me.)
3-4 sprigs fresh rosemary or your favorite fresh herb, plus extra for garnish
Olive oil
Sea salt
Freshly ground black pepper

Method
Preheat your oven to 375°F or 190°C. Peel your onions and cut the smaller ones in half. Cut larger ones in three or four pieces.

Set them cut side up on a large baking tray. Sprinkle with sea salt and freshly ground black pepper.

Pull the leaves off of the rosemary and sprinkle them on the onions as well.


Drizzle everything generously with extra virgin olive oil.


Pop the pan in your preheated oven and set the timer for 30 minutes.

When the timer goes off, have a look at the onions. If the edges are just beginning to turn brown, leave them another 15 minutes on that side.


When that time is up, take the pan out of the oven and give the onions a gentle stir. Some of the outer layers of the onions will come loose, but that’s okay.

Put the pan back in the oven for another 15-25 minutes, checking periodically so that the onions don’t burn. You want them very dark in some places, crispy in others but still with some soft insides showing.


Remove them from the oven and taste for seasonings. Add more salt and pepper, if needed.

Sprinkle with a little more chopped rosemary, if desired.


Enjoy!

.

Tuesday, October 20, 2015

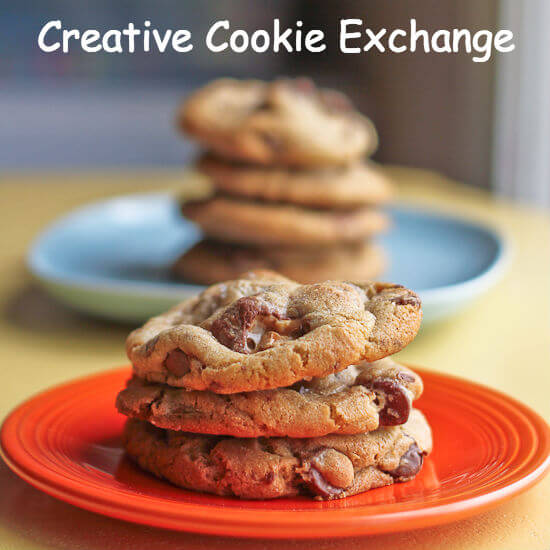
Peanut Butter Pumpkin Cookies #CreativeCookieExchange

Peanut butter and pumpkin combine beautifully for cake-y cookies chock full of chocolate chips or M&Ms. Great for parties and snacks this time of year!

I may have mentioned once or a thousand times before but I am not much of a sweet eater. Give me a large link of smoked sausage over a sweet slice of chocolate cake any day. New friends, that is ones I've made in the last four years since I started blogging, are always shocked by this revelation because I bake so much. I love to bake, it’s true! I just give it all away, mostly. When you consider the expensive hobbies some people enjoy, like collecting antiques, horseback riding or racing yachts – even quilting, have you priced quality fabric lately?! - this is relatively cheap. Some eggs, butter, flour, flavorings. I love the creative process of baking, plus there’s the added bonus of feeling benevolent when I give treats away. If you are looking for a hobby, this is a good one!

M&Ms vs Chocolate Chips
I’ve got another confession to make about these cookies in particular. I’ve discovered that I am not a fan of the seasonal M&Ms. I thought they would taste the same as other M&Ms but they really don’t. I think they are sweeter. (See paragraph 1.) The colors are great but next time I make these cookies, I’m going to stick to semi-sweet or dark chocolate chips, the only chocolate I actually like. If you like the seasonal ones, by all means, carry on. The cookies themselves were fluffy and cake-y and soft. And not overly sweet when I ate around the M&Ms. Yes, I did that thing.

Many thanks to Laura from The Spiced Life for organizing our Creative Cookie Exchange group and choosing this month’s theme: Celebrate the Pumpkin. Thanks also to Renee from Magnolia Days for putting together our link list of 12 pumpkin related cookies. Make sure you scroll down to check them out at the bottom of my post.

This recipe was adapted from one on the Bob’s Red Mill site.

Ingredients
1/4 cup or 65g crunchy peanut butter
1/4 cup or 60g unsalted butter at room temperature
1/2 cup, firmly packed, or 100g brown sugar
1/4 cup or 50g sugar
1 egg
1 teaspoon vanilla extract
1 cup or 125g flour
1 teaspoon baking soda
1/2 teaspoon salt
3/4 cup or 195g canned pumpkin puree (not pumpkin pie filling)
1 1/4 cups or 113g 5-minute oats
3/4 cup or 150g M&Ms (or sub chocolate chips – see paragraph 2 above) plus a handful extra for decorating (optional)

Method
Preheat your oven to 350°F or 180°C and prepare your baking sheet by lining it with parchment or a silicone baking mat.

In a large mixing bowl or the bowl of your stand mixer, cream the peanut butter, butter and sugars together until fluffy.

Scrape down the bowl with a rubber spatula. Add in your egg and vanilla and beat again.


Add in the pumpkin and beat again until combined.


Sift the flour, soda and salt directly into the same bowl. Beat again.


Finally, add the oats and M&Ms and stir well or use your beaters on a very slow speed to combine. You don’t want to break up the M&Ms.


Use a scoop or a spoon to drop balls of cookie dough onto your prepared cookie sheet.

Poke a few more M&Ms on the top of each for decoration, if desired.


Bake in your preheated oven for 12-14 minutes or until just browned. These cookies should be chewy and slightly under- rather than over-baked, if you are going to err on one side or the other. They turn out soft and cake-y and no one likes dry cake.

Allow to cool for a few minutes on the pan then remove the cookies and leave to cool completely on a wire rack.


Repeat the scooping/baking process until all the cookies are done. This makes about 2 dozen, depending on the size of your scoop. Mine is 2 tablespoons or 30ml and I got 27 cookies.


Enjoy!


Need a great resource for cookie recipes? Be sure to check out our Pinterest Board and our monthly posts (you can find all of them at The Spiced Life), on the first Tuesday after the 15th of each month!


.

Thursday, October 15, 2015

Root Beer Float Bundt #BundtBakers

Frosty root beer with a big scoop of vanilla ice cream – that is to say, root beer cake with vanilla ice cream glaze or a root beer float – in Bundt cake form!

You know that feeling your teeth get after drinking Coke, kinda gritty like they are rough as you rub them together? I hated that as a child so I wouldn’t drink Coke. My favorite beverage was root beer, and if it wasn’t on the menu, I’d order Sprite or 7Up. Remember the uncola? My parents divorced when I was nine so every summer my sisters and I would travel to spend time with our father. In the early years he lived in South America – known to some as The Land of No Root Beer. Okay, I’m the only one who called it that. It is a fact though that until just a few years ago, most of the world was The Land of No Root Beer. I guess it’s a typically American thing. Anyway, when we went to visit Daddy, my mom always packed a small bottle or two of root beer extract so that I could make my own libation. Non-bubbly root beer wasn’t quite the same as the bottled stuff but it was way better than a summer without root beer. Truth.

When our host Laura, of Baking in Pyjamas, chose Beverages for this month’s Bundt Baker theme, I thought I was being original in wanting to make a root beer flavored cake, but as often happens when theoretical brilliance strikes, the internet revealed that many people had beat me to it. I also found many recipes for frosting using ice cream, but this may be the first Bundt cake to combine the two, root beer float style. Or not. At some point a person just has to stop searching the web for reassurance and get on with baking.

Ingredients
For the root beer cake batter:
2 cups or 475ml root beer (Do not use diet root beer! You are baking CAKE, after all.)
1 cup or 100g unsweetened cocoa powder
1/2 cup or 115g unsalted butter
1 1/4 cups or 250g granulated sugar
1/2 cup, firmly packed, or 100g dark brown sugar
1/2 teaspoon root beer flavoring or 1 teaspoon root beer extract
2 cups or 250g all-purpose flour
1 teaspoon baking powder
1 1/4 teaspoons baking soda
1 teaspoon salt
2 large eggs

For the ice cream glaze:
2/3 cup or 156ml melted rich vanilla bean ice cream
1/4 teaspoon salt
1 3/4 cups or 220g powdered sugar

Method
Preheat your oven to 325°F or 163°C and prepare your 10-inch Bundt pan by spraying it liberally with nonstick cooking spray; alternatively, butter it then dust lightly with cocoa powder and knock out the excess.

Cut your butter into small chunks. In a medium sized pot, heat the root beer, cocoa powder, and butter over medium heat until the butter is melted and you have a nice homogeneous chocolatey sauce.


Add the sugars and whisk until dissolved. Add the root beer flavoring and whisk again. Remove from the heat and leave to cool.


In a mixing bowl, whisk the flour, baking powder, baking soda and salt together. If your whisking arm is tired, take a short break. We've got more whisking coming up and the chocolate mixture needs a little more cooling time anyway. Probably.

In a small bowl, whisk the eggs until just beaten, then whisk them into the cooled cocoa mixture until combined.


Gently fold the flour mixture into the cocoa mixture. A few small lumps may be visible but that’s okay.

Just keep folding. 


Pour the batter into the prepared pan.

Bake for 45 to 50 minutes. Test for doneness with a wooden skewer. When it comes out clean, your cake is done.


Transfer the pan to a wire rack and leave to cool for about 10 minutes. Gently loosen the sides of the cake from the pan and turn it out onto the rack. Leave to cool completely while you get on with making the glaze.


In a mixing bowl, add the salt to the melted vanilla ice cream along with one cup or 125g of icing sugar. Whisk well to combine. Keep adding the remainder of the sugar a little at a time, stirring well with each addition, until you reach your desired consistency of glaze. I like a thick glaze so I added all of the sugar.


Once the cake is completely cooled, drizzle on the glaze or pour it completely over the Bundt.

Since I had baked in the Nordic Ware Heritage pan and wanted to emphasize its wonderful swirls, I didn’t use all the glaze this recipe makes. Store any leftover glaze in the refrigerator. You can spoon more on when serving the cake, if desired.


Enjoy!


Has your favorite beverage been transformed into a Bundt this month? Check out our link list of 30 drink inspired recipes to see!

BundtBakers

#BundtBakers is a group of Bundt loving Bakers who get together once a month to bake Bundts with a common ingredient or theme. You can see all of our lovely Bundts by following our Pinterest Board. We take turns hosting each month and choosing the theme or ingredient.

Updated links for all of our past events and more information about BundtBakers can be found on our homepage.


.