Monday, March 28, 2022

Sourdough Sweet Carrot Mini Muffins #MuffinMonday

These sourdough sweet carrot mini muffins are tender and delightful with a cinnamon sugar topping. They disappear in record time. Bake some today!

Food Lust People Love: These sourdough sweet carrot mini muffins are tender and delightful with a cinnamon sugar topping. They disappear in record time. Bake some today!

If you’ve been reading along here for a number of years, you might remember that my younger daughter’s favorite birthday cake is our friend Jacky’s divine carrot cake. Unlike many carrot cake recipes, it does not start with grated carrots but cooked mashed ones. The result is a tender crumb that has won over even professed carrot haters. 

When I decided to bake sourdough carrot muffins for this month’s Muffin Monday, I knew that cooked, mashed carrots were going to be featured but if you google carrot muffins, as I did, every single one that turned up had grated carrot. 

It suddenly occurred to me that my search was faulty. What I really needed was a squash or pumpkin muffin recipe so I could replace them with cooked carrot. And so I did. 

Sourdough Sweet Carrot Mini Muffins

This recipe is adapted from a pumpkin muffin recipe on Lynn’s Way of Life. You can bake these as 12 normal sized muffins but I just love the way that the mini ones disappear in my house. I mean, really, who doesn’t have room for a mini muffin? So tiny, so good. 

Ingredients for 24 mini muffins
For the muffin batter:
8 oz or 227g fresh carrots
1 cup or 125g all purpose flour
1/3 cup, firmly packed, or 66g brown sugar
1 1/2 teaspoons cinnamon 
1/2 teaspoon baking powder
1/4 teaspoon baking soda
1/4 teaspoon salt
1 egg
1/4 cup or 60ml canola or other light oil, plus extra for the pan, if necessary
1/4 cup or 57g sourdough discard

For the cinnamon sugar topping:
2 tablespoons, firmly packed, or 32g brown sugar
1/2 teaspoon cinnamon

Method
Trim the ends off of your carrots and peel them. Cut them into short lengths.


Boil the carrots in a small pot of water until tender, about 8-10 minutes. Drain the carrots and mash them with a potato masher or fork. I like to use a fork because it results in a finer mash than my potato masher. 


Put the mashed carrots in a mixing bowl to cool. 

Preheat oven to 350°F or 180°C. Prepare your 24-cup mini muffin pan (or 12-cup regular muffin pan) by greasing it or lining it with paper liners.

Add the egg, sourdough starter, and oil to the cooled carrot bowl. Whisk to combine.


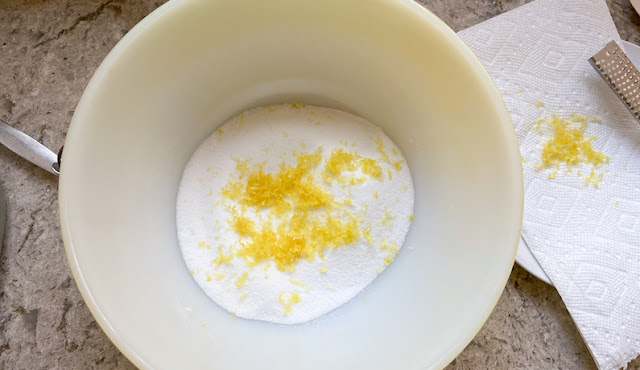
In another mixing bowl, whisk together the flour, sugar, cinnamon, baking powder, baking soda, and salt.


Add the wet ingredients to the dry ingredient bowl and fold until just combined. 


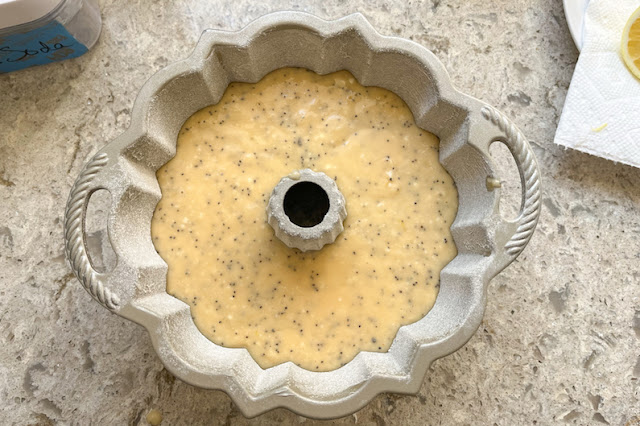
Divide the mixture into the cups in your prepared muffin pan.  I like to use a small cookie dough scoop. 


To make the cinnamon sugar topping, mix together brown sugar and cinnamon. Sprinkle the mixture over the muffins. 


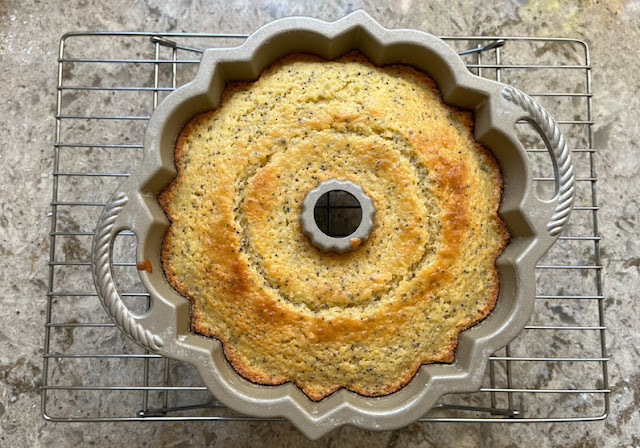
Bake for about 14 minutes or until a toothpick inserted into the center of the muffin comes out clean.


Enjoy! 

Food Lust People Love: These sourdough sweet carrot mini muffins are tender and delightful with a cinnamon sugar topping. They disappear in record time. Bake some today!

It’s Muffin Monday, the last Monday of every month where we share delicious muffin recipes! Check them out below. 


#MuffinMonday is a group of muffin loving bakers who get together once a month to bake muffins. You can see all of our lovely muffins by following our Pinterest board. Updated links for all of our past events and more information about Muffin Monday can be found on our home page.

Pin these Sourdough Sweet Carrot Mini Muffins!

Food Lust People Love: These sourdough sweet carrot mini muffins are tender and delightful with a cinnamon sugar topping. They disappear in record time. Bake some today!

 .

Sunday, March 27, 2022

Marinated Turkey Kabobs - Shish Hindi

Flavorful and tender, these Marinated Turkey Kabobs aka Shish Hindi are a delightful main course. Stuff them in pita bread or eat them plain! So good!

Food Lust People Love: Flavorful and tender, these Marinated Turkey Kabobs aka Shish Hindi are a delightful main course. Stuff them in pita bread or eat them plain! So good!

For years I’ve been making shish tawook, the chicken version of this dish. It’s truly one of our favorite meals especially when served with homemade hummus and tabouli for a full-on Middle Eastern dining experience. 

While researching turkey (the fowl) for this recipe, I learned that in many languages it is called some version of “Indian bird,” for instance, in Armenian, it is called hndkahav or hntkahav, which translates to “Indian chicken.” In Hebrew, the turkey is called tarnegol hodu, literally meaning "rooster of India." In both Polish and Ukrainian, turkey is called indyk, a reference to India. Similarly it is indik in Yiddish, also referring to India. And there are more! Source: Bare Bones Translations

If you are saying to yourself, I had no idea that turkeys originated in India! Well, that's because they didn't. Turns out that the story is more convoluted than the name in other languages would have you believe and, frankly, the whole thing started making my head hurt. Suffice to say that the turkey is a native north American bird but it's been domesticated in many locales and one of those is India. 

At some point in my google fest, I found a site that called turkey skewers (skewers = shish) shish hindi and I can only imagine that what they were trying to indicate was Indian chicken aka turkey. I have since lost that link but it tickled me so I kept the name. 

Marinated Turkey Kabobs - Shish Hindi

I haven’t included the recipes for the garlic mayo or salad since this post is primarily about the turkey but making garlic mayo is simple. Add 1 clove of minced garlic to about 1/4 cup or 60ml of your favorite mayonnaise. For the salad, I include deseeded cucumber, finely sliced onion, sliced black olives and small tomatoes, halved. Dress the salad simply with a drizzle of olive oil, a generous squeeze of lemon juice, salt and pepper.

Ingredients
1/3 cup or 80ml plain yogurt
1 teaspoon smoked paprika
1 teaspoon fresh thyme leaves
1 tablespoon tomato paste
2 cloves garlic, finely chopped
3 tablespoons or 45ml fresh lemon juice
1 teaspoon fine sea salt
1 lb or 450g turkey breast fillet 

8-10 wooden skewers, soaked in water for an hour. 

Optional to serve:
Pita bread
Garlic mayonnaise - see note above
Mixed salad- see note above

Method
Put all the ingredients except the turkey into a nonreactive bowl and mix well.  


Clean the extra fat and sinews off of the turkey breast, if any, and cut it into bite-sized pieces. 


Pop them in the bowl with the marinade and stir until the turkey is well-coated.  Let this marinate for as long as you have but at least one hour. 


When you are ready to cook the shish hindi, push the turkey pieces on to your soaked wooden skewers.


Heat a well-seasoned iron skillet till very hot.  Put the turkey on and cook for several minutes. Turn the skewers over when they are well-browned. 


Cook for a few more minutes until both sides are browned and the turkey is cooked through.   

You can eat the turkey kabobs as is with side dishes but we like to stuff them into a folded pita bread with garlic mayo and salad. A delicious, tasty meal!


Enjoy! 

Food Lust People Love: Flavorful and tender, these Marinated Turkey Kabobs aka Shish Hindi are a delightful main course. Stuff them in pita bread or eat them plain! So good!


It’s Sunday FunDay and today we are sharing recipes in celebration of National Something on a Stick Day, which happens to be tomorrow, 28 March! Many thanks to our host, Mayuri of Mayuri’s Jikoni.

 
We are a group of food bloggers who believe that Sunday should be a family fun day, so every Sunday we share recipes that will help you to enjoy your day. If you're a blogger interested in joining us, just visit our Facebook group and request to join.

Pin these Marinated Turkey Kabobs!

Food Lust People Love: Flavorful and tender, these Marinated Turkey Kabobs aka Shish Hindi are a delightful main course. Stuff them in pita bread or eat them plain! So good!

 .

Sunday, March 20, 2022

Crispy Oven Fried Okra

This crispy oven fried okra is crunchy, tasty and super easy! It’s also much healthier and less messy to make than deep fried versions. 

Food Lust People Love: This crispy oven fried okra is crunchy, tasty and super easy! It’s also much healthier and less messy to make than deep fried versions.

Before COVID struck and closed the hot food counter at my local Walmart, one of my favorite things to do was to buy a brown bag with 1/4 pound of fried okra and eat it as I shopped. The hot food section is open again but the okra didn’t make a comeback. I miss it. 

I hardly ever deep-fry anything because it just breaks my heart to use oil in such quantities and then throw it out. On the rare occasions that I have made southern fried chicken or some other fried treat like my jalapeño corn puffs, I usually strain the oil and save it in the refrigerator (so it doesn’t turn rancid) for at least one more use. Which makes me feel a little bit better. 

I was delighted when our host for this week’s Sunday FunDay event chose okra as our theme because I’ve been wanting to try to make oven fried okra for quite a while. I was pretty pleased by how this turned out. Some of the coating did fall off of the okra but most of it stayed on so I’m calling this one a win. 

Crispy Oven Fried Okra

This recipe is adapted from one on Sing for Your Supper with a few extra ingredients added to the egg for more flavor. 

Ingredients  
14 oz or 400g fresh okra
6 tablespoons cornmeal
6 tablespoons panko breadcrumbs
1 egg
2 tablespoons mayonnaise
1 tablespoon flour
1 1/2 teaspoons Dijon mustard
1/2 teaspoon cayenne

Olive oil spray

Method 
Preheat your oven to 425°F or 218°C and line a large baking pan with foil or a silicone liner.

Combine the cornmeal and panko, in a gallon-size Ziploc bag.


Trim the ends off of the okra and cut it into short pieces about 1/2 in or 1cm wide.


In a mixing bowl, whisk together the egg, mayonnaise, flour, mustard and cayenne.


Add the cut okra and stir well until all the pieces are well coated. 


Add the okra a little at a time to the bag and shake until coated. 


Tip the okra out on to the lined baking sheet and then separate the pieces. 


Spray them lightly with the olive oil spray. 

Bake for 20-22 minutes, or until crispy, turning the okra halfway through baking and giving them another spray of the olive oil. 

For the last few minutes, turn the oven to broil and watch the okra closely so it browns but doesn’t burn. 


This crispy oven fried okra would make a lovely side dish but I like to eat it by hand straight out of the bowl as a snack! 

Food Lust People Love: This crispy oven fried okra is crunchy, tasty and super easy! It’s also much healthier and less messy to make than deep fried versions.

Enjoy!

It’s Sunday FunDay and we are all sharing okra recipes! Many thanks to our host Sneha of Sneha’s Recipe. 

 
We are a group of food bloggers who believe that Sunday should be a family fun day, so every Sunday we share recipes that will help you to enjoy your day. If you're a blogger interested in joining us, just visit our Facebook group and request to join.

Pin this Crispy Oven Fried Okra!

Food Lust People Love: This crispy oven fried okra is crunchy, tasty and super easy! It’s also much healthier and less messy to make than deep fried versions.

 .

Friday, March 18, 2022

Nori-wrapped Ginger Soy Steamed Cod

This nori-wrapped Ginger Soy Steamed Cod is marinated with sautéed ginger and garlic, green onions, soy and lemon juice, for a healthy flavorful dish. The roasted nori is a delightful added bonus!

Food Lust People Love: Nori-wrapped Ginger Soy Steamed Cod is marinated with sautéed ginger and garlic, green onions, soy and lemon juice, for a healthy flavorful dish. The roasted nori is a delightful added flavor-boosting bonus!

Right after poaching, steaming fish is the most reliable way to cook it to make sure it doesn’t dry out. The trick though is how to make it flavorful as well. No one likes boring fish!

Enter the marinade. A 30-minute rest in some cooked aromatics, oils and lemon works beautifully to add a punch of piquancy while, in the case of this cod, the nori wrap also adds a little saltiness and a most welcome extra hint of the sea. The goal is to complement the cod with the cooked aromatics, not to overwhelm its delicate flavor. 

Nori-wrapped Ginger Soy Steamed Cod

This recipe is adapted from two recipes from Delia’s How to Cook, books 1 and 3. If you don’t know Delia Smith, one of Britain’s great cookery writers, you’ve been missing out. Her recipes are clear, concise and every single one I’ve ever tried has been delicious. 

Ingredients
2 1/2 in or 6cm piece ginger, peeled
1 tablespoon sodium reduced soy sauce
1 rounded tablespoon toasted sesame seeds
1 tablespoon sesame oil
1 tablespoon canola or other light oil
3 cloves garlic, peeled
2 green onions
1 lemon for zest and juice (about 3 tablespoons)
1.7 lb or 770g cod loin
fine sea salt
freshly ground black pepper
2 sheets toasted nori seaweed

lettuce leaves for lining steamer 

Optional for garnish: slice red chili peppers and cilantro

Method
Thinly slice the ginger then cut it into fine shreds. Mince the garlic and the green onions. 


Put the oils in a small pan and add the ginger and garlic. Gently cook them over a medium low heat until they are golden being careful not to let them get too dark. 


While the garlic and ginger are cooking, zest and juice the lemon into a small mixing bowl. 


Use a rubber spatula to scrape the ginger and garlic into the small bowl, along with all the oil that is left in the pan. 


Add in the toasted sesame seeds, the soy sauce and the chopped green onions and give the whole thing a good stir. 


Cut the cod loin into four equal pieces and season them lightly with sea salt and freshly ground black pepper. 


Put a thin layer of the ginger garlic mixture in a small dish. Add the cod pieces and then top them with the balance of the mixture. Cover and leave to marinate for 30 minutes.
 

Cut your sheets of nori in two. Place one piece of cod upside down (so the side with the most aromatics is down) on each half sheet of nori.


Fold the ends over to close. Line a fan steamer with lettuce leaves (to stop the fish from sticking to the steamer) and place the nori-wrapped cod on top, seam side down. Repeat till all four pieces of cod are on the steamer.


In a large pot, heat 2 in or 5 cm of water to boiling. Put the steamer in the pot. 


Cover with a tight fitting lid and steam over the boiling water for 8-10 minutes or until the fish reaches an internal temperature of 145°F or 63°C.

Carefully remove the cod from the steamer and serve hot. Garnish with some sliced red chili peppers and cilantro, if desired. 

Food Lust People Love: Nori-wrapped Ginger Soy Steamed Cod is marinated with sautéed ginger and garlic, green onions, soy and lemon juice, for a healthy flavorful dish. The roasted nori is a delightful added flavor-boosting bonus!

Enjoy! 

It’s that time of the month when my Fish Friday Foodies share recipes! This month we are all steaming seafood so make sure to check out the links below. Many thanks to our host, Karen of Karen’s Kitchen Stories!


Would you like to join Fish Friday Foodies? We post and share new seafood/fish recipes on the third Friday of the month. To join our group please email Wendy at wendyklik1517 (at) gmail.com. Visit our Facebook page and Pinterest page for more wonderful fish and seafood recipe ideas.

Pin this Nori-wrapped Ginger Soy Cod!

Food Lust People Love: Nori-wrapped Ginger Soy Steamed Cod is marinated with sautéed ginger and garlic, green onions, soy and lemon juice, for a healthy flavorful dish. The roasted nori is a delightful added flavor-boosting bonus!

 .


Thursday, March 17, 2022

Lemon Poppy Seed Ricotta Cake #BundtBakers

Rich, tender and oh, so flavorful, this lemon poppy seed ricotta cake is speckled, with seeds but also tiny dots of the soft white ricotta cheese. The tart lemon glaze with the sprinkle of zest and more poppy seeds is a tasty addition. 

Food Lust People Love: Rich, tender and oh, so flavorful, this lemon poppy seed ricotta cake is speckled, with seeds but also tiny dots of the soft white ricotta cheese. The tart lemon glaze with the sprinkle of zest and more poppy seeds is a tasty addition.

As I’ve mentioned before, one of my younger daughter’s favorite baked good combinations is lemon and poppy seeds. Probably because the lemon offsets the sugar in most recipes. And who doesn’t love the subtle crunch of poppy seeds? 

My cake was baked and cooled and I was whisking the glaze when she came into the kitchen yesterday. She sidled over and peered into the glaze bowl. “Are you sure you want to add that?” she asked. I was absolutely positive that I did! One of her tenets is that everyone loves plain things. And while I cannot disagree with that, and this cake would be just as tasty glaze-less, it wouldn’t be as pretty!

My best compliment came after she cut herself a small slice and said, “It’s good. Not too sweet!” 

Lemon Poppy Seed Ricotta Cake

This recipe is adapted from one on Food 52 which was baked in an 8x8in pan. That’s the same volume as a 6-cup Bundt pan so it fit perfectly in my small Nordic Ware anniversary one. I have to say that I would not hesitate to double this for the 12-cup pan next time. It’s that good!

Ingredients
For the cake batter:
1 cup or 200g granulated sugar
zest from 1 large lemon
1 cup or 240g whole milk ricotta, at room temperature
2 tablespoons lemon juice
1/2 cup or 120ml canola or other light oil
2 large eggs, at room temperature
1 tablespoon poppy seeds, plus extra to decorate, if desired 
1/2 teaspoon fine sea salt
1 1/2 teaspoons baking powder
1/4 teaspoon baking soda
1 cup or 125g all-purpose flour, plus extra for the pan

1-2 teaspoons butter, for greasing the pan

For the lemon glaze:
2 tablespoons lemon juice
1 cup or 125g icing sugar, sifted
pinch fine sea salt

Method 
Preheat your oven to 350°F or 180°C and prepare a 6-cup Bundt pan by buttering and flouring it. 

In a large mixing bowl, combine the sugar and most of the zest, reserving a little to sprinkle on the glaze for decoration. (I put the spare zest on a paper towel. This dries it just enough to make sprinkling it easier after the cake has baked and cooled.)


Use your fingers (or the back of a rubber spatula) to rub the zest into the sugar until fully incorporated and fragrant. This step smells like sunshine and makes me hopeful that spring and brighter days are coming!

Add the ricotta, lemon juice, oil, and eggs to the bowl and whisk together until blended.


Add the poppy seeds, salt, baking powder and baking soda to the bowl. Whisk again to combine. 


Sift in the flour and then fold it until it is no longer visible.


Pour the batter into your prepared pan.


Bake for 35 to 40 minutes, until it springs back when touched, and a toothpick inserted into the center comes out clean. 


Cool the cake in the pan for about 7-10 minutes then turn it out on a wire rack. Allow the cake to cool completely before glazing.

Food Lust People Love: Rich, tender and oh, so flavorful, this lemon poppy seed ricotta cake is speckled, with seeds but also tiny dots of the soft white ricotta cheese. The tart lemon glaze with the sprinkle of zest and more poppy seeds is a tasty addition.

To make the glaze, place the icing sugar and salt in a large bowl. Add 1 tablespoon of the lemon juice and whisk to combine. Add more of the lemon juice as needed to make glaze of a pouring consistency. If you live in a humid climate like I do, you might not need all the juice. 

Gently pour or drizzle the glaze over the cake. Sprinkle immediately with the extra poppy seeds, if using, and the reserved lemon zest. 

Food Lust People Love: Rich, tender and oh, so flavorful, this lemon poppy seed ricotta cake is speckled, with seeds but also tiny dots of the soft white ricotta cheese. The tart lemon glaze with the sprinkle of zest and more poppy seeds is a tasty addition.

Slice to serve and enjoy!  

Food Lust People Love: Rich, tender and oh, so flavorful, this lemon poppy seed ricotta cake is speckled, with seeds but also tiny dots of the soft white ricotta cheese. The tart lemon glaze with the sprinkle of zest and more poppy seeds is a tasty addition.

It’s the third Thursday of the month so it’s time for my Bundt Bakers to share their favorite recipes with you. This month we are celebrating the impending arrival of spring! Many thanks to our host, Camilla of Culinary Adventures with Camilla

#BundtBakers badge

#BundtBakers is a group of Bundt loving bakers who get together once a month to bake Bundts with a common ingredient or theme. You can see all of our lovely Bundts by following our Pinterest board. We take turns hosting each month and choosing the theme/ingredient. Updated links for all of our past events and more information about BundtBakers, can be found on our home page.


Pin this Lemon Poppy Seed Ricotta Cake!

Food Lust People Love: Rich, tender and oh, so flavorful, this lemon poppy seed ricotta cake is speckled, with seeds but also tiny dots of the soft white ricotta cheese. The tart lemon glaze with the sprinkle of zest and more poppy seeds is a tasty addition.

 .
 

Sunday, March 13, 2022

Ham and Split Pea Soup - Instant Pot

This hearty ham and split pea soup is flavorful and satisfying. Made with a smoked hambone, split peas, potatoes and carrots, it’s a full meal soup!

Food Lust People Love: This hearty ham and split pea soup is flavorful and satisfying. Made with a smoked hambone, split peas, potatoes and carrots, it’s a full meal soup!

I love baked ham, especially when it has a brown sugar/mustard glaze and pineapples! But my favorite part of that meal comes after most of the cut ham has been eaten, when I can use the bone to make soup. There’s always plenty enough meat left on the bone and the bone itself adds the most wonderful flavor to the broth. 

Before I bought my Instant Pot, this soup would take a couple of hours in a pot stovetop or, occasionally, I’d use the slow cooker to make the base broth and the hambone would simmer for six to eight hours. Either way, this soup was worth it. 

Enter the game changing Instant Pot! Now I can enjoy my ham and split pea soup in under an hour and you can too. 

Ham and Split Pea Soup - Instant Pot

This soup is one I often make after Christmas and Easter if baked ham was on the menu but I must confess that this time, I bought and baked a ham because I really wanted the bone for this soup. Call me crazy. I don’t mind. We enjoyed the ham in myriad ways but this is the best one.

Ingredients
1 onion, finely chopped
1 tablespoon olive oil
1 hambone (with some meat attached) from a spiral cut baked ham
4-5 cups or 946-1180ml ham, chicken or vegetable stock 
1 large russet potato, peeled and cubed
2-3 carrots, peeled and small cubed
1 lb or 450g green split peas

Method
Use the sauté function to cook the onion in the olive oil for a few minutes. 


Add the hambone and enough stock to almost cover it. Cook on the soup setting for 30 minutes, then use a quick release. 


Fish the hambone out with a slotted spoon and set it on a plate to cool. 

One of the handy features of the Instant Pot is the volume measurements on the side of the pot. For 1 lb or 450g of split peas, we’ll need 6.75 cups or 1.6L of liquid to cook them in for soup. After the ham bone removal, I had 4 cups or .95L of liquid left. 

I hate to make you do math in the middle of a recipe but 6.75 minus 4 = 2.75 so this means we need to add 2 3/4 cups or 650ml more water or stock in with the split peas. Depending on what you have left behind, you may need to add less or more, remembering that your goal is 6 3/4 cups or 1.6L for 1 lb or 450g split peas.

Add in the cubed potatoes and carrots as well. I always cut the potatoes larger than than the carrots because they cook faster and I don't want them to cook to mush. To give you a size perspective, the carrots are about the size of small garden peas, the ones that are called petit pois.


Cook on high 15 minutes, followed by 15 minutes of natural release, then quick release.

While the split peas and veggies are cooking, remove all the edible ham from the bone and discard the bone, gristle and fat. Cut any larger pieces in cubes. 


When the soup is ready, add the ham back in with a few generous grinds of black pepper. 


Serve hot and enjoy! This is soooooo tasty! I wish I had another bowl (or three) now. 

Food Lust People Love: This hearty ham and split pea soup is flavorful and satisfying. Made with a smoked hambone, split peas, potatoes and carrots, it’s a full meal soup!

It’s almost St. Patrick’s Day so my Sunday FunDay friends and I are sharing some of our favorite Irish recipes. This ham and split pea soup is one of mine 1. because it’s delicious and 2. because it’s green! Luck o' the Irish to ye!  Check out all the other St. Patrick’s Day recipes below. Many thanks to Amy of Amy’s Cooking Adventures for hosting. 

 
We are a group of food bloggers who believe that Sunday should be a family fun day, so every Sunday we share recipes that will help you to enjoy your day. If you're a blogger interested in joining us, just visit our Facebook group and request to join.

Pin this Ham and Split Pea Soup!

Food Lust People Love: This hearty ham and split pea soup is flavorful and satisfying. Made with a smoked hambone, split peas, potatoes and carrots, it’s a full meal soup!

 .

Tuesday, March 8, 2022

Flakey Guinness Cheddar Scones #BreadBakers

Grated butter and cheese add little pockets of flavor and flakiness to these Guinness Cheddar Scones. They are perfect for breakfast or snack time and go great with soup!

Food Lust People Love: Grated butter and cheese add little pockets of flavor and flakiness to these Guinness Cheddar Scones. They are perfect for breakfast or snack time and go great with soup!

I’ve baked with stout quite a few times and love how much depth and flavor a dark brew adds to any batter or dough. For example, check out my mocha stout brownies, London Porter cake and oatmeal stout loaf, just to name a few. All lovely! 

If there is any product more iconically Irish then Guinness Stout, I don’t know what it would be. Anytime Irish teams are playing in a tournament, ubiquitous Guinness shows up as a sponsor. When our host for this month’s Bread Bakers chose Irish bread as our theme for March, I knew I wanted to use Guinness in the recipe. 

NOTE: Start this recipe far enough in advance of when you've like to serve them to leave plenty of time for freezing the scones before baking. Depending on your freezer, a couple of hours ought to do it. 

Flakey Guinness Cheddar Scones

This recipe is adapted from Coley Cooks. It’s been a while since I saved it so the author has updated the post name and the URL and these are now called biscuits, which I find very odd for an Irish recipe. Back when I found it, they were called, quite rightly, Irish scones with a URL to match.  Whatever you call them, bake these. They got four thumbs up from my family!

Ingredients
2 1/2 cups or 312g flour
2 1/2 teaspoons baking powder
1/2 teaspoon baking soda
1 teaspoon sugar
1 teaspoon fine sea salt
1 tablespoon Dijon mustard
1 cup or 240ml Guinness, cold
1/2 cup or 113g unsalted butter, FROZEN, plus 2 tablespoons (28g), melted
7 oz or 200g mature cheddar or extra sharp cheddar cheese, grated

Method
Whisk together the flour, baking powder, baking soda, sugar and salt in a mixing bowl.

The dry ingredients

Using a box grater, grate the frozen butter, then quickly transfer it to the flour mixture and use a fork to gently mix and coat all the butter pieces with flour. 

Adding the grated butter to the flour mixture

Add the grated cheese and mix to combine, being sure to coat all pieces with flour.

Adding the cheddar to the mixture

In a separate bowl, whisk together the Dijon mustard and Guinness.

Make a well in the center and pour in the beer mixture.

Adding the Guinness and mustard to the mixture

Carefully mix until it forms a shaggy dough.  Do not overmix. 

A shaggy dough

Dump the mixture out onto a lightly floured surface, then roll out into a long strip about 7x14 in or 18x36cm.

Rolled out into a rectangle

Fold one side half way up, adding in any loose bits.

The first fold

Then fold the other side over top, like a letter.
 
The second fold

Rotate the dough 90 degrees, roll out and repeat the two letter folds again. Rotate again and fold for the final two times.

Roll the dough into a rectangle about 1/2 in or 1 cm thick. Cut the scones out with a cutter and place them on a pan lined with baking parchment.  

Roll the dough out and cut into scones with a cookie cutter

Roll the dough out again and cut scones until you run out of dough. As you can see, I got 14 scones out of my dough.

Fourteen scones, ready for freezing

Place the baking pan in the freezer. Freeze till solid or overnight. Once frozen, transfer the scones to a sealed bag. For maximum rising and flakiness, the dough needs to be kept very cold. The beauty of this recipe is that once the scones are frozen, you can bake as many or as few as you’d like. 

Preheat your oven to 400° F or 200°C.

When the oven is preheated, remove the number of scones you’d like to bake from the freezer, and put them on a parchment or silicone-lined pan then put it into the oven immediately.

Six scones, ready for the oven

Bake for about 20 minutes or until the scones has risen well and are golden brown, rotating the pan halfway through so they brown evenly.

Just out of the oven

Brush the tops with the melted butter.

Brushing the scones with melted butter

Serve warm with extra butter, if desired. I'll be honest. I only buttered the one you see below. They really don't need it. 

Enjoy! 

Food Lust People Love: Grated butter and cheese add little pockets of flavor and flakiness to these Guinness Cheddar Scones. They are perfect for breakfast or snack time and go great with soup!

As I mentioned above, it’s time for Bread Bakers, always the second Tuesday of the month, and Irish bread is our theme. Check out all the great recipes we are sharing ahead of St. Patrick’s Day below! Many thanks to our host, Wendy of A Day in the Life on the Farm. 

BreadBakers
#BreadBakers is a group of bread loving bakers who get together once a month to bake bread with a common ingredient or theme. Follow our Pinterest board right here. Links are also updated each month on this home page. We take turns hosting each month and choosing the theme/ingredient.

Pin these Flakey Guinness Cheddar Scones!

Food Lust People Love: Grated butter and cheese add little pockets of flavor and flakiness to these Guinness Cheddar Scones. They are perfect for breakfast or snack time and go great with soup!

.