Showing posts with label party food recipes. Show all posts

Sunday, November 9, 2025

Creamy Duck Liver Mousse

The perfect make-ahead appetizer for your holiday feast, this creamy duck liver mousse is flavorful and rich. Serve with sliced baguette and let guests dig in! 

Food Lust People Love: The perfect make-ahead appetizer for your holiday feast, this creamy duck liver mousse is flavorful and rich. Serve with sliced baguette and let guests dig in!

I was practically skipping up to the cashier when I unexpectedly found duck liver in my local grocery store. Turns out they have it in the refrigerated section quite often so I don’t how I had missed it up till then. But I knew exactly what I wanted to make! 

One of my favorite party dishes from years past was a chicken liver pâté that was always popular and I was just imagining how much richer and more lovely one made with duck liver would be. 

I was not wrong! We really loved this. Processing the just-cooked liver with chilled duck fat made such a smooth and creamy mixture that I decided it deserved to be called mousse rather than plain old pâté! 

Creamy Duck Liver Mousse

If you can’t find duck liver, chicken liver can certainly be substituted. 
This makes two dishes of about 5 1/3 oz or 150g each. This recipe was adapted from one on the BBC Good Food website. bbcgoodfood.com/recipes/velvety-duck-liver-parfait 

Ingredients
For the mousse:
10 1/2 oz or 300g duck liver
1 cup or 240ml milk
2 tablespoons butter
1 shallot, finely sliced
1 garlic clove, sliced
1 1/2 teaspoons brandy
1 1/2 teaspoons port
Fine sea salt and freshly ground black pepper
3 1/2 oz or 100g duck fat, chilled

For the sealing the top:
1 3/4 oz or 50g duck fat or butter
For decoration:
1/2 teaspoon whole black or mixed peppercorns
Small sprigs fresh thyme

Method
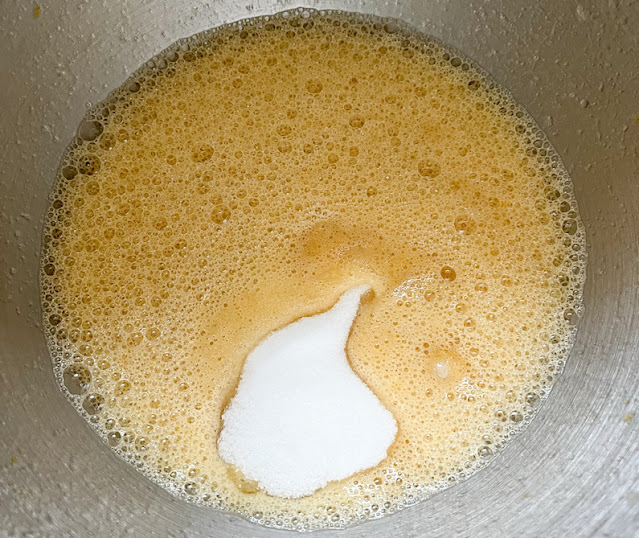
In a small mixing bowl, soak the duck liver in the milk for an hour, refrigerated.


Drain and discard the milk. Cut away and discard any large sinews from the liver. It’s messy to do this but the only really successful way to make sure you remove all of the sinews is to grab the end of one with one hand and then press along the sinew with your other hand to separate it from the liver. Repeat till the sinews are all removed. 


Wash your hands with hot water and lots of soap and reward yourself with a tot from that bottle of brandy you have out for later in the recipe. You've earned it! Cut the liver up into big chunks. 


Heat the butter in a large frying pan, then gently fry the shallot and garlic for 3-4 mins until soft. 


Remove the shallot and garlic to a small bowl, leaving behind as much butter as possible. (I prop up one side of the pan so the butter will collect on the other side, then remove the shallot and garlic.)


Turn up the heat then fry the liver until just browned on all sides. It spits and spatters a lot so I recommend using a spatter guard. DO NOT cover the pan with a lid! We don’t want the liver to steam or cook through, just brown. 


Add the brandy and port then boil those off as quickly as possible. 


Remove the pan from the heat and transfer the liver to a plate. Season the liver generously with the salt and freshly ground black pepper and leave it to cool completely.


Tip the cooled liver into a food processor with the shallot, garlic and the cold duck fat, and blitz until smooth and creamy. 


Push the mixture through a fine sieve into a bowl. 


Taste for seasoning, adding more salt and pepper, if necessary. Spoon into serving dishes or ramekins. Place in the refrigerator to set.


Once the mixture has set, make the topping. Gently melt the duck fat in a small pan or in a bowl in the microwave. 

Put the peppercorns and thyme on top the mousse to decorate and gently pour in the melted duck fat to cover. Leave to set in the fridge. 

Food Lust People Love: The perfect make-ahead appetizer for your holiday feast, this creamy duck liver mousse is flavorful and rich. Serve with sliced baguette and let guests dig in!

Serve with slices of baguette for spreading. 

Food Lust People Love: The perfect make-ahead appetizer for your holiday feast, this creamy duck liver mousse is flavorful and rich. Serve with sliced baguette and let guests dig in!

Enjoy! 

It’s Sunday FunDay and today we are sharing appetizers for your Thanksgiving feast. Many thanks to our host Amy from Amy’s Cooking Adventures. Check out all the links below. 

 
We are a group of food bloggers who believe that Sunday should be a family fun day, so every Sunday we share recipes that will help you to enjoy your day. If you're a blogger interested in joining us, just visit our Facebook group and request to join.


Pin this Creamy Duck Liver Mousse!

Food Lust People Love: The perfect make-ahead appetizer for your holiday feast, this creamy duck liver mousse is flavorful and rich. Serve with sliced baguette and let guests dig in!

.

Sunday, January 23, 2022

Burmese-style Bean Thread Noodle Salad

This Burmese-style Bean Thread Noodle Salad is spicy and delicious, full of tasty crispy pork, shrimp, fresh cilantro, chili peppers and lime juice. 

Food Lust People Love: This Burmese-style Bean Thread Noodle Salad is spicy and delicious, full of tasty crispy pork, shrimp, fresh cilantro, chili peppers and lime juice.

This salad recipe is a family favorite that my Burmese friend, Ma Toe, taught me many, many years ago, back when we were neighbors in a small oilfield town in Brazil. I loved our diverse expat community and learned recipes from all over the world from friends there. 

Aside from how tasty it is, the best thing about this salad is that it can be made a day or two ahead of time. It travels well and keeps for several days in the fridge. I tend to make a big batch even if it’s just my husband and me at home because we can eat this every day till it’s gone and never tire of it! I hope you like it as much as we do!

Burmese-style Bean Thread Noodle Salad 

Mung bean thread noodles are available in Asian markets and many regular supermarkets as well these days. They are also called simply bean thread noodles or glass noodles but do not mistake them for rice noodles!

Ingredients
1/4 cup or 20g dried shrimp (or 2 tablespoons dried shrimp powder)
8 oz or 227g ground pork (or sub turkey or chicken)
Fine sea salt
6 oz or 170g raw shrimp, weight already peeled (about 1 dozen medium)
8 oz or 227g mung bean thread noodles 
Chopped hot fresh bird’s eye chili peppers to taste  (I use 3-4 but we like things spicy.) 
1 large purple onion, very finely sliced
1/4 cup or 60ml fresh lime juice
1/4 cup or 60ml fish sauce
3/4 teaspoon sugar
1 big bunch of coarsely chopped coriander leaves (You can use the soft stems too, but they must be chopped very fine.)

Method
Pound the dried shrimp, if using, in a mortar to flatten them into a fluffy powder. Set aside. 

Lightly salt the pork and pan-fry it, separating it into crispy crumbles as it fries. If your pork is very lean, you might need a drizzle of oil to get it to get brown and crispy. Remove from the pan to cool and drain the fat off.

Browning the pork

Shell, devein and chop the shrimp into two or three pieces. Lightly salt them and cook them in the pork pan till just pink. 

Cooking the shrimp

Soak the mung bean thread noodles in hot water for 10 minutes, until soft. 

Soaking the bean thread noodles

Drain and immediately rinse with cold water to stop the cooking. Drain well and set aside.  

Cut the noodles up with a pair of scissors a few times. This will make it easier to stir the other ingredients in. 

Put the sliced onions and chopped chili peppers in a bowl with the lime juice and set aside for a few minutes. The lime juice helps soften the bite of both the peppers and the raw onion. Add in the fish sauce and sugar to complete the dressing.

Pouring the lime juice over the onions and chili peppers

Put the drained noodles in a really big bowl, one big enough that you can stir without creating a big mess. Add in the chopped coriander and sprinkle with the shrimp powder. Mix thoroughly, using your clean hands, if that’s easier. 

Adding the cilantro and shrimp powder to the noodles

Add the ingredients of the onion bowl and mix well.

Adding the onion, etc.

Finally add the shrimp and pork and mix again. 

Adding the pork and shrimp

Taste and add more lime juice or fish sauce if necessary. Cover the bowl with cling film and keep chilled until ready to serve. 

Food Lust People Love: This Burmese-style Bean Thread Noodle Salad is spicy and delicious, full of tasty crispy pork, shrimp, fresh cilantro, chili peppers and lime juice.

We usually just eat this salad in small bowls with a fork, but it’s also excellent spooned into small lettuce leaves as a finger food, perfect for a party. You can put extra fish sauce and lime wedges out in case anyone would like to add more to their salad.

Food Lust People Love: This Burmese-style Bean Thread Noodle Salad is spicy and delicious, full of tasty crispy pork, shrimp, fresh cilantro, chili peppers and lime juice.

Enjoy!

It’s Sunday FunDay and I’m hosting. Today just happens to be my birthday so I thought it would be fun to get all of my fellow bloggers to share recipes they’d bring to a birthday party potluck. Check out all the delicious dishes (and one drink!) I so wish I could actually enjoy in real life today!

 
We are a group of food bloggers who believe that Sunday should be a family fun day, so every Sunday we share recipes that will help you to enjoy your day. If you're a blogger interested in joining us, just visit our Facebook group and request to join.


Pin this Burmese-style Bean Thread Noodle Salad!

Food Lust People Love: This Burmese-style Bean Thread Noodle Salad is spicy and delicious, full of tasty crispy pork, shrimp, fresh cilantro, chili peppers and lime juice.

 .

Tuesday, January 11, 2022

Natural Rainbow Challah #BreadBakers

This natural rainbow challah is colored with spices, fruit and vegetables for a bright and festive look without artificial dyes. It would make a beautiful addition to any party table or weekend brunch. 

Food Lust People Love: This natural rainbow challah is colored with spices, fruit and vegetables for a bright and festive look without artificial dyes. It would make a beautiful addition to any party table or weekend brunch..

Here’s where I suggest, right up at the top, that if you plan to make this bread on the day you want to eat it, you will want to make your natural dyes a day ahead of time. None of this is hard to do but it is time consuming. 

Also, this would be a great project for Easter because you end up with way more dye than you need for this bread and it could be used up dying eggs the old fashioned way. I felt really bad tipping it all out when I was done, without another use for it. 

Natural Rainbow Challah

The inspiration for this challah was a post on the blog What Jew Wanna Eat and the recipe itself is a combo of that post and Joan Nathan’s favorite challah on New York Times Cooking. 
 
Ingredients
For the food coloring:
Pink - 1 small beet (about 3 oz or 85g)
Orange – 1- 1 1/2 teaspoons ground annatto aka achiote
Yellow – 1- 1 1/2 teaspoons ground turmeric
Green – 1 cup, packed, or 85g spinach leaves
Purple – 1 cup or 140g fresh or frozen blueberries 
Blue – unused cooked blueberry juice from purple + 1 teaspoon baking soda

For challah dough:
2 1/4 teaspoons active dry yeast 1 packet
3/4 cups or 80ml warm water 
1/2 cup or 100g sugar
1/4 cup or 60ml canola or other light oil, plus more for dough bowls
1/4 cup or 60ml honey 
2 large eggs +1 egg white  (Save that 1 egg yolk for glazing)
1 teaspoon fine sea salt
5 cups or 625g bread flour, plus more as needed for kneading

Method
First, we’ll make the dye colors.

For the pink, boil your beet in just enough water to cover until tender. When it’s cool enough to handle, use a paper towel to push the peels off. Blend it in small food processor until smooth. Set aside to cool completely. 

Blending the beet

For the green dye, simmer the spinach leaves or greens with a little bit of water in a covered skillet until they completely wilted. Blend in small food processor until smooth. Set aside to cool completely.

Blending the spinach

For the purple, simmer the fresh or frozen blueberries in 2 tablespoons water in a covered pot until they fall apart. Cool, drain, and reserve the liquid.

Cooking the blueberries

We'll make the blue out of the purple once we've used it to color one ball of dough by adding the baking soda to the balance. 

Now, make your challah dough. Prepare the yeast in a large mixing bowl for a stand mixer by whisking it with warm water and 1 teaspoon sugar. Leave it for a few minutes to activate the yeast. It should bubble up and get foamy. This means your yeast is live. 

Beat the oil and honey into the foamy yeast mixture. 

Adding the oil and honey

Add in the two eggs, one at a time, beating with each addition, then add the egg white. 

Adding the eggs, one at a time

Beat in the remaining sugar and salt. 

Adding the balance of the sugar and the salt

Gradually add flour beating with each addition. As the dough gets thicker, you might need to change to the bread hook. 

Adding the first amount of flour

When dough holds together and isn't too sticky, you are ready to start adding your natural dyes.

The finished plain dough

Divide your dough into six even pieces. I used a food scale to weigh them out. The dough weighed 1162g so each ball was approximately 94g.

Flatten out each piece one at a time (keep the others covered) and put some of each of the homemade food coloring in the middle of each one.  Fold the dough over the dye and pop it back in your stand mixer with the bread hook. Knead until the dye is thoroughly mixed in. 

I started with the easy ones that didn't add liquid, the annatto and turmeric! 

Adding the annatto to the dough ball


Add a little more flour or dye as needed. I had to hand knead some of mine as well to get the colors well mixed. Form the dough into a ball and place it in a greased bowl and cover lightly with cling film. 

Repeat with the four more dough balls, making a yellow one with the turmeric and adding a little flour as needed for the pink, green and purple dyes. 

Once you've colored the purple ball, add 1 teaspoon of baking soda to the blueberry juice. This will turn it a dark indigo blue. Color the final ball of dough with some of this and knead to incorporate it as you did with the others. 

The blue ball!


Put the six dough balls in lightly oiled bowls and cover them with cling film. Leave them to rise in a warm place until they have at least doubled in size, about 1 hour. 

To form the rainbow challah, roll the colored balls into long tubes. 

All six colored dough balls rolled into tubes

Now braid and tuck by following these instructions here on the King Arthur Flour YouTube channel: How to braid a six-strand challah. They make the process much clearer than I ever could with words so I'm not even going to try to confuse you! 

Food Lust People Love: This natural rainbow challah is colored with spices, fruit and vegetables for a bright and festive look without artificial dyes. It would make a beautiful addition to any party table or weekend brunch..

Leave your challah to rise again on a parchment or silicone lined baking sheet, lightly covered, until doubled in size, about 45 minutes. 

My latest wintertime trick is to heat a couple of inches of water to boiling in a bowl in the microwave. I open it quickly and set my baking pan on top, closing the door again swiftly. This creates a moist, warm environment for the dough to rise in.  Works like a charm as long as no one else needs the microwave for an hour or so.

When the challah is almost finished rising, preheat your oven to 350° F or 180°C. 

Whisk the egg yolk with 1/2 tablespoon water and generously brush the mixture over the challah.

Brushing on the egg wash

Bake for 40-45 minutes in your preheated oven, rotating the pan halfway through. If it starts to brown too fast, make a foil tent to cover it. It’s done when the internal temperature reaches 190°F or 88°C.

Food Lust People Love: This natural rainbow challah is colored with spices, fruit and vegetables for a bright and festive look without artificial dyes. It would make a beautiful addition to any party table or weekend brunch..

Leave to cool then slice and enjoy! 

Food Lust People Love: This natural rainbow challah is colored with spices, fruit and vegetables for a bright and festive look without artificial dyes. It would make a beautiful addition to any party table or weekend brunch..

It’s the second Tuesday of the month so that means my Bread Bakers are out in force! Today we are sharing naturally colored breads. One over-achiever (looking at Kelly from A Messy Kitchen!) even baked two different breads. Check out all the links below. Many thanks to our host, Radha of Magical Ingredients for this fun and challenging theme!


BreadBakers
 
#BreadBakers is a group of bread loving bakers who get together once a month to bake bread with a common ingredient or theme. Follow our Pinterest board right here. Links are also updated each month on this home page. We take turns hosting each month and choosing the theme/ingredient.


Pin this Natural Rainbow Challah! 

Food Lust People Love: This natural rainbow challah is colored with spices, fruit and vegetables for a bright and festive look without artificial dyes. It would make a beautiful addition to any party table or weekend brunch..


 .

Wednesday, November 3, 2021

Jalapeño Pecan Cheese Ball

This spreadable Jalapeño Pecan Cheese Ball is made with cream cheese and cheddar. It’s a spicy, creamy, crunchy, delicious, attractive addition to your party table. Watch it disappear!

Food Lust People Love: This spreadable Jalapeño Pecan Cheese Ball is made with cream cheese and cheddar. It’s a spicy, creamy, crunchy, delicious, attractive addition to your party table. Watch it disappear!

Growing up I was not a fan of the cheese balls my paternal grandmother adored. But because she loved them, they always made an appearance at family gatherings around the holidays. I think my mom bought them for Gram from Hickory Farms but I’ll have to get back to you on that.

If you’ve been buying them too, I’m here to tell you how easy they are to make at home. The only challenging part is mixing the ingredients together since this makes a fairly firm ball. Roll up your sleeves and apply a little elbow grease to that wooden mixing spoon and you’ll be fine.

Jalapeño Pecan Cheese Ball

The ingredients below make one substantial cheese ball (about 1.1 lbs or 500g) but I can promise it will disappear in no time. We like to spread it on crackers or toast but you just might find yourself licking the knife when all of those are gone. Choose a dull one.

Ingredients
8 oz or 227g cream cheese, softened
4 oz or 113g sharp white cheddar cheese
1 1/2 cups or 150g pecans
2 green onions
1 fresh jalapeño
4 soft sun-dried tomato halves (if in oil, drain and pat completely dry with paper towels)

To serve:
Crackers or toast rounds

Method
Grate the cheddar cheese. Finely mince the jalapeño, green onions and sun-dried tomatoes. Separate out about 1 tablespoon each of the vegetables to be used later when we roll the cheese ball. 

Chop the pecans finely.

Finely mince the jalapeño, green onions and sun-dried tomatoes. Separate out about 1 tablespoon each of the vegetables to be used later when we roll the cheese ball.   Chop the pecans finely.

In a bowl, use a wooden spoon or stiff spatula to combine the cream cheese, cheddar cheese, one quarter of the pecans (you can just eyeball this) and the bigger piles of jalapeño, green onions and sun-dried tomatoes until thoroughly blended. 

In a bowl, use a wooden spoon or stiff spatula to combine the cream cheese, cheddar cheese, one quarter of the pecans (you can just eyeball this) and the bigger piles of jalapeño, green onions and sun-dried tomatoes until thoroughly blended.

Form the mixture into a ball.

Form the mixture into a ball.

Cover your work surface with cling film. I find this works best if I wipe the countertop with a clean damp sponge first which helps the cling film stick and stay in place. Sprinkle the reserved minced jalapeño, green onions and sun-dried tomatoes onto the cling film. 

Cover your work surface with cling film. I find this works best if I wipe the countertop with a clean damp sponge first which helps the cling film stick and stay in place. Sprinkle the reserved minced jalapeño, green onions and sun-dried tomatoes onto the cling film.

Top these with the remainder of the chopped pecans. Transfer the cheese ball to the middle. 

Top these with the remainder of the chopped pecans. Transfer the cheese ball to the middle.

Dampen your hands with a little water to stop the cheese from sticking to them and then roll the cheese ball around on the pecans and veggies until it’s completely covered. You can keep rolling it, applying gentle pressure until most of the pecans have adhered to the ball. 

Dampen your hands with a little water to stop the cheese from sticking to them and then roll the cheese ball around on the pecans and veggies until it’s completely covered. You can keep rolling it, applying gentle pressure until most of the pecans have adhered to the ball.

Pile any leftover pecan/veggie bits in the middle of your serving plate and, using your hands, pop the cheese ball on top, pressing down gently. 

Pile any leftover pecan/veggie bits in the middle of your serving plate and, using your hands, pop the cheese ball on top, pressing down gently.

Refrigerate the jalapeño pecan cheese ball, covered, for at least 1 hour to chill.

The finished cheese ball with crackers.

Serve with crackers or toasted rounds of bread.

Food Lust People Love: This spreadable Jalapeño Pecan Cheese Ball is made with cream cheese and cheddar. It’s a spicy, creamy, crunchy, delicious, attractive addition to your party table. Watch it disappear!

Enjoy!

Food Lust People Love: This spreadable Jalapeño Pecan Cheese Ball is made with cream cheese and cheddar. It’s a spicy, creamy, crunchy, delicious, attractive addition to your party table. Watch it disappear!

It’s the first Wednesday of the month so that means it’s time for my Foodie Extravaganza friends to get together to celebrate an obscure food holiday. This time it’s National Georgia Pecan Month! I can’t promise my pecans are from Georgia but this recipe certainly showcases my favorite nut. Check out the links to the other recipes below. Many thanks to our host, Wendy of A Day in the Life on the Farm


Foodie Extravaganza is where we celebrate obscure food holidays by cooking and baking together with the same ingredient or theme each month. Posting day is always the first Wednesday of each month. If you are a blogger and would like to join our group and blog along with us, come join our Facebook page Foodie Extravaganza. We would love to have you! If you're a spectator looking for delicious tid-bits check out our Foodie Extravaganza Pinterest Board.

Pin this Jalapeño Pecan Cheese Ball!

Food Lust People Love: This spreadable Jalapeño Pecan Cheese Ball is made with cream cheese and cheddar. It’s a spicy, creamy, crunchy, delicious, attractive addition to your party table. Watch it disappear!

.