Showing posts with label gluten free recipes. Show all posts

Sunday, July 5, 2026

Chocolate Coconut Flour Cookies

These delicious chocolate coconut flour cookies are naturally gluten free but they are also made with Swerve, making them diabetic friendly, low carb and relatively low calorie as well. You won't miss any of those things! 

Food Lust People Love: These delicious chocolate coconut flour cookies are naturally gluten free but they are also made with Swerve, making them low carb, relatively low calorie and diabetic friendly as well. You won't miss any of those things!

One of my dearest and oldest friends is on weight loss journey for her health. She is doing amazingly well and we are all so proud of her for the lifestyle changes she’s made and her perseverance in pursuit of better health. A while back, she and her husband were going to be in town for doctors’ visits so I invited them to stop by after for tea before they had to drive the couple of hours back home. 

I made some savory snacks and baked these cookies as our sweet treat. She liked them so much that I happily wrapped up the leftovers for her to take home. I call that a win! 

Chocolate Coconut Flour Cookies

This recipe is adapted from one on today’s Sunday FunDay host’s blog, Cook with Renu. Her original recipe uses honey instead of my Swerve. If you are looking for lovely healthy recipes, many with alternative gluten free flours and little refined sugar, go have a browse

Ingredients for 12-15 cookies
⅓ cup or 28g coconut flour
¼ cup or 30g unsweetened cocoa powder
½ teaspoon baking soda
⅛ teaspoon or a generous pinch fine sea salt
2 eggs
¼ cup or 50g brown Swerve
1 tablespoon water
⅓ cup or 75g coconut oil - melted and at room temperature – or vegetable oil
½ cup or 90g 63% cacao extra dark chocolate chips

Method
Preheat your oven to 350°F or 180°C and line a baking pan with baking parchment or a silicone liner. I actually used two pans because all my cookies didn’t quite fit on mine, which only holds 12. That said, my cookie scoop was small. You could probably make 12!

In a large mixing bowl sift the flour, cocoa powder, baking soda and salt.


In another bowl whisk the eggs, along with the Swerve, water and melted oil.


Toss the chocolate chips into the dry ingredients and stir to coat. 


Pour the wet ingredients into the dry and combine until well incorporated.


Leave the mixture to rest for five minutes so the coconut flour can absorb the liquid.


Use a cookie scoop or a spoon and put dollops of the dough on your prepared baking pan/s. 


Bake in your preheated oven for 12-15 minutes, until the cookies are firm on the top yet give a little if you poke them gently. They will firm up more as they cool. Like with all dark chocolate cookies, you can’t use color to see if they are cooked! 

Food Lust People Love: These delicious chocolate coconut flour cookies are naturally gluten free but they are also made with Swerve, making them low carb, relatively low calorie and diabetic friendly as well. You won't miss any of those things!

Cool the cookies on a wire rack. Once cooled, store them in an airtight container, if they don’t get eaten right away! 

Food Lust People Love: These delicious chocolate coconut flour cookies are naturally gluten free but they are also made with Swerve, making them low carb, relatively low calorie and diabetic friendly as well. You won't miss any of those things!

Enjoy! 

It’s Sunday FunDay and today we are sharing recipes made with coconut flour. Many thanks to our host, Renu of Cooking with Renu. Check out the links below.
 
We are a group of food bloggers who believe that Sunday should be a family fun day, so every Sunday we share recipes that will help you to enjoy your day. If you're a blogger interested in joining us, just visit our Facebook group and request to join. 


Pin these Chocolate Coconut Flour Cookies! 

Food Lust People Love: These delicious chocolate coconut flour cookies are naturally gluten free but they are also made with Swerve, making them low carb, relatively low calorie and diabetic friendly as well. You won't miss any of those things!

.

Tuesday, September 10, 2024

Rosemary Onion Socca - Chickpea Flatbread #BreadBakers

This rosemary onion socca aka chickpea flatbread is super easy to make and even easier to devour. The crispy edges and golden bottom are superb. This had us standing around, picking up just one more piece. And maybe just one more. All right, this really is the last one! And it's gone.

Food Lust People Love: This rosemary onion socca aka chickpea flatbread is super easy to make and even easier to devour. The crispy edges and golden bottom are superb. This had us standing around, picking up just one more piece. And maybe just one more. All right, this really is the last one! And it's gone.

Despite living in France for three years, I had never come across socca until a couple of years ago when I was researching gluten free recipes for another edition of Bread Bakers. It sounded delightful but I didn’t have any chickpea flour (and was too lazy to go shopping) so I chose to make something else. 

It popped back into my mind when our host for this month’s Bread Baker event chose flatbreads as our theme. As you can see from the photos, bread really doesn’t get any flatter than socca! There are no leavening agents so it doesn’t rise at all. 

I checked out several recipes for this French regional bread and while all of them had varying amounts of chickpea flour, water and oil, none had baking powder so I had to conclude that this is correct. 

Rosemary Onion Socca - Chickpea Flatbread

It’s best to start ahead by several hours or even the day before you want to make this as the batter needs time to be its best. This recipe is adapted from one on New York Times Cooking. If your local grocery store doesn't carry chickpea flour, try an Asian or Indian shop where it might be labeled besan or gram flour.

Ingredients
1 cup or 118g chickpea flour
1 teaspoon salt
1 teaspoon freshly ground black pepper
1 cup or 240ml lukewarm water
4 to 6 tablespoons olive oil
½ medium onion
1 tablespoon fresh rosemary, small tender leaves or chopped bigger leaves

Method
Put the chickpea flour in a bowl; add the salt and pepper. Slowly add the lukewarm water, whisking to eliminate lumps. Whisk in 2 tablespoons olive oil. 


Cover or pour into a jar and let sit for 12 hours or overnight in the refrigerator. The batter should be about the consistency of heavy cream. I like using a clean pint jar which fits better in the refrigerator. It also makes mixing easier, as you’ll see later. 


When you are about ready to bake the socca, finely slice your onions. 


Heat two tablespoons of the olive oil in a large iron skillet and pan fry the onions until crispy, about 8-9 minutes. 


Add in most of the rosemary, reserving just a little for sprinkling on the socca before baking, and give it a quick stir. Fry for one minute. 


Remove the onions and rosemary from the pan and leave them to cool. 


Meanwhile, heat your oven to 450°f or 232°C. Once hot, add two more tablespoons of olive oil to the iron skillet and put it in the oven for about 5 minutes. 

Mix the onions and rosemary into your socca batter. (If you’ve also put your batter in a jar, this is super easy. Add them in, screw the lid on tight and give the jar a good shake.) 


Immediately pour the batter into the hot pan. Sprinkle on the reserved rosemary leaves. 


Bake for 10 -12 minutes, or until the socca is firm and the edges set.


Heat the broiler/grill and brush the top of the socca with 1 or 2 tablespoons of oil. 


Set the pan a few inches away from the heat source, and cook just long enough to brown it in spots. 

Food Lust People Love: This rosemary onion socca aka chickpea flatbread is super easy to make and even easier to devour. The crispy edges and golden bottom are superb. This had us standing around, picking up just one more piece. And maybe just one more. All right, this really is the last one! And it's gone.

Cut the socca into wedges, and serve hot or warm.

Food Lust People Love: This rosemary onion socca aka chickpea flatbread is super easy to make and even easier to devour. The crispy edges and golden bottom are superb. This had us standing around, picking up just one more piece. And maybe just one more. All right, this really is the last one! And it's gone.

Enjoy! 

Since it’s the second Tuesday of the month, it’s BreadBakers day! Many thanks to our host Kelly of Passion Kneaded who chose flatbreads as our theme. Check out all the links below. 

#BreadBakers is a group of bread loving bakers who get together once a month to bake bread with a common ingredient or theme. Follow our Pinterest board right here. Links are also updated each month on this home page. We take turns hosting each month and choosing the theme/ingredient.


Pin this Rosemary Onion Socca
– Chickpea Flatbread!

Food Lust People Love: This rosemary onion socca aka chickpea flatbread is super easy to make and even easier to devour. The crispy edges and golden bottom are superb. This had us standing around, picking up just one more piece. And maybe just one more. All right, this really is the last one! And it's gone.
.

Tuesday, May 14, 2024

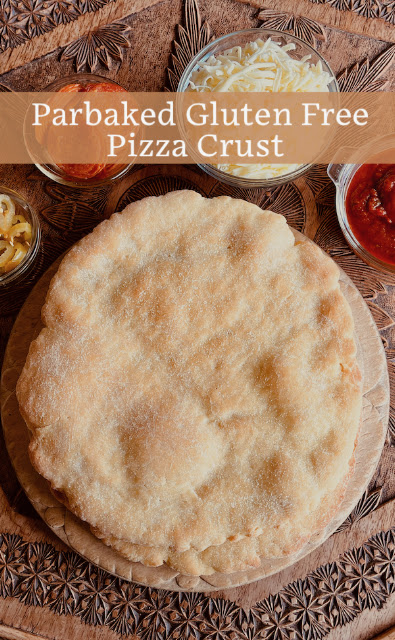
Parbaked Gluten Free Pizza Crust #BreadBakers

Long proofing and the addition of baking powder ensure that this parbaked gluten free pizza crust is chewy, crunchy and able to support all the toppings you love.

Food Lust People Love: Long proofing and the addition of baking powder ensure that this parbaked gluten free pizza crust is chewy, crunchy and able to support all the toppings you love.

Gluten free dough for something quick-baked like pizza is a challenge when regular pizza dough sets such a high standard of crunch, chewiness and texture. I like to add a little cornmeal to the dough – and use it when rolling it out to bake – which helps a lot. 

Is this the same as your favorite gluten-full pizza crust? Not exactly. But it’s darn close. The secret is partially baking it just so it rises but doesn’t really brown much. Parbaking the crust means that it retains its shape and texture, even when toppings are added. Best of all, parbaked crusts can be frozen or refrigerated for future pizza nights. 

Parbaked Gluten Free Pizza Crust

As per Serious Eats, 95°F or 35°C is the best temperature for yeast to multiply, but that's not quite warm enough for proofing active dry yeast. It needs the extra warmth to dissolve and become active. If you have a thermometer, employ it when warming your water to the specified temperature range.

Ingredients
2 ¼ teaspoons or 7g active dry yeast
1 cup or 240ml warm water (between 105-110°F or 40-43°C)
1 tablespoon sugar
2 ½ cups or 400g gluten free bread flour (with xanthan gum) plus extra for kneading (I used Freee White Bread Flour.) 
1/4 cup or 60g cornmeal plus extra for rolling out the pizza crust
1 teaspoon fine sea salt
1 teaspoon baking powder
1 egg
5 tablespoons olive oil, plus extra for brushing on when baking
1 teaspoon apple cider vinegar

Method
Warm the water to the correct temperature range. I like to use a microwaveable measuring vessel with quick zaps of the microwave but a small pot over a low flame will also work. 


Stir in the sugar and the yeast and leave to prove for five minutes. Your yeast should start frothing up, showing that it has been activated by the warm water. 

In a large mixing bowl, whisk together the flour, baking powder and salt. 


In another mixing bowl, whisk together the egg, vinegar and olive oil. 


Stir in the water/yeast mixture.


Add in the wet ingredients to the dry ingredients bowl.


 Mix them together with a wooden spoon or Danish whisk until a sticky dough forms. 


Cover with cling film or a shower cap and place somewhere warm for 2-3 hours. 


After the rising time is up, preheat your oven to 425°F or 218°C and put the dough in fridge for 15 minutes to rest. This will make it easier to roll out.


Lightly flour a clean work surface and knead the dough with a good sprinkling of flour until it forms into a smooth ball. 


Avoid adding too much flour, just enough until a ball dough forms and the dough isn't as sticky.


Divide the dough into two even pieces. 

Sprinkle your work surface lightly with cornmeal and use a floured rolling pin to roll each piece of dough into a roughly 10 in or 25cm circle. 


Sprinkle a little more cornmeal on your baking pan and transfer the pizza crusts to a pan. Generously brush the top of the crusts with olive oil and bake for 12 minutes in the preheated oven.


Remove from the oven. Leave to cool completely and then store in a refrigerator or freezer, well wrapped, until you are ready to add toppings and bake again. 

Food Lust People Love: Long proofing and the addition of baking powder ensure that this parbaked gluten free pizza crust is chewy, crunchy and able to support all the toppings you love.

When ready to bake as pizza, add your favorite sauce and desired toppings. 

Leave to cool completely and then store in a refrigerator or freezer, well wrapped, until you are ready to add toppings and bake again.

Bake in an oven preheated to 425°F or 218°C for about 8-12 minutes, perhaps just a little longer if your crust was in the freezer. 

Remove from the oven and leave to cool for a few minutes. 

Food Lust People Love: Long proofing and the addition of baking powder ensure that this parbaked gluten free pizza crust is chewy, crunchy and able to support all the toppings you love.

Cut in slices to serve.

#BreadBakers is a group of bread loving bakers who get together once a month to bake bread with a common ingredient or theme. Follow our Pinterest board right here. Links are also updated each month on this home page. We take turns hosting each month and choosing the theme/ingredient.

Enjoy!

It's the second Tuesday of the month which means it's time for my fellow Bread Bakers to share their recipes. Our theme today is gluten free pizza. Many thanks to our host, Renu of Cook with Renu. Check out the links:

#BreadBakers is a group of bread loving bakers who get together once a month to bake bread with a common ingredient or theme. Follow our Pinterest board right here. Links are also updated each month on this home page. We take turns hosting each month and choosing the theme/ingredient.


Pin this Parbaked Gluten Free Pizza Crust!

Food Lust People Love: Long proofing and the addition of baking powder ensure that this parbaked gluten free pizza crust is chewy, crunchy and able to support all the toppings you love.

 .

Monday, July 12, 2021

Toasted Eggplant Crust Mini Pizzas

These Toasted Eggplant Crust Mini Pizzas are as delicious as they are adorable with quick tomato sauce and toppings baked on toasted eggplant slices.

Food Lust People Love: These Toasted Eggplant Crust Mini Pizzas are as delicious as they are adorable with quick tomato sauce and toppings baked on toasted eggplant slices.

We went through a phase a while back of attempting to eat keto, that is to say, without carbs or very low carb. It did not go well. I didn’t lose any weight, for one, and I can’t imagine the increased fat in the cheese, meat and bacon I consumed did my cholesterol any good. Nevertheless, I did create a couple of recipes we loved so I’ll call that part of the experiment a win. 

The first used leftover pork roast slices and eggplant to make stuffed cheesy rolls covered in a rich tomato sauce then baked. Seriously, so good! Most canned tomatoes are not considered keto because of the added sugar so the secret appears to be making your sauce from scratch with fresh tomatoes. 

The second recipe was for rice-free cabbage rolls made with both beef and smoked sausage. I don't know that I'll ever make traditional cabbage rolls again because the smoked sausage adds so much flavor and who needs the rice really?

These toasted eggplant mini pizzas were the third keeper. They kind of remind us of our favorite eggplant Parmigiana but with a lot less trouble. Also: pepperoni - always a welcome addition in my book. 

Toasted Eggplant Crust Mini Pizzas

These would be a great appetizer for any crowd, with the added bonus of being naturally gluten free and keto-friendly.

Ingredients
1 large eggplant (about 19 oz or 535g, but a little bigger or smaller won't matter too much.)
fine sea salt

For the fresh tomato sauce:
2 ripe medium sized tomatoes
2 cloves garlic, minced
1 teaspoon dried oregano
1/4 teaspoon baking soda
1/8 teaspoon fine sea salt 

Suggested toppings:
Mozzarella or your favorite pizza cheese, shredded
Pepperoni (get the mini ones if you can, so cute!)
Black olives, pitted and sliced
Sliced jalapeños
Anchovies
Crushed red pepper 

To garnish after baking: fresh basil

Method
Trim the stem of your eggplant and cut it into 1/2 in or 1 cm slices (I got 16.) If you look closely, you'll see the little pokes of the knife I made at the appropriate intervals using a measuring tape because I'm anal like that. Eyeball it if you want to. 


Sprinkle the eggplant slices lightly with salt and stack them in a colander and set aside in your sink or on a plate to catch any liquid that drips out so it doesn't make a big mess.


Peel your tomatoes. I find the easiest way to peel tomatoes is to cut a cross in the skin with a sharp knife and then use a fork to dip the tomato into just boiled water for about 10-15 seconds. The skin will then slip off easily. 


Core and finely chop the peeled tomatoes.


Combine them in a pan with the minced garlic, oregano, baking soda and salt. 


Cook over medium heat for about 17-20 minutes, or until the tomatoes and garlic are softened and most of the liquid has evaporated. Set aside to cool. 


By this time, your eggplant should have released some juice. Dry the slices off with a tea cloth or paper towels. 

Toast them on a non-stick griddle pan over a medium high heat until they are browned on both sides. This takes just 4-5 minutes a side. Unless you’ve got a really large pan, this is going to have to be done in batches. 

Keep a careful eye on the eggplant slices so they don’t burn, especially if you’ve cut some of them a bit unevenly and some edges are thinner than others. I use a spatula to press them down occasionally, to make sure the eggplant and the pan are making a good connection and shift them around the griddle so they brown evenly. 

When one batch is golden on both sides, remove it to a dry tea cloth or layer of paper towels on a clean work surface. The slices should be laid on in a single layer. If you stack the eggplant slices, they’ll continue cooking and steaming. We want them to cool off once they are toasted. 


At this point, if you are ready to bake the mini pizzas, preheat your oven to 400°F or 200°C.

Place your toasted eggplant circles on a baking pan lined with baking parchment or a silicone liner and top them with a small spoon of the tomato sauce, cheese and your favorite other toppings. I made one pan of 12 and the other of four.

Food Lust People Love: These Toasted Eggplant Crust Mini Pizzas are as delicious as they are adorable with quick tomato sauce and toppings baked on toasted eggplant slices.

Bake in the preheated oven until the cheese is melted and bubbling, just 6 -7 minutes. 

Food Lust People Love: These Toasted Eggplant Crust Mini Pizzas are as delicious as they are adorable with quick tomato sauce and toppings baked on toasted eggplant slices.

Garnish with fresh basil leaves and serve with extra crushed red pepper, if desired. Enjoy!

Food Lust People Love: These Toasted Eggplant Crust Mini Pizzas are as delicious as they are adorable with quick tomato sauce and toppings baked on toasted eggplant slices.

It’s high summer now in the northern hemisphere so tomatoes and basil are flourishing in gardens everywhere. To celebrate the season, my Baking Blogger group has chosen to showcase tomatoes and basil for today’s theme. Check out all the recipes below. Many thanks to our organizer and host, Sue of Palatable Pastime

Baking Bloggers is a friendly group of food bloggers who vote on a shared theme and then post recipes to fit that theme one the second Monday of each month. If you are a food blogger interested in joining in, inquire at our Baking Bloggers Facebook group. We'd be honored if you would join us in our baking adventures.

Pin these Toasted Eggplant Crust Mini Pizzas!

Food Lust People Love: These Toasted Eggplant Crust Mini Pizzas are as delicious as they are adorable with quick tomato sauce and toppings baked on toasted eggplant slices.
 .