Showing posts with label keto recipes. Show all posts

Sunday, April 24, 2022

Zucchini Noodle Lasagna

This zucchini noodle lasagna is made with zucchini “noodles” instead of pasta, upping your vegetable intake and lowering carbs. You won’t miss them!

Food Lust People Love: This zucchini noodle lasagna is made with zucchini “noodles” instead of pasta, upping your vegetable intake and lowering carbs. You won’t miss them!

I’ve wanted to share this recipe for the longest time but something kept getting in the way. I made it when we were attempting a keto diet and trying to eat more vegetables as well. The more veggies thing worked really well but the keto part, not so much. Pretty sure I gained weight. :D

While this dish is low carb, it’s not low calorie because of the beef, sausage and cheese. It is delicious!

For a vegetarian version, use double the amount of mushrooms in place of the beef and sausage or a meat substitute. 

Zucchini Noodle Lasagna

Unfortunately the process photos for the red sauce somehow went missing. I have no idea how or why but I hope the explanation is sufficiently clear. If you do have any questions, please leave me a comment and I will endeavor to respond in a timely manner. 

Ingredients
For the red sauce:
2 tablespoons olive oil
1 lb or 450g ground beef
14 oz or 387g smoked sausage
2 cans (14.1 oz or 400g) whole peeled tomatoes, with juice
4 3/4 oz or 135g tomato paste
2 tablespoons Italian seasonings  (I use Durkee Pasta Seasoning (<affiliate link) which has dehydrated onions, garlic, etc. along with the actual Italian spices.)*
2 bay leaves
1/2 teaspoon baking soda
*Without that lovely shortcut, mince 1 small onion and 3 cloves garlic. Add to pan while browning beef. 

For the cheese layers:
5 1/3 oz or 150g mozzarella, grated
8.8 oz or 250g fresh ricotta 
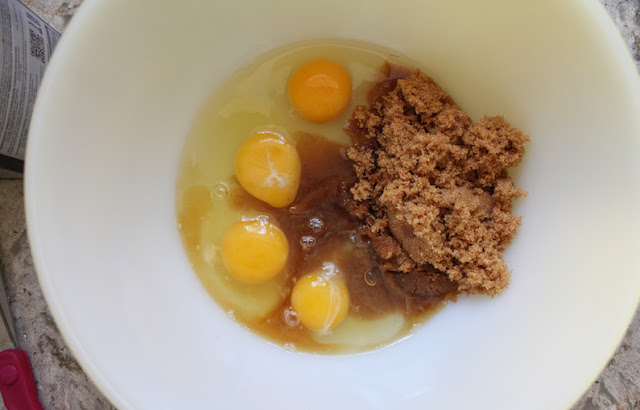
2 large eggs
Freshly ground black pepper

For the zucchini layers:
4 medium zucchini (about 1.1 lbs or 500g)
Fine sea salt

For topping:
1/2 cup or 55g Parmesan, grated
(Plus reserved grated mozzarella – see method below)
1 teaspoon oregano

Method
Add olive oil to pan, then the ground beef. Cook until ground beef is browned and the smaller bits are a little bit crispy. (Put in onion/garlic in at this point, when the smaller bits are well browned, if using.)

While that’s happening, cut the sausage lengthwise into four strips and then chop them into small cubes. Add the sausage to the beef pan and cook further until the sausage starts to brown. 

Add the Italian seasonings, canned tomatoes and tomato paste, along with about half a can of water, using that water to rinse out the tomato cans so as not to leave any tomato behind in them. 

Pop in the bay leaves, give the whole pot a good stir and simmer, covered, for about 45 minutes. 

Meanwhile, trim off the stem ends and slice your zucchini into thin strips with a vegetable peeler. 


Lay in single file on a clean kitchen towel. Lightly sprinkle the zucchini with salt and set aside. 


Put about 1/2 cup of the grated mozzarella in a small mixing bowl and stir in the Parmesan and dried oregano. Set aside till needed for topping. 

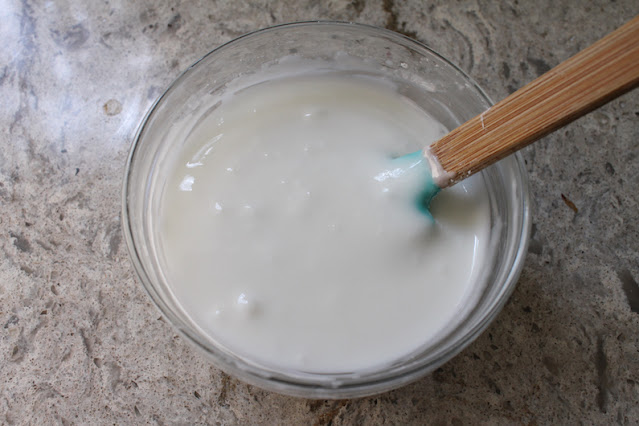
In a larger mixing bowl, whisk together the rest of the mozzarella, the ricotta, the eggs and some freshly ground black pepper. This is going to look much drier that the usual cheese layer for lasagna. Don’t worry. The cooking zucchini will ensure that this lasagna isn’t dry. 


After the red sauce has simmered for about 45 minutes, stir in the baking soda. I was taught this trick by an Italian American nonna. It’s going to bubble up as the soda reacts with the natural acids in the tomatoes. Keep stirring till about the bubbles are gone. The result is a sweeter, less acidic and according to my mentor nonna, more stomach-friendly sauce. 

Simmer for about 10-15 minutes longer, uncovered. Remove from the heat. Meanwhile, preheat your oven to 350°F or 180°C.

To assemble the zucchini noodle lasagna, remove the bay leaves from the red sauce and spoon a thin layer into your baking dish. (9x13in or 23x33cm for thin lasagna, a smaller pan for thicker lasagna).


Roll the zucchini tightly up in the clean kitchen towel to dry them off. Unroll the towel and top the red sauce with zucchini slices.


Add another layer of red sauce. Then spoon on a layer of the cheese mixture. 


Add another layer of zucchini, followed by red sauce and then cheese mixture. Keep going till you use up all the zucchini, the red sauce and cheese. In my pan, I did three complete sets of layers. 

Finish the dish by sprinkling it with the mozzarella/Parmesan cheese topping. 


Bake in your preheated oven for 45-50 minutes or until the zucchini noodle lasagna is hot through, bubbling around the edges and well browned on top. 


Leave to cool for about 10 minutes then cut in squares to serve. 

Food Lust People Love: This zucchini noodle lasagna is made with zucchini “noodles” instead of pasta, upping your vegetable intake and lowering carbs. You won’t miss them!

Enjoy! 

It’s Sunday FunDay and today we are sharing creative lasagna recipes! Check them all out below. 
 
We are a group of food bloggers who believe that Sunday should be a family fun day, so every Sunday we share recipes that will help you to enjoy your day. If you're a blogger interested in joining us, just visit our Facebook group and request to join.

Pin this Zucchini Noodle Lasagna!

Food Lust People Love: This zucchini noodle lasagna is made with zucchini “noodles” instead of pasta, upping your vegetable intake and lowering carbs. You won’t miss them!

 .

Thursday, October 21, 2021

Chocolate Spider Web Bundt Cake #BundtBakers

This Chocolate Spider Web Bundt Cake is super chocolate-y with a tender, light crumb and just the right amount of sweetness. Made with almond flour, sour cream and brown Swerve, it’s keto and diabetic friendly. 

Food Lust People Love: This Chocolate Spider Web Bundt Cake is super chocolate-y with a tender, light crumb and just the right amount of sweetness. Made with almond flour, sour cream and brown Swerve, it’s keto and diabetic friendly.

I know a lot of people took up new hobbies or learned a new craft last year during lockdown. I’m a little slow on the uptake. A few weeks ago an amazing knitter friend offered to teach a small group of us to knit. More for the camaraderie than anything, I agreed. 

My first project, a rather chunky small blanket made with thick yarn and immense needles, isn’t going as well as I could hope but I am determined to persevere and finish it. If only to say that I didn’t give up. I am enjoying the company of friends much more!

Yesterday, my small group – we like to call ourselves Well-Knit because aside from the actually knitting together now, we’ve been friends for almost 50 years! – came over for dinner. I made a pot of Four-Alarm Texas chili and a big spinach salad. This delicious cake was the perfect dessert for all of our varied diets and dietary needs, not to mention being holiday appropriate for October. 

Chocolate Spider Web Bundt Cake 

Aside from the eggs, the only leavening in this cake is the baking soda so it’s essential that you use unsweetened natural cocoa powder and not Dutch processed. The reaction between the acid in the natural cocoa (and the sour cream) and the baking soda is what gives this cake lift. 

Ingredients
For the cake:
melted unsalted butter for pan
4 large eggs
2/3 cup, packed, or 133g brown Swerve or brown sugar
2 teaspoons vanilla extract
1/2 cup or 120ml sour cream
2 cup or 226g almond flour
2/3 cup or 66g unsweetened cocoa powder (not Dutch processed), plus extra for pan
1/2 teaspoon fine sea salt
1 teaspoon baking soda

For the icing spider web:
2 tablespoons pasteurized egg whites (1 large egg white)
1 teaspoon lemon juice
1 1/3 cups 166g powdered Swerve or powdered sugar

For decoration: one plastic spider

Method
Preheat oven to 350°F or 163°C. Liberally butter a six-cup Bundt pan and sprinkle it thoroughly with cocoa powder.

In a large mixing bowl, whisk together the eggs, brown Swerve and vanilla extract. (This was my first time using Swerve and I was amazed by how much it looked exactly like brown sugar. But zero-calorie and low-glycemic. What sorcery is this?)


In another bowl. Sift together the cocoa powder, baking soda and salt. I live in a humid climate and despite keeping the cocoa powder and baking soda in airtight containers, they still get lumpy. If your cocoa and baking soda are free-flowing and lump free, you can skip the sifting step and put them right in the bowl. 


Whisk the sour cream, almond flour and cocoa powder mix into the egg/Swerve mixture.


Spoon the thick batter into your prepared pan. 


Bake until center is set, and a toothpick inserted in it comes out clean, 40-45 minutes.


Cool the cake for about 10 minutes, then turn it out on to a wire rack until it cools completely. 

To make the icing for the spider web, mix all the ingredients together in a small bowl. Stir well until it’s completely smooth. If it seems too runny to apply with a piping bag, add another tablespoon or two of powdered Swerve or sugar. 


Using a piping bag with a #3 tip, make lines down the Bundt cake from the bottom up and down the inside.


Starting at the top, pipe curves between the lines to complete the spider web. 


Use a spoon or spatula to fill the bottom of the spider with icing and press it gently to the cake to adhere. Royal icing hardens when it dries and will hold the spider in place nicely.

Food Lust People Love: This Chocolate Spider Web Bundt Cake is super chocolate-y with a tender, light crumb and just the right amount of sweetness. Made with almond flour, sour cream and brown Swerve, it’s keto and diabetic friendly.

Slice to serve!

Food Lust People Love: This Chocolate Spider Web Bundt Cake is super chocolate-y with a tender, light crumb and just the right amount of sweetness. Made with almond flour, sour cream and brown Swerve, it’s keto and diabetic friendly.

It’s Bundt Baker time and since it’s October and All Hallow’s Eve is nigh, we are sharing Halloween cakes! Check out the links below. Many thanks to our host, Wendy of A Day in the Life on the Farm!

#BundtBakers badge

#BundtBakers is a group of Bundt loving bakers who get together once a month to bake Bundts with a common ingredient or theme. You can see all of our lovely Bundts by following our Pinterest board. We take turns hosting each month and choosing the theme/ingredient. Updated links for all of our past events and more information about BundtBakers, can be found on our home page.

Pin this Chocolate Spider Web Bundt Cake!

Food Lust People Love: This Chocolate Spider Web Bundt Cake is super chocolate-y with a tender, light crumb and just the right amount of sweetness. Made with almond flour, sour cream and brown Swerve, it’s keto and diabetic friendly.
 .

Monday, July 12, 2021

Toasted Eggplant Crust Mini Pizzas

These Toasted Eggplant Crust Mini Pizzas are as delicious as they are adorable with quick tomato sauce and toppings baked on toasted eggplant slices.

Food Lust People Love: These Toasted Eggplant Crust Mini Pizzas are as delicious as they are adorable with quick tomato sauce and toppings baked on toasted eggplant slices.

We went through a phase a while back of attempting to eat keto, that is to say, without carbs or very low carb. It did not go well. I didn’t lose any weight, for one, and I can’t imagine the increased fat in the cheese, meat and bacon I consumed did my cholesterol any good. Nevertheless, I did create a couple of recipes we loved so I’ll call that part of the experiment a win. 

The first used leftover pork roast slices and eggplant to make stuffed cheesy rolls covered in a rich tomato sauce then baked. Seriously, so good! Most canned tomatoes are not considered keto because of the added sugar so the secret appears to be making your sauce from scratch with fresh tomatoes. 

The second recipe was for rice-free cabbage rolls made with both beef and smoked sausage. I don't know that I'll ever make traditional cabbage rolls again because the smoked sausage adds so much flavor and who needs the rice really?

These toasted eggplant mini pizzas were the third keeper. They kind of remind us of our favorite eggplant Parmigiana but with a lot less trouble. Also: pepperoni - always a welcome addition in my book. 

Toasted Eggplant Crust Mini Pizzas

These would be a great appetizer for any crowd, with the added bonus of being naturally gluten free and keto-friendly.

Ingredients
1 large eggplant (about 19 oz or 535g, but a little bigger or smaller won't matter too much.)
fine sea salt

For the fresh tomato sauce:
2 ripe medium sized tomatoes
2 cloves garlic, minced
1 teaspoon dried oregano
1/4 teaspoon baking soda
1/8 teaspoon fine sea salt 

Suggested toppings:
Mozzarella or your favorite pizza cheese, shredded
Pepperoni (get the mini ones if you can, so cute!)
Black olives, pitted and sliced
Sliced jalapeños
Anchovies
Crushed red pepper 

To garnish after baking: fresh basil

Method
Trim the stem of your eggplant and cut it into 1/2 in or 1 cm slices (I got 16.) If you look closely, you'll see the little pokes of the knife I made at the appropriate intervals using a measuring tape because I'm anal like that. Eyeball it if you want to. 


Sprinkle the eggplant slices lightly with salt and stack them in a colander and set aside in your sink or on a plate to catch any liquid that drips out so it doesn't make a big mess.


Peel your tomatoes. I find the easiest way to peel tomatoes is to cut a cross in the skin with a sharp knife and then use a fork to dip the tomato into just boiled water for about 10-15 seconds. The skin will then slip off easily. 


Core and finely chop the peeled tomatoes.


Combine them in a pan with the minced garlic, oregano, baking soda and salt. 


Cook over medium heat for about 17-20 minutes, or until the tomatoes and garlic are softened and most of the liquid has evaporated. Set aside to cool. 


By this time, your eggplant should have released some juice. Dry the slices off with a tea cloth or paper towels. 

Toast them on a non-stick griddle pan over a medium high heat until they are browned on both sides. This takes just 4-5 minutes a side. Unless you’ve got a really large pan, this is going to have to be done in batches. 

Keep a careful eye on the eggplant slices so they don’t burn, especially if you’ve cut some of them a bit unevenly and some edges are thinner than others. I use a spatula to press them down occasionally, to make sure the eggplant and the pan are making a good connection and shift them around the griddle so they brown evenly. 

When one batch is golden on both sides, remove it to a dry tea cloth or layer of paper towels on a clean work surface. The slices should be laid on in a single layer. If you stack the eggplant slices, they’ll continue cooking and steaming. We want them to cool off once they are toasted. 


At this point, if you are ready to bake the mini pizzas, preheat your oven to 400°F or 200°C.

Place your toasted eggplant circles on a baking pan lined with baking parchment or a silicone liner and top them with a small spoon of the tomato sauce, cheese and your favorite other toppings. I made one pan of 12 and the other of four.

Food Lust People Love: These Toasted Eggplant Crust Mini Pizzas are as delicious as they are adorable with quick tomato sauce and toppings baked on toasted eggplant slices.

Bake in the preheated oven until the cheese is melted and bubbling, just 6 -7 minutes. 

Food Lust People Love: These Toasted Eggplant Crust Mini Pizzas are as delicious as they are adorable with quick tomato sauce and toppings baked on toasted eggplant slices.

Garnish with fresh basil leaves and serve with extra crushed red pepper, if desired. Enjoy!

Food Lust People Love: These Toasted Eggplant Crust Mini Pizzas are as delicious as they are adorable with quick tomato sauce and toppings baked on toasted eggplant slices.

It’s high summer now in the northern hemisphere so tomatoes and basil are flourishing in gardens everywhere. To celebrate the season, my Baking Blogger group has chosen to showcase tomatoes and basil for today’s theme. Check out all the recipes below. Many thanks to our organizer and host, Sue of Palatable Pastime

Baking Bloggers is a friendly group of food bloggers who vote on a shared theme and then post recipes to fit that theme one the second Monday of each month. If you are a food blogger interested in joining in, inquire at our Baking Bloggers Facebook group. We'd be honored if you would join us in our baking adventures.

Pin these Toasted Eggplant Crust Mini Pizzas!

Food Lust People Love: These Toasted Eggplant Crust Mini Pizzas are as delicious as they are adorable with quick tomato sauce and toppings baked on toasted eggplant slices.
 .