Showing posts sorted by date for query caramel. Sort by relevance Show all posts

Sunday, August 27, 2023

Banana Pecan Caramel Sauce

Gooey, sweet and sticky, this banana pecan caramel sauce is perfection over ice cream, brownies or baked apples. Or you can just eat it with a spoon. You won’t get any judgment from me. Seriously, it’s that good. 

Food Lust People Love: Gooey, sweet and sticky, this banana pecan caramel sauce is perfection over ice cream, brownies or baked apples. Or you can just eat it with a spoon. You won’t get any judgment from me. Seriously, it’s that good.

I am not a big sweet eater but I do have a fondness for caramel. The caramelization of sugar adds a welcome slight bitterness that I find very appealing and I know I’m not alone in that. Some of the most popular candies in the world have caramel as an element. Think Snickers, Milky Way and Twix to name just three.

As a kid, my movie candy of choice was always a big box of Milk Duds and I loved Sugar Daddys which were basically a solid rectangle of caramel on a stick. Those would pull your fillings out if you weren’t careful! Totally worth the risk. 

If you feel the same way as I do about caramel, you are going to love this sauce. 

Banana Pecan Caramel Sauce

This recipe makes a little more than two cups of sauce. Because of the bananas, I recommend you store any leftovers in a refrigerator, which means it will turn solid but spoon-able. Gently rewarm it back to sauce consistency before using. This recipe is adapted from one on Marsha’s Baking Addiction.

Ingredients
1 cup or 240ml water
2 cups or 400g sugar
1/2 cup or 57g chopped pecans
2 medium bananas (about 180g), pureed until smooth
1/2 cup or 120ml heavy cream, at room temperature
1 teaspoon vanilla extract


Method
In a large saucepan over medium-high heat, add the water and sugar. Bring to the boil, stirring constantly to dissolve the sugar.


Turn the heat down to medium and allow the mixture to come to a light amber color without stirring. 


Instead, swirl the pan around occasionally to make sure the mixture caramelizes evenly. (This can take a while. Be patient, and don't be tempted to turn up the heat!)

Remove the pan from the heat, and add in the chopped pecans. Stir well.


 Add in the pureed banana. Stir constantly until combined and the bubbling has stopped.


Place back on the heat, and keep stirring until the mixture becomes a deep, rich amber color.


Remove from the heat and gradually pour in the heavy cream, stirring constantly until combined. The sauce might sugar up at this point if your cream isn't room temperature but just keep stirring and all will be well, as the sugar melts again and it turns back into a sauce. 


Take the pot off of the stove and stir in the vanilla.


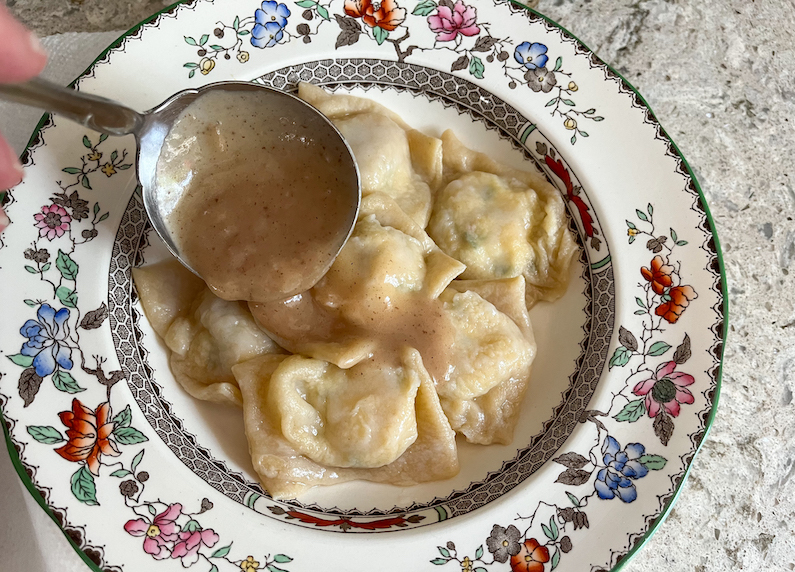
Pour the caramel into a heat-proof jar and allow to cool completely before using. Serve over ice cream or even spread on toast or pancakes. 

Food Lust People Love: Gooey, sweet and sticky, this banana pecan caramel sauce is perfection over ice cream, brownies or baked apples. Or you can just eat it with a spoon. You won’t get any judgment from me. Seriously, it’s that good.

Or eat it with a spoon. 

Food Lust People Love: Gooey, sweet and sticky, this banana pecan caramel sauce is perfection over ice cream, brownies or baked apples. Or you can just eat it with a spoon. You won’t get any judgment from me. Seriously, it’s that good.

Again, no judgment from me.

Enjoy!

It’s Sunday FunDay and my blogger friends and I are celebrating National Banana Lover’s Day, which is today! How will you celebrate? We’ve got a list of great recipes you might like to try. Check them out below: 

 
We are a group of food bloggers who believe that Sunday should be a family fun day, so every Sunday we share recipes that will help you to enjoy your day. If you're a blogger interested in joining us, just visit our Facebook group and request to join.


Pin this Banana Pecan Caramel Sauce!

Food Lust People Love: Gooey, sweet and sticky, this banana pecan caramel sauce is perfection over ice cream, brownies or baked apples. Or you can just eat it with a spoon. You won’t get any judgment from me. Seriously, it’s that good.

 .

Friday, January 20, 2023

Lemon Ricotta Lobster Ravioli

Lemon ricotta lobster ravioli are easy to make and even easier to eat with their light, flavorful filling and tender pasta outside. Truly it’s a special meal for any special person or occasion. 
Food Lust People Love: Lemon ricotta lobster ravioli are easy to make and even easier to eat with their light, flavorful filling and tender pasta outside. Truly it’s a special meal for any special person or occasion.

As I said in my original spinach and cheese ravioli post, our family loves the group project of making ravioli. The joint effort produces more ravioli much faster which helps us not feel so bad when they are eaten even more quickly. And they do disappear quickly. 

I was on my own making these lemon ricotta lobster ravioli so I decided to pare down the ingredients for the pasta dough and make just enough for about 24 ravioli, a manageable amount and still more that my husband and I could eat at one sitting. It’s always nice to have some leftovers of a nice dish and I can assure you, this is indeed a Very Nice Dish.

Lemon Ricotta Lobster Ravioli

You can serve this with your favorite sauce, but one caveat: Choose one that will complement and not overwhelm the flavors in your filling. We want that lobster to shine! I’ve included the ingredient list and instructions for my garlic browned butter wine sauce, in case you’d like to try it as well. It’s not the prettiest color but, oh, the flavor! So good. For the lobster meat, I used two lobster tails (8 1/4 oz or 230g total weight) and steamed them for about 7 minutes until internal temp reached 160°F or 71°C.

Ingredients
For the pasta dough:
1 1/2 - 1 2/3 cups or 187.5- 208g tipo 00 flour (plus extra for rolling out the pasta)
1 egg 
1 egg yolk (save white for filling)
2 teaspoons olive oil or salad oil 
1/2 teaspoon fine sea salt

For the ravioli filling:
4 oz or 112g cooked lobster meat, chopped
1 large clove garlic, minced
1/2 cup or 125g whole milk ricotta cheese
1 egg white
Zest of 1 lemon
1 sprig Italian parsley, just leaves, chopped finely, plus extra for garnish, if desired
1/2 teaspoon salt
1/4 teaspoon freshly ground black pepper

For the garlic brown butter wine sauce (optional):
3 tablespoons butter
1 clove garlic, sliced as thinly as possible
2 tablespoons flour
1/4 cup or 60ml dry white wine
1 cup or 240ml lobster or seafood stock (from a cube is fine – I used shrimp)
1/2 teaspoon salt

Method
In large bowl, combine 3/4 cup or 94g flour, 1/4 cup or 60ml water and remaining dough ingredients. With mixer at slow speed, beat for two minutes, occasionally scraping the bowl with a rubber spatula.


Using a wooden spoon or a Danish dough whisk, stir in enough of remaining flour to make a soft dough.


Turn out onto floured surface and knead until smooth and elastic, about 10 minutes. Wrap in cling film and let stand at least 30 minutes. (After the 30 minutes, refrigerate the dough if you are making this ahead of time.)


While the dough rests, we can get on to the ravioli filling. It couldn’t be simpler. Mix all the ingredients together well in a mixing bowl. Set aside.


Once the dough has rested, cut it in four equal pieces and remove one. Wrap the rest of the dough again with the cling film.

Flour the dough ball well and use a rolling pin or a pasta roller to roll it out quite thinly to the size of your ravioli plaque. Check out my original ravioli post to see my roller in action.

Flour your ravioli plaque liberally and lay the sheet of pasta on top. Fill each hole with about a teaspoon of the filling.


Using the second quarter of the dough and, following the same instructions, roll it out to the size of your ravioli plaque.

Use a pastry brush to wet the pasta on the plaque between the spoons of filling.


Carefully, starting at one end, lay the second sheet of pasta on top of the filled one, sticking the two sheets together and pressing out the air as you go along.


Turn the ravioli plaque over and let the filled pasta drop out onto your countertop. If it sticks, just gently pry it off.


Trim the ravioli around the edges and cut them apart.


Set them aside on a plate lined with cling film that has been well floured.


Continue the process until all the ravioli are rolled out, filled and cut apart. I put another layer of cling film and flour again with each layer of ravioli.


The ravioli should be stored in the refrigerator, covered with cling film until you are ready to boil them.

I re-rolled the scraps that were cut off and just made a few noodles with them so they didn't go to waste. I cooked those a different night to add to a veggie stir-fry.


If you are making my garlic brown butter wine sauce, now’s the time. If not prepare your own sauce.

Cook the butter over a medium heat, watching it carefully and stirring occasionally until it turns a nutty caramel color. 


Add in the sliced garlic and cook stirring for about 15-20 seconds. 


Immediately whisk in the flour until it's incorporated into the butter.


Slowly pour in the wine and stock and whisk until creamy. Cook over a medium heat until the sauce reduces slightly and thickens. 


Add the salt and stir well. Keep warm until the ravioli are cooked. 

To cook the ravioli, boil water with salt and a little olive oil in a large pot, as you would for regular pasta, and lower the ravioli in gently a few at a time. Stir gently so they don’t stick to each other or the bottom of the pot. They only take a few minutes to cook. 


Remove with a slotted spoon and tap it gently on a folded paper towel to get rid of most of the water. 


Serve with the sauce of your choice or my garlic brown butter wine sauce. Spoon over the ravioli to serve.


Garnish with chopped parsley, if desired. 

Food Lust People Love: Lemon ricotta lobster ravioli are easy to make and even easier to eat with their light, flavorful filling and tender pasta outside. Truly it’s a special meal for any special person or occasion.

Enjoy!

Food Lust People Love: Lemon ricotta lobster ravioli are easy to make and even easier to eat with their light, flavorful filling and tender pasta outside. Truly it’s a special meal for any special person or occasion.

It’s Fish Friday Foodie time and this month we are starting the year off in style by sharing lobster recipes. Check out the links below! Many thanks to our host Camilla of Culinary Cam. 


Would you like to join Fish Friday Foodies? We post and share new seafood/fish recipes on the third Friday of the month. To join our group please email Wendy at wendyklik1517 (at) gmail.com. Visit our Facebook page and Pinterest page for more wonderful fish and seafood recipe ideas.


Pin these Lemon Ricotta Ravioli!

Food Lust People Love: Lemon ricotta lobster ravioli are easy to make and even easier to eat with their light, flavorful filling and tender pasta outside. Truly it’s a special meal for any special person or occasion.

 .


Sunday, December 4, 2022

2-Minute Quick Fudge

This rich, nutty 2-Minute Quick Fudge is so easy that children can make it all by themselves. Even better, its main ingredients are store cupboard and refrigerator staples: powdered sugar, cocoa powder, butter and milk. 

Food Lust People Love: This rich, nutty 2-Minute Quick Fudge is so easy that children can make it all by themselves. Even better, its main ingredients are store cupboard and refrigerator staples.

It’s perfect for slumber parties, unexpected midnight munchies and, especially important this time of year, it makes a great gift for neighbors and friends. Who doesn't like fudge?!

I miss the days when my daughters still lived at home and we’d have a fairly steady stream of overnight guests and sleepovers on the weekends. I was in my absolute element cooking and baking for a crowd. 

One of our favorite sleepover meals was homemade pizza. I’d make the dough and pizza sauce and set out all of the toppings. Each girl would get a ball of dough to spread out on a pan and top her own custom made pizza. It took awhile to make and bake them all so the pizza was both entertainment for part of the evening, and dinner. 

As they got older, I’d head off to my room to read after we ate, knowing that they were quite capable of baking up a pan of brownies and more on their own, if the munchies hit. The muted giggles and games and music from downstairs were joy to me. 

I originally created this recipe post for a sleepover theme blog event so I was determined to find a quick fudge recipe that children could make on their own with simple ingredients. No condensed milk or marshmallow fluff since a lot of folks don’t keep those in the cupboard. I didn’t want the stove involved either. Flames and unsupervised children should never mix. Unfortunately, most quick fudge recipes call for one or both those things. 

Until I found this one in my archives. I’d love to give credit where it’s due, but the source wasn’t in my notes. It did say that nuts were optional. I had scratched through Nuts to write Pecans. Because pecans are my favorite nut. And I added the mini M&Ms. 

The bottom line is, you can eat the base quick fudge all on its own. It’s perfectly chocolate-y and rich. Or you can add in whatever you like. Chopped candy bars, mint chips, peanut butter chips, mini marshmallows, other nuts? They’d all be excellent. 

2-Minute Quick Fudge

Technically, this does take just a bit longer than two minutes because you have to chop the pecans and measure all of your other ingredients out. It’s still super quick and worth it!  

Ingredients
1 lb or 450g powdered sugar
1/2 cup or 40g unsweetened cocoa powder
1/2 teaspoon fine sea salt
1/4 cup or 60ml milk
1/2 cup or 113g butter 
1 tablespoon vanilla
1/2 cup or 57g chopped pecans, plus more for decoration, if desired
1/2 cup or 100g mini M&Ms, plus more for decoration, if desired

Method
Grease an 8 x 8 in or 20 x 20cm pan or line it with baking parchment across the bottom and up at least two opposing sides, so that the fudge can be lifted out of the pan by those ends. 

In a large microwavable mixing bowl, whisk together the sugar, cocoa and salt in mixing bowl. 


Add milk and butter. Do not mix. 


Cook uncovered in a microwave oven on high for 2 minutes. Remove bowl from microwave and stir well to mix the ingredients into a lovely thick chocolate.


Add the vanilla, pecans and mini M&Ms.  Stir until blended. 


Pour or spoon the fudge into your prepared pan. 


Press it out evenly in the pan. 


Sprinkle on the extra mini M&Ms and pecans, if using. Press them down with a spoon so they stick into the fudge. 


If your kitchen is warm, you can put the pan in the freezer for 20 minutes to cool and set. My quartz countertop is cold this time of year so mine set up quickly without chilling. 

Cut into small squares with a sharp knife and serve. Store in an airtight container. 

Food Lust People Love: This rich, nutty 2-Minute Quick Fudge is so easy that children can make it all by themselves. Even better, its main ingredients are store cupboard and refrigerator staples.

Tip: If you are giving this fudge away as a gift, cut a piece of thick cardboard into a square. Cover it in foil and stack the pieces of fudge on top. Cover with cling film, ribbon optional. Voilà – a pretty gift package! 

Food Lust People Love: This rich, nutty 2-Minute Quick Fudge is so easy that children can make it all by themselves. Even better, its main ingredients are store cupboard and refrigerator staples.

Enjoy! 

It’s Sunday FunDay and today we are sharing recipes for holiday sweets and treats. Check out all the links below. Many thanks to our host, Wendy of A Day in the Life on a Farm and her able stand-in, Sue of Palatable Pastime


We are a group of food bloggers who believe that Sunday should be a family fun day, so every Sunday we share recipes that will help you to enjoy your day. If you're a blogger interested in joining us, just visit our Facebook group and request to join.


Pin this 2-Minute Quick Fudge!

Food Lust People Love: This rich, nutty 2-Minute Quick Fudge is so easy that children can make it all by themselves. Even better, its main ingredients are store cupboard and refrigerator staples.

 .

Sunday, October 16, 2022

Creepy Pumpkin Seed Brittle

Creepy Pumpkin Seed Brittle is a great seasonal party sweet and perfect for wrapping up to give as gifts for teachers, friends and coworkers. The crunchy pumpkin seeds toast and pop in the syrup as it cooks and caramelizes, flavoring the buttery brittle.

Food Lust People Love: Creepy Pumpkin Seed Brittle is a great seasonal party sweet and perfect for wrapping up to give as gifts for teachers, friends and coworkers. The crunchy pumpkin seeds toast and pop in the syrup as it cooks and caramelizes, flavoring the buttery brittle.

When my girls were quite young, we lived in a small oilfield town in Brazil where we were one of very few American families. Our neighborhood was just four or five blocks square, with the tiny little international school within its perimeter.

Halloween was not celebrated in Brazil, at least when we lived there, so if I wanted my daughters to experience that great American tradition as I had when I was little, it was up to me to organize it myself.

I started in early October by asking neighbors I knew to give out candy then I’d make a map of all the participating houses and pass them out at the beginning of the evening. 

Some participating houses had children so one parent would join the groups going from house to house, leaving someone at home to hand out candy. Others didn’t have kids but they got into the spirit with enthusiasm, decorating their front doors and more, to welcome the trick or treaters.

After trick or treating, everyone would come back to our house where we had decorated the backyard for a spooky Halloween party and set up a table with cupcakes, sandwiches, chips and punch. We’d bob for apples the old-fashioned way in a big basin of water, pass oranges or small balloons under chins and play other fun games. 

And, of course, the kids would sort out their candy, trading for their favorites and eating much of it in the process. It was a festival of sweetness and fun! Such a sugar rush! 

One of my favorite candies to make for a Halloween party was, and still is, peanut brittle. This week I made it seasonal, using pumpkin seeds to celebrate Halloween.

Your Halloween party guests will love it! Or make some as a gift for your favorite teacher or neighbor. Add a creepy chocolate spiderweb for decoration!

Creepy Pumpkin Seed Brittle

Like peanut brittle, pumpkin seeds brittle is simple to make but take the time ahead to butter your foil and put it in a heatproof pan before you start boiling the concoction, as per the instructions. I don't have photos of the in-between steps because there wasn't any time to stop to take a picture!

Ingredients
1 cup or 200g sugar 
1⁄2 cup or 120ml light corn syrup 
1⁄4 cup or 60ml water
1⁄2 teaspoon fine sea salt
1 1⁄4 cups or 180g raw green (hulled) pumpkin seeds (not toasted) 
2 tablespoons butter, softened, plus more for greasing the foil lined pan
1 teaspoon baking soda
1⁄3 cup or 66g semi­sweet chocolate chips for spider web ­- optional

Method
To make the pumpkin seed brittle, first line a large pan with foil and grease the foil liberally with butter. Set aside.

In a heavy pot, heat the sugar, corn syrup, water and salt over a medium heat, stirring until the sugar dissolves.

Separate out a tablespoon of the pumpkin seeds and set them aside.

Stir in the remaining pumpkin seeds.


Continue cooking, stirring frequently until the pumpkin seeds start popping and the liquid turns caramel colored.

If you use a candy thermometer, you are looking for a temperature of 300°F or 149°C. Alternatively, you can drop a small amount into very cold water. It’s ready when it separates out into hard and brittle threads.

Remove the pot from the heat and stir in the butter and soda. The syrup will froth up but just keep stirring till the butter is melted.

Pour the bubbling pumpkin syrup into your prepared pan.

Holding the pan securely, shake it from side to side and front to back, tipping it carefully this way and that so the pumpkin seed brittle spreads out. Quickly sprinkle on the reserved pumpkin seeds and leave it to cool.


To make the creepy chocolate spider web, melt the chocolate chips with a few quick zaps in a microwave or in a double boiler.

Fill a piping bag fitted with a number 3 tip with the melted chocolate. Pipe on a spider web following these instructions here.


Set the Creepy Pumpkin Seed Brittle out on your party table whole, then break it into pieces with a little hammer to serve.

Food Lust People Love: Creepy Pumpkin Seed Brittle is a great seasonal party sweet and perfect for wrapping up to give as gifts for teachers, friends and coworkers. The crunchy pumpkin seeds toast and pop in the syrup as it cooks and caramelizes, flavoring the buttery brittle.

Enjoy! 

It's Sunday FunDay and since Halloween is nigh, we are sharing Halloween party treat recipes. Many thanks to our host, Sue of Palatable Pastime and her able helper, Wendy of A Day in the Life on the Farm. Check out all the links below!


We are a group of food bloggers who believe that Sunday should be a family fun day, so every Sunday we share recipes that will help you to enjoy your day. If you're a blogger interested in joining us, just visit our Facebook group and request to join.
 

Pin this Creepy Pumpkin Seed Brittle!

Food Lust People Love: Creepy Pumpkin Seed Brittle is a great seasonal party sweet and perfect for wrapping up to give as gifts for teachers, friends and coworkers. The crunchy pumpkin seeds toast and pop in the syrup as it cooks and caramelizes, flavoring the buttery brittle.

 .