Monday, November 26, 2018

Artichoke Dip Mini Muffins #MuffinMonday

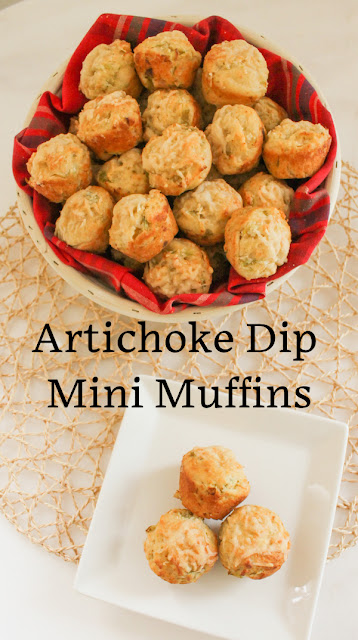
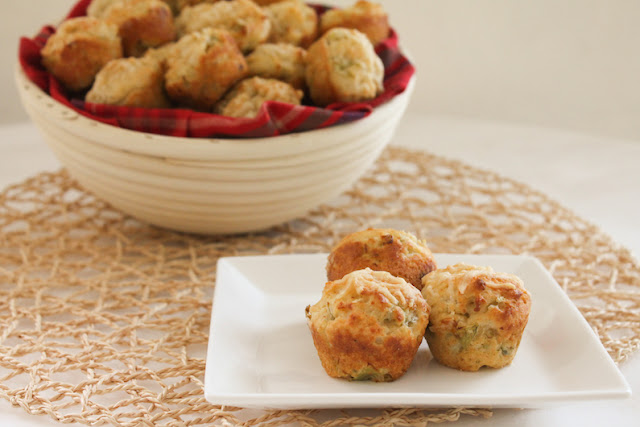
Cheesy artichoke dip mini muffins are made with all of the wonderful ingredients of our favorite hot baked dip: artichokes, of course, along with Parmesan cheese, mayonnaise and green chiles.

Food Lust People Love: Cheesy artichoke dip mini muffins are made with all of the wonderful ingredients of our favorite hot baked dip: artichokes, of course, along with Parmesan cheese, mayonnaise and green chiles.


Every Christmas Eve, our dinner menu is appetizers only:  Smoked salmon or home-cured salmon, angels on horseback, caviar, deviled eggs, potato latkes, a variety of stinky cheese and sometimes bruschetta. But artichoke dip always makes an appearance. As good as it is the day it is baked, it’s also wonderful as leftovers, stirred through some hot pasta or stuffed into a baked potato. (I’ve even used it as stuffing for puff pastry tarts!)

Here I recreate our favorite dip in muffin form. Bake some up and pour yourself a drink! And make sure to scroll down to the bottom to see the other Muffin Monday recipes I'm sharing.

Artichoke Dip Mini Muffins

To get most of the packing liquid out of the artichokes, give each one a gentle squeeze then place them bottom up in a sieve so they can continue draining. To completely drain the green chiles, put them in a sieve and press down with the back of a spoon.

Ingredients - Makes 34 mini muffins
2 cups or 250g flour
1 cup or 100g finely grated Parmesan
2 teaspoons baking powder
1/2 teaspoon cayenne (optional)
1⁄2 cup or 115g mayonnaise
3/4 cup or 180ml milk
1 can or jar artichoke hearts, drained weight 7.9oz or 225g*
1 small can (4.5 oz or 127g) chopped peeled green chiles, drained well
Canola or other light oil for greasing muffin pan

Optional for decoration: coarsely grated Parmesan

*Do not use marinated artichokes as those, even well drained, will add unnecessary oil to the muffins.

Method
Preheat your oven to 375°F or 190°C and brush your mini muffin pans with oil.

In a large mixing bowl, combine the flour, finely grated Parmesan and baking powder.


In another mixing bowl, whisk together the mayonnaise and milk.

Chop the well-drained artichoke hearts roughly and add them to the mayo/milk bowl, along with the drained green chiles. Stir well.


Pour the wet ingredients into the dry ones and fold just until the flour is moistened.


Use a tablespoon or scoop to fill the prepared muffin pan. My scoop is 2 tablespoons. Using it, the batter made 34 mini muffins.


Top with some extra grated Parmesan, if desired.


Bake in the preheated oven for 12-15 minutes, or until the muffins are golden and a toothpick inserted in the middle comes out clean.

Food Lust People Love: Cheesy artichoke dip mini muffins are made with all of the wonderful ingredients of our favorite hot baked dip: artichokes, of course, along with Parmesan cheese, mayonnaise and green chiles.


These delightful savory morsels are excellent served with cold beer, a crisp dry white wine or a full-bodied red.

Enjoy!

Food Lust People Love: Cheesy artichoke dip mini muffins are made with all of the wonderful ingredients of our favorite hot baked dip: artichokes, of course, along with Parmesan cheese, mayonnaise and green chiles.


This month my Muffin Monday group is sharing five wonderful recipes. Get baking!

Muffin Monday
#MuffinMonday is a group of muffin loving bakers who get together once a month to bake muffins. You can see all our of lovely muffins by following our Pinterest board.
Updated links for all of our past events and more information about Muffin Monday, can be found on our home page.

Pin it!

Food Lust People Love: Cheesy artichoke dip mini muffins are made with all of the wonderful ingredients of our favorite hot baked dip: artichokes, of course, along with Parmesan cheese, mayonnaise and green chiles.
 .

Tuesday, November 20, 2018

Fudgy Flourless Chocolate Cashew Cookies #CreativeCookieExchange

All of my taste testers agree, these fudgy flourless chocolate cashew cookies are GOOD. Better than good. We thought they were fabulous. Crunchy on the outside and wonderfully chewy in the middle. And as long as there are no nut allergies to worry about, your gluten-free friends will love them too.

Food Lust People Love: All of my taste testers agree, these fudgy flourless chocolate cashew cookies are GOOD. Better than good. We thought they were fabulous. Crunchy on the outside and wonderfully chewy in the middle. And as long as there are no nut allergies to worry about, your gluten-free friends will love them too.


With Thanksgiving nearly upon us, I chose the theme "quick last minute cookies" for this month’s Creative Cookie Exchange. I don’t know about you, but aside from the traditional pecan pie, desserts always take a back seat to the main course and sides at my house. As my elder daughter says, "Thanksgiving is All About the Sides!" When extra guests show up and that pie won’t stretch far enough, whip up some quick cookies.

While these cookies are easy to put together and bake, I am also delighted to tell you that, once baked, they freeze and thaw beautifully, making your life even easier. You are welcome!

Fudgy Flourless Chocolate Cashew Cookies

I named these for the nuts I had on hand, but please feel free to substitute whatever you have in the cupboard. If your nuts aren’t roasted and lightly salted, toast them in a dry skillet and add one half teaspoon of fine sea salt when you sift the sugar and cocoa powder together. The salt is absolutely essential to balance the sweetness of these fudgy cookies.

Ingredients - for 2 dozen big cookies or 4 dozen small ones
3 cups or 375g powdered sugar
2/3 cup or 53g extra dark cocoa powder (I used Hershey's Special Dark.)
1/2 cup or 95g mini dark chocolate chips
5 1/3 oz or 150g lightly salted roasted cashews, chopped roughly
3 large egg whites

Method
Preheat your oven to 350°F or 180°C and prepare your cookie sheets by lining them with baking parchment or a silicone mat.

Sift the powdered sugar and cocoa into a large bowl together.


Add in the chocolate chips and chopped cashews, saving a couple of tablespoons of the cashews for topping, if desired. I always like to add nuts to the tops of baked goods if there are nuts inside because 1. They look nice and more importantly, 2. They are a warning to those with nut allergies. No bad surprises.


Whisk your egg whites for a minute or so, just to break down the proteins. Pull your whisk out occasionally and let the egg whites drip off. You’ve beaten them enough when they no longer drop off in glops but drip smoothly. I use a small whisk and a measuring jug for this step, which makes the egg whites easier to pour into the other mixing bowl.

Pour the egg whites into the sugar/cocoa bowl and stir with wooden spoon or hard silicone spatula till they are well combined.

You will think that there are not enough egg whites, but just keep stirring. This batter is super stiff.


Using a 2-tablespoon or 1-tablespoon scoop (depending on whether you want big or small cookies), spoon the thick batter onto your prepared cookie sheets. Mine was a 2-tablespoon scoop.

Sprinkle each mound with a pinch of the chopped cashews, if you saved some.


Bake one pan at a time in the middle shelf of the oven for 12-14 minutes for the big cookies or 11-13 minutes for the smaller ones, or until the cookies are cooked on the outside edges and just set in the middle. Do not over bake!

Remove from the oven and allow to cool before removing them from the pan with a thin spatula.

Food Lust People Love: All of my taste testers agree, these fudgy flourless chocolate cashew cookies are GOOD. Better than good. We thought they were fabulous. Crunchy on the outside and wonderfully chewy in the middle. And as long as there are no nut allergies to worry about, your gluten-free friends will love them too.


I highly recommend serving glasses of ice cold milk with these fudgy flourless chocolate cashew cookies. A match made in heaven.

Food Lust People Love: All of my taste testers agree, these fudgy flourless chocolate cashew cookies are GOOD. Better than good. We thought they were fabulous. Crunchy on the outside and wonderfully chewy in the middle. And as long as there are no nut allergies to worry about, your gluten-free friends will love them too.


Enjoy!

Food Lust People Love: All of my taste testers agree, these fudgy flourless chocolate cashew cookies are GOOD. Better than good. We thought they were fabulous. Crunchy on the outside and wonderfully chewy in the middle. And as long as there are no nut allergies to worry about, your gluten-free friends will love them too.


Check out the other quick last minute cookies, my Creative Cookie Exchange friends are sharing. Such a small but delicious group this month!


You can also use us as a great resource for cookie recipes. Be sure to check out our Pinterest Board and our monthly posts (you can find all of them here at The Spiced Life). You will be able to find them the first Tuesday after the 15th of each month! If you are a blogger and want to join in the fun, contact Laura at thespicedlife AT gmail DOT com and she will get you added to our Facebook group, where we discuss our cookies and share links.


Pin it! 

Food Lust People Love: All of my taste testers agree, these fudgy flourless chocolate cashew cookies are GOOD. Better than good. We thought they were fabulous. Crunchy on the outside and wonderfully chewy in the middle. And as long as there are no nut allergies to worry about, your gluten-free friends will love them too.

 .

Friday, November 16, 2018

Thai-Style Pumpkin and Shrimp Stir-fry #FishFridayFoodies

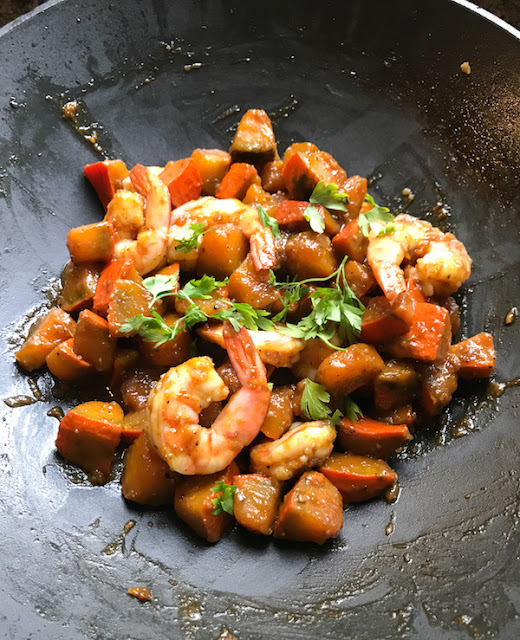
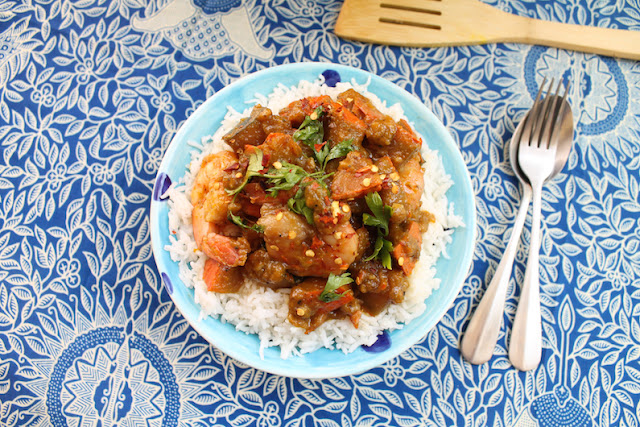
This healthy Thai-style pumpkin and shrimp stir-fry is super quick to the table, with enormous flavor. With or without the shrimp, it’s a satisfying meal. But add the shrimp. You won’t regret it.

Food Lust People Love: This healthy Thai-style pumpkin and shrimp stir-fry is super quick to the table, with enormous flavor. With or without the shrimp, it’s a satisfying meal. But add the shrimp. You won’t regret it.


I’d been hearing about this recipe for a while before I finally got to taste it for myself two years ago. It’s a favorite at my elder daughter’s home where both she and her husband know how to make it without consulting a recipe. I get the impression is in regular rotation, when their favorite kabocha squash is in season.

I’ve made it with red kuri squash and pumpkin, but the original recipe says that you can also substitute delicata, acorn or butternut as well. I could be wrong but I think yams would work too. The slightly sweet flesh with the savory fish sauce, fragrant garlic and spicy peppercorns make this dish very more-ish. This is truly a dish that is more than the sum of its parts.

One more thing, I like to leave the skin on squash and pumpkin. It’s my favorite part. If you are concerned that your pumpkin skin is too thick and might not be edible because it’s tough, slice off a small piece and boil it in a little water for about 5-6 minutes. If it turns tender, you don’t need to cut it off before cooking. Remove any blemishes, but otherwise, cut the pumpkin into pieces, peel and all. If it doesn’t turn tender, by all means, cut it off.

Thai-Style Pumpkin and Shrimp Stir-fry

This recipe is adapted from the original at Thai Table, an excellent source for information about Thai ingredients, travel, and, of course, recipes. If you love Thai cooking, you need to check it out. If your pumpkin is a bit larger or small than mine, don't worry. It will still turn out just fine.

Ingredients
5 cloves garlic
1 slightly overfilled teaspoon or 4g black peppercorns
2 lb 2 oz or 965g whole pumpkin (1 lb 13 oz or 825g after seeding, with peel intact)
3 tablespoons canola or other light vegetable oil
2 cups or 480ml water
5 tablespoons fish sauce
1 tablespoon sugar
8.5 oz or 240g peeled, cleaned shrimp

For garnish: chopped cilantro
Optional: crushed red pepper

To serve: Steamed rice

Method
Cut your pumpkin in quarters and remove the seeds, scraping the inside clean. If you need to remove the skin, set each quarter on its side and cut the skin off. If not, simply cut off any hard spots or blemishes.


Cut the pumpkin in bite-sized pieces and set aside.


Using a mortar and pestle, grind the peppercorns and garlic together into a smooth paste. In a small bowl, combine the fish sauce and the sugar, stirring till the sugar dissolves.


Heat your wok over a high flame. Add in the oil, closely followed by the garlic pepper paste. Cook the paste for just a minute, stirring continually, until the garlic starts browning.


Add the pumpkin to the wok, stirring to coat it with the garlic and pepper.

Pour in the water and stir again.

Cook for five minutes or until the pumpkin is tender and the water has almost all evaporated. Add in the sweetened fish sauce and stir again.

When the fish sauce has been absorbed by the squash, toss in the shrimp.

Cook minute or two more, until the shrimp are pink and cooked through. Add crushed red pepper to taste, if desired, and sprinkle on some chopped cilantro.

Food Lust People Love: This healthy Thai-style pumpkin and shrimp stir-fry is super quick to the table, with enormous flavor. With or without the shrimp, it’s a satisfying meal. But add the shrimp. You won’t regret it.


Serve over steamed rice.

Food Lust People Love: This healthy Thai-style pumpkin and shrimp stir-fry is super quick to the table, with enormous flavor. With or without the shrimp, it’s a satisfying meal. But add the shrimp. You won’t regret it.


Enjoy!


Would you like to join Fish Friday Foodies? We post and share new seafood/fish recipes on the third Friday of the month. To join our group please email Wendy at wendyklik1517 (at) gmail.com. Visit our Facebook page and Pinterest page for more wonderful fish and seafood recipe ideas.


Pin it!

Food Lust People Love: This healthy Thai-style pumpkin and shrimp stir-fry is super quick to the table, with enormous flavor. With or without the shrimp, it’s a satisfying meal. But add the shrimp. You won’t regret it.
  .


Thursday, November 15, 2018

Île Flottante Floating Island Bundt #BundtBakers

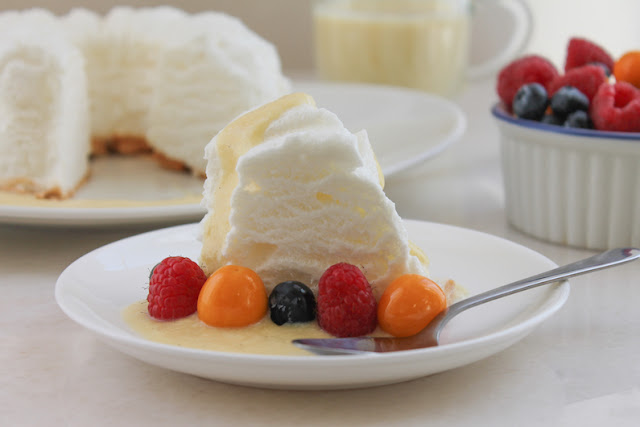
A fun and easy twist on the original French dessert called îles flottantes, this floating island Bundt features meringue baked in a Bundt pan, served with fresh fruit and crème anglais, a pourable vanilla custard.

Food Lust People Love: A fun and easy twist on the original French dessert called îles flottantes, this floating island Bundt features meringue baked in a Bundt pan, served with fresh fruit and crème anglais, a pourable vanilla custard.


This month our host for Bundt Bakers is Lara from Tartacadabra and she posed an interesting challenge: Recreate a French dessert or pastry using a Bundt pan. Make sure you scroll down past my recipe to see what everyone else made.

Île Flottante Floating Island Bundt

The original Îles Flottantes are made by poaching meringue in water or milk, then serving them in custard. In this adaptation, we bake the meringue in a Bundt pan. So much easier and, if you ask me, more impressive as a holiday or dinner party dessert.  Possibly my favorite part though, is that you don’t have leftover yolks, which so often happens when making meringue. The crème anglais, aka pouring custard, takes care of that!

Ingredients - to serve 6
For the île flottante:
4 large egg whites, room temperature
1/2 teaspoon cream of tartar
pinch salt
1/2 cup plus 1 tablespoon or 125g superfine (caster) sugar
1 teaspoon pure vanilla extract

For the crème anglaise:
1/3 cup or 75g extra fine (caster) sugar
2 tablespoons flour
1 teaspoon vanilla paste
pinch salt
2 cups or 480ml whole milk
4 egg yolks
1 1/2 teaspoons butter

To grease a 6-cup Bundt pan:
2 teaspoons canola oil

Optional for serving: your choice of berries or fresh fruit. I used a mix of blueberries, raspberries and golden berries. https://en.wikipedia.org/wiki/Physalis_peruviana

Method
Preheat oven to 375°F or 190°C. Brush your Bundt pan with oil, and invert onto a paper towel so any excess oil can drain off.

To make the meringue, first put your kettle on to boil.

Sift the cream of tartar into the egg whites with the pinch of salt. Beat them at a medium speed until soft peaks form.

Add in the sugar one tablespoon at a time, gradually turning the beaters up to high as you add the sugar. Beat on high until stiff glossy peaks form then mix in the vanilla extract.


Put your Bundt pan into a larger baking pan. Spoon the meringue into the oiled Bundt pan, making sure to fill all the corners and crevices.


Put the pans into your preheated oven and pour boiling water into the outer pan till it reaches about 2 inches or 5cm up the side of the Bundt pan.


Bake for 20-25 minutes or until the meringue is puffed and golden brown. Set on a wire rack to cool for about 30 minutes. It will be very tall when you first take it out and then it will shrink. This is normal.

Food Lust People Love: A fun and easy twist on the original French dessert called îles flottantes, this floating island Bundt features meringue baked in a Bundt pan, served with fresh fruit and crème anglais, a pourable vanilla custard.


Turn the meringue out onto a serving plate and chill until ready to serve. I turned mine out onto a cling film lined wire rack then transferred it. Save yourself an unnecessary step and go straight to the serving dish.

Food Lust People Love: A fun and easy twist on the original French dessert called îles flottantes, this floating island Bundt features meringue baked in a Bundt pan, served with fresh fruit and crème anglais, a pourable vanilla custard.


The Crème Anglais aka Pouring Custard
I make this the same way I make homemade vanilla custard for banana cream pie, except I stop cooking it when it’s still pourable. You can see those instructions and step-by-step photos in this post, so I won't add them all in again here.

In a 2-quart saucepan (don’t turn the heat on yet!) mix sugar, flour and salt. Stir in milk and vanilla paste and whisk until smooth. Make sure you get ALL the lumps out before turning on the heat.

Over medium heat, cook the mixture, stirring constantly, until it starts to thicken and begins to boil gently (about 10 minutes). Boil one minute. Remove immediately from heat and set aside.

In a small mixing bowl, beat the egg yolks with a whisk, while drizzling in about half of the hot milk mixture. Quick beating and slow drizzling are essential so that you don’t end up with cooked eggs.

Slowly pour the egg mixture into the saucepan, stirring rapidly to prevent lumping. Occasionally, scrape the saucepan with a rubber spatula.

Over low heat, cook, stirring constantly, until the custard just coats the back of a spoon. It should still be pourable. Add in the butter and stir till it melts completely. If there are any little lumps, you might want to put the custard through a sieve before putting it in a heatproof vessel and covering the surface with cling film. Put it in the refrigerator to cool.


Pour some custard around the outside of the floating island before bringing it to the table.

Food Lust People Love: A fun and easy twist on the original French dessert called îles flottantes, this floating island Bundt features meringue baked in a Bundt pan, served with fresh fruit and crème anglais, a pourable vanilla custard.


Serve a wedge of île flottante – floating island Bundt with crème anglais and fruit.

Food Lust People Love: A fun and easy twist on the original French dessert called îles flottantes, this floating island Bundt features meringue baked in a Bundt pan, served with fresh fruit and crème anglais, a pourable vanilla custard.


Enjoy!

Many thanks to Lara for hosting Bundt Bakers this month. I loved this creative theme! Check out the other très magnifique French desserts we’ve made into Bundts:

BundtBakers


#BundtBakers is a group of Bundt loving bakers who get together once a month to bake Bundts with a common ingredient or theme. We take turns hosting each month and choosing the theme or ingredient.

You can see all our of lovely Bundts by following our Pinterest board. Updated links for all of our past events and more information about #BundtBakers, can be found on our home page.


Pin it!

Food Lust People Love: A fun and easy twist on the original French dessert called îles flottantes, this floating island Bundt features meringue baked in a Bundt pan, served with fresh fruit and crème anglais, a pourable vanilla custard.
 .

Tuesday, November 13, 2018

Cranberry Lardy Cake #BreadBakers

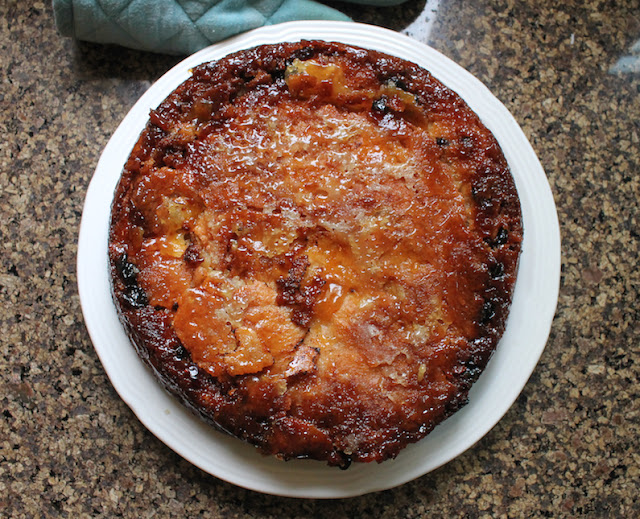
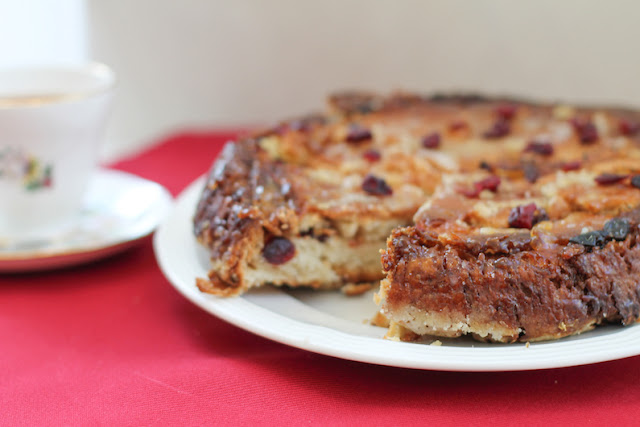
Traditionally, this British afternoon teacake is made with raisins, sultanas and/or currants. My cranberry lardy cake is studded with dried cranberries, but fear not, it is amply filled with the requisite lard and sugar, for a properly respectable British teatime treat.

Food Lust People Love: Traditionally, this British afternoon teacake is made with raisin, sultanas and/or currants. My cranberry lardy cake is studded with dried cranberries, but fear not, it is amply filled with the requisite lard and sugar, for a properly respectable teatime treat.


This month my Bread Bakers are baking up yeast cakes, a subject that required some research on my part. I came up with a list of possibilities, mostly from old English recipes, to be honest. Before the days of chemical rising agents, like baking powder, the most reliable ways to get a cake to rise was either to add eggs or yeast.

Lardy cake caught my fancy because, as previously mentioned here, I have a weakness for caramel. When baked up properly - that is with plenty of lard and sugar! - the bottom turns into a crunchy caramel. As the cake is flipped for serving, you end up with a gorgeous caramel top. Who can resist that?

Cranberry Lardy Cake

My recipe below is a combination of a couple I found on the internet from The Happy Foodie and Hobb House Bakery. Check out this YouTube video to watch one of the Baker Brothers make their version. That first link is actually the one that gave me the idea to add cranberries. The recipe called for crimson grapes, which I’d never heard of. Cranberries, on the other hand, I keep always on hand.

Ingredients
For the dough:
3/4 cup or 175ml warm water
1 teaspoon sugar
1/4 oz or 7g dried yeast
2 1/4 cups or 285g strong white bread flour plus extra for kneading
Scant 1/4 cup or 50g lard
Pinch flaky sea salt

For the lard and sugar filling:
1 cup or 225g caster (very fine) sugar, plus extra for the pan
1 cup or 200g lard, at room temperature
1/2 cup or 65g dried cranberries, plus extra for decorating, if desired

Method
Mix the yeast into the warm water with one teaspoon of the sugar. Set aside.

Measure the flour, salt and lard into a big bowl and use a pastry cutter to cut the lard into the flour.


When the yeast mixture has started to bubble up, pour it into the flour bowl and mix all the ingredients together.


If you are using an electric mixer with a bread hook, knead the dough for 10 minutes. If not, sprinkle a little flour onto a clean work surface and tip the dough out of the bowl onto it. Knead the dough for 15 minutes. Once you have a smooth and elastic dough, pop it back into the bowl and cover it with cling film.

Leave the bowl in a warm place for the dough to rise to twice its size or for 1 hour, whichever comes first.


Meanwhile make the lard and sugar mix by creaming them together in a mixer or with a wooden spoon.

Prepare your 8 in or 20cm round nonstick baking pan by coating it with 1/3 cup or 87g of the lard sugar mixture. Use a rubber spatula to spread it over the bottom and up the sides. Sprinkle an extra tablespoon of sugar over the bottom.


When it’s risen, gently press the air out of the dough and form it into a ball. Pop it on a well-floured work surface and use a rolling pin to roll it into a circle about 15 in or 38cm across.

Divide the remaining lard/sugar paste in half. Use a spoon to distribute one half over the dough circle. Use a rubber spatula to spread the paste over the dough, leaving a small margin of dough around the sides uncovered.

Starting on one side, fold the dough towards the middle. Continue until till all the sides are folded over. (See the first five photos below.) Again, this video shows the method so much better than words can explain.


Let the dough rest for a few minutes, then roll it out again to a 15 in or 38cm circle. Spoon the other half of the lard mixture over the dough circle. (Photo 6 above) Spread it with the rubber spatula. Now sprinkle on the cranberries.


Repeat the folding process till all of the sides have been folded in again. Place the dough in the prepared pan.


Cover loosely with cling film and leave the cranberry lardy cake to rest and rise for two hours. It doesn’t really rise very high but it does fill the pan.


When your two hours are almost up, preheat your oven to 375°F or 190°C.

Bake the lardy cake for 45 minutes, covering the top with foil if it starts to get too brown. Remove the pan from the oven and leave to cool for just a few minutes.

Leave it any longer and you may find that the caramel will stick to your pan, even it it’s nonstick. If this happens to you, use a blunt knife to ease it off the pan so the whole cake will come out in one piece.

Food Lust People Love: Traditionally, this British afternoon teacake is made with raisin, sultanas and/or currants. My cranberry lardy cake is studded with dried cranberries, but fear not, it is amply filled with the requisite lard and sugar, for a properly respectable teatime treat.
If necessary, return any pieces that stayed in the pan to the top of the cake. Or just eat them. I cannot tell you how wonderful this crunchy caramel is! It's the perfect topping for the yeast cake underneath.

Food Lust People Love: Traditionally, this British afternoon teacake is made with raisin, sultanas and/or currants. My cranberry lardy cake is studded with dried cranberries, but fear not, it is amply filled with the requisite lard and sugar, for a properly respectable teatime treat.


Sprinkle with tablespoon or two dried cranberries to decorate, if desired. Enjoy!

Food Lust People Love: Traditionally, this British afternoon teacake is made with raisin, sultanas and/or currants. My cranberry lardy cake is studded with dried cranberries, but fear not, it is amply filled with the requisite lard and sugar, for a properly respectable teatime treat.

Many thanks to this month's Bread Bakers host, Archana from The Mad Scientist Kitchen. Check out the other recipes our fellow bakers made for the yeasted cake challenge:

#BreadBakers is a group of bread loving bakers who get together once a month to bake bread with a common ingredient or theme. Follow our Pinterest board right here. Links are also updated each month on this home page.

We take turns hosting each month and choosing the theme/ingredient.

Pin it! 

Food Lust People Love: Traditionally, this British afternoon teacake is made with raisin, sultanas and/or currants. My cranberry lardy cake is studded with dried cranberries, but fear not, it is amply filled with the requisite lard and sugar, for a properly respectable teatime treat.
 .

Monday, November 12, 2018

Baked Cheese and Sausage Ziti #BakingBloggers

The perfect weeknight family meal or Sunday supper, this baked cheese and sausage ziti is quick to put together but full of flavor. Comfort food at its best.

Food Lust People Love: The perfect weeknight family meal or Sunday supper, this baked cheese and sausage ziti is quick to put together but full of flavor. Comfort food at its best.


For many years, nay, for my whole life, my mom has been singing the praises of cooking in cast iron. She has an enviable collection of cast iron pots of every size and shape, an amazing array.

When I was younger, she’d offer me a pot or two, but I couldn’t be bothered with what I thought were the difficulties of keeping cast iron clean. Plus, before I lived in Dubai, I simply didn’t have enough luggage allowance for all of my shopping, never mind bringing back a very heavy iron pot from Houston.

Finally, just a few years ago, Mom kindly offered again and I accepted the 13 1/4 inch (34cm) beauty you see in these photos. Let me tell you, friends, I use it All The Time. And I regret the years before when I didn’t say yes to the cast iron. It’s actually quite easy to keep clean and is more nonstick than my actual “nonstick” skillets. So just for the record, I want to say, my mother was right and I was wrong.

Baked Cheese and Sausage Ziti

And while I am admitting my errors, let me also say that this pasta is probably actually penne, not ziti. A little research after the fact revealed that while ziti can have ridges, most don’t. But who has ever heard of baked penne? So baked ziti it is. Either way, your family will be fighting over the crispy bits.

Ingredients
3 medium cloves garlic
1 medium onion, minced
2 tablespoons olive oil
1 1/2 lbs or 680g fresh hot Italian sausage, casings removed
2 (14.5 oz or 411g) cans diced tomatoes with basil, garlic and oregano
Salt and freshly ground black pepper
1 lb or 450g  uncooked penne or ziti
3/4 cup or 75g grated Parmesan cheese

For baking:
1/4 cup or 25g grated Parmesan
1 cup or 110g grated mozzarella

For garnish – finely chopped parsley (optional)

Method
Adjust oven rack to the center position and preheat the oven to 350°F or 180°C.

Cook the pasta according to the directions on the package, until just al dente. Scoop out a cup of the cooking water and set aside. Drain the pasta and return it to the warm pot you used for boiling it.

Mince the garlic and onions.

In a large iron skillet, add the olive oil, garlic and onion. Cook over a medium heat until the onion softens, being careful not to let the garlic burn.

Add the sausage meat and cook until it is browned, breaking the sausage into small pieces as you stir.


Add in the two cans of the seasoned diced tomatoes. Stir well and bring to a simmer. Cook for about 8-10 minutes.


Remove the pan from the stove and tip in the cooked pasta stirring well.

Stir in the Parmesan cheese and the cup of reserved pasta water. Taste the mixture and add salt if needed and a few generous grinds of black pepper from a pepper mill.


Sprinkle the mozzarella and additional Parmesan over the top and put the skillet in your preheated oven.


Bake for 30 minutes, covering the skillet with foil, if it begins to brown too quickly.


To serve, sprinkle with a little finely chopped parsley, if desired.

Enjoy!

Food Lust People Love: The perfect weeknight family meal or Sunday supper, this baked cheese and sausage ziti is quick to put together but full of flavor. Comfort food at its best.


This month my Baking Bloggers group is sharing cast iron pot recipes, both savory and sweet. Many thanks to our organizers, Sue of Palatable Pastime and Wendy of A Day in the Life on the Farm.


Baking Bloggers is a friendly group of food bloggers who vote on a shared theme and then post recipes to fit that theme one the second Monday of each month. If you are a food blogger interesting in joining in, inquire at our Baking Bloggers Facebook group. We'd be honored if you would join us in our baking adventures.


Pin it! 

Food Lust People Love: The perfect weeknight family meal or Sunday supper, this baked cheese and sausage ziti is quick to put together but full of flavor. Comfort food at its best.
 .

Wednesday, November 7, 2018

Hot and Sour Chicken Soup #FoodieExtravaganza

Hot and sour chicken soup is a restaurant favorite that is quick and easy to make at home. With bits of chicken breast and cubes of tofu, it’s high in protein with a comforting spicy and flavorful broth that will cure whatever ails you.

Food Lust People Love: Hot and sour chicken soup is a restaurant favorite that is quick and easy to make at home. With bits of chicken breast and cubes of tofu, it’s high in protein with a comforting spicy and flavorful broth that will cure whatever ails you.


Aside from its healing properties, hot and sour chicken soup also brings back fun and fond memories for me.

Many years ago, my sister lived near a Chinese buffet restaurant we adored. It had The Best pork ribs and Sichuan green beans, my favorite things to eat there, but everything else was pretty tasty as well.

When my eldest nephew was old enough to eat real food, my sister would scoop the little cubes of tofu out of the hot and sour soup for him, blow on them to cool them off, then set them on his plate. It was a lot of fun watching him trying to pincer grasp the tofu with his plump baby hands and get it to his mouth. Considering how soft and slippery tofu can be, he did a great job. Those were good times.

This month, my Foodie Extravaganza group is making chicken soup in honor of National Chicken Soup for the Soul Day on November 12th. Make sure to scroll down past my recipe to see the rest.


Hot and Sour Chicken Soup

This version of hot and sour soup is adapted from two separate recipes from Ken Hom’s Foolproof Chinese Cookery and Joanne Chang’s Flour, Too. Both of these wonderful recipes use pork. I have used boneless, skinless chicken breasts instead.

Ingredients
2 small boneless chicken breasts (about 9 oz or 250g by weight)
2 tablespoons canola or other light oil
1 garlic clove, smashed and minced
1 tablespoon minced fresh ginger
1 chilli pepper, minced
2 tablespoons sliced onion tops (white part only – save green for garnish)
5 cups or 1.2L chicken stock
7 oz or 200 grams tofu (bean curd), medium firm
3 1/2 oz or 100g shiitake mushrooms
Salt

For the chicken marinade:
1 teaspoon light soy sauce
1 teaspoon Shaoxing rice wine or substitute dry sherry
1 teaspoon sesame oil
1/2 teaspoon cornstarch
Pinch each of salt and sugar

For the egg mixture:
2 large eggs
2 teaspoons toasted sesame oil
Pinch salt

Just before serving:
1/4 cup or 60ml Chinese black (mature) vinegar
1 tablespoon light soy sauce
1 tablespoon dark soy sauce
1 tablespoon chili bean sauce
2 teaspoons toasted sesame oil

For garnish:
Chopped cilantro
Sliced chilli peppers
Sliced green onion tops
Slivered ginger

Method
Combine your marinade ingredients in a small bowl.


Slice your chicken breasts very thinly and add them to the marinade. Mix well and set aside.


In a measuring cup with a spout, whisk the eggs with the sesame oil and the pinch of salt. You can use a bowl but the spout will making pouring the egg into the soup much easier. In another small bowl, mix together the vinegar, light soy, the dark soy, the chili bean sauce and the sesame oil. Set aside.


Clean and finely slice the shiitake mushrooms. Cut the tofu (aka bean curd) into 1/2 in or 1 cm cubes.


In a deep saucepan, heat the canola oil over medium-high heat until hot. Add the garlic, ginger and green onions and cook for a minute or two, stirring constantly. Be careful not the let the garlic color.

Add the chicken and cook, stirring occasionally, for about 2 more minutes.


Add the stock and bring the soup to a simmer.

Add the tofu and mushrooms and bring the soup back to a simmer over medium-high heat.


Now add the egg mixture in a very slow, thin and steady stream. Use a chopstick or a fork to pull the cooked egg slowly into strands.

Turn the fire off under the soup and stir in the vinegar mixture.

Serve each bowl garnished with cilantro, green onion tops, sliced red chili peppers and slivered ginger, as desired.

Food Lust People Love: Hot and sour chicken soup is a restaurant favorite that is quick and easy to make at home. With bits of chicken breast and cubes of tofu, it’s high in protein with a comforting spicy and flavorful broth that will cure whatever ails you.

Enjoy! 

Food Lust People Love: Hot and sour chicken soup is a restaurant favorite that is quick and easy to make at home. With bits of chicken breast and cubes of tofu, it’s high in protein with a comforting spicy and flavorful broth that will cure whatever ails you.


How will you celebrate National Chicken Soup for the Soul Day? Try one of our delicious recipes!


Foodie Extravaganza celebrates obscure food holidays by posting delicious recipes your family will love. Posting day is always the first Wednesday of each month. If you are a blogger and would like to join our group and blog along with us, come join our Facebook page Foodie Extravaganza. We would love to have you! If you're a home cook looking for tasty recipes, check out our Foodie Extravaganza Pinterest Board!

 Pin it! 

Food Lust People Love: Hot and sour chicken soup is a restaurant favorite that is quick and easy to make at home. With bits of chicken breast and cubes of tofu, it’s high in protein with a comforting spicy and flavorful broth that will cure whatever ails you.
 .