Tuesday, June 17, 2014

Raspberry Lemon Blueberry Bars #CreativeCookieExchange


Lemon bars with cream cheese are the cheater’s way to cheesecake in just a couple of easy steps. Add seasonal fruit to fancy them up.

This month’s Creative Cookie Exchange theme is red, white and blue and we were free to interpret that any way we wanted. I love it when the themes are wide open like that! Since it’s summer and juicy bright berries are all over the markets, I couldn’t resist using blueberries (Texas grown, naturally) and raspberries (Californian, I believe) for my blue and red. The white was a little more challenging. Can we all just pretend that the fresh lemony cream cheese is whiter than it appears, please? Thank you! In return I will promise you that these bars have the seal of approval from my family and you won’t regret making them for yours.

Ingredients (for 18 bars)
For the base:
1 1/2 cups or 175g graham cracker crumbs
6 tablespoons salted butter, melted
1/4 cup, tightly packed, or 50g light brown sugar
Zest of one large lemon
Pinch fine sea salt

For the top layer:
2 large egg yolks
5 oz or 150ml (190g) sweetened condensed milk
4 oz or 115g cream cheese, at room temperature
1/3 cup or 80ml fresh lemon juice
1/4 cup or 50g sugar
2 teaspoons lemon zest
1/4 teaspoon fine sea salt
3 1/2 oz or 100g fresh raspberries
3 1/2 oz or 100g fresh blueberries

Method
Preheat the oven to 350°F or 180°C and line an 8x8 inch or 20x20cm or equivalent volume baking pan with parchment paper. As you will see, mine is actually rectangular.

Combine the graham cracker crumbs, sugar, salt and lemon zest in a medium bowl and pour in the melted butter. Stir until completely mixed.


Pour the mixture into the prepared pan and press the crumbs out evenly, being careful to make sure they go into the corners as well.

Bake for 10 minutes in your preheated oven. Remove from the oven and allow to cool to room temperature.

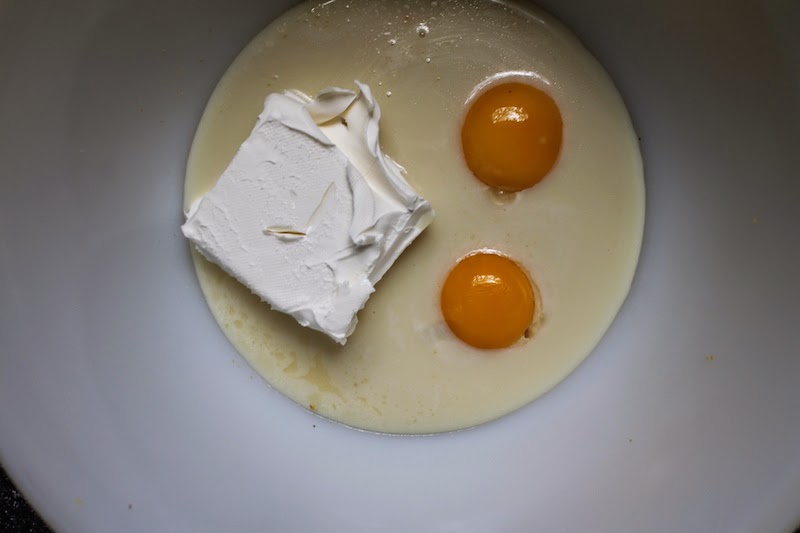
Meanwhile, whisk the egg yolks, condensed milk and softened cream cheese in another bowl until well mixed.

Stir in the lemon juice, sugar, salt and lemon zest. Whisk again until completely combined.

Gently fold in the raspberries and the blueberries. Gently now. You don't want to break the berries.


Pour the lemon raspberry blueberry topping over the graham cracker bottom and spread it around evenly with a spatula. Redistribute the berries if you need to. But, once again, gently.


Bake for 15-20 minutes, or until just set.


Cool to room temperature, then chill for at least one hour before serving. Cut into bars and serve. Bars can be kept in the refrigerator for up to five days, but they'll never last that long.


Enjoy!


This recipe was adapted from Two Peas and Their Pods' lemon raspberry bars.


If you are looking for red, white and blue inspiration for the upcoming Fourth of July holiday, I’ve got a great list of links for you!

Want to join the Creative Cookie Exchange? 
If you are a blogger and want to join in the fun, contact Laura via email (thespicedlife AT gmail DOT com) and she will get you added to our Facebook group where we coordinate events.

Need more creative cookie recipes? 
You can also use us as a great resource for cookie recipes. Be sure to check out our Pinterest Board, and our monthly posts. You will be able to find them the first Tuesday after the 15th of each month!

Monday, June 16, 2014

Peppermint Patty Chocolate Muffins for #MuffinMonday

Baking with candy is an easy way to turn a sweet favorite into a delightful muffin and socially acceptable breakfast food. Try this recipe using Twix, Snickers, Milky Ways, Almond Joys or whatever chocolate candy is your own personal favorite.


It doesn’t happen very often but I am happy to say that I have not only my husband but both daughters under one roof this weekend. I know that these occasions will get more and more rare as they get older so I am cherishing this time. My motto has always been life before blog, so I'm posting my Monday Muffin later than usual today since a late family breakfast out at the iconic Houston restaurant House of Pies seemed way more important this morning. I chose to use one of my younger daughter’s favorite sweets, York peppermint patties, to make a chocolate muffin I hope she likes as much as the actual candy, which is a pretty tall order.

We are all still full from breakfast so I’ll have to report back on this later, but I’m pleased with how they came out. If you are a fan of chocolate mint anything, you are going to like them too.

Ingredients
8 peppermint patties or 125g, chilled
2 cups or 250g flour
3/4 cup or 150g sugar
1/2 teaspoon salt
1/3 cup or just over 26g unsweetened cocoa powder
1 tablespoon baking powder
1 teaspoon vanilla extract
2 eggs
3/4 cup or 180ml milk
1/2 cup or 120ml canola or other light oil

For decoration: 6 peppermint patties, chilled and cut in half.

Method
Preheat your oven to 350°F or 180°C and prepare your 12-cup muffin tin by lining with muffin papers and then spraying the top with non-stick spray to keep the melted peppermint patties from sticking.

Chop up the first eight peppermint patties into small chunks.


Combine your flour, cocoa powder, sugar, baking powder and salt in a large mixing bowl.


Add the chopped patties into the dry ingredients and stir to separate them so they are coated and are not sticking to each other.


In another smaller bowl, whisk together your egg, milk, oil and vanilla extract.


Pour the wet ingredients into the dry ingredients.


Fold the wet ingredients into the dry ones and stop when it’s still quite dry looking.

Divide your batter between the 12 muffin cups. Top each with one half of a peppermint patty.


Bake for 20-25 minutes. You can try the toothpick test but remember that you will probably hit a piece of peppermint patty in the muffin which might make you think it’s not cooked yet.

Allow to cool for a few minutes in the pan and then remove to continue cooling on a wire rack.


Enjoy!


Sunday, June 15, 2014

Mom's Slow Roasted Brisket

Meat falls into two categories for me. Tender cuts that should be cooked quickly to char a little on the outside and still stay rare and juicy on the inside, and tougher cuts that need a long time on the stovetop or in the oven to become tender. Brisket most definitely falls into category two. With its thick layer of fat on top, cooked long and low, there is no more succulent cut of beef. 

Almost the whole while that my husband and I were dating and for our first year of marriage, he worked offshore. That meant five weeks away working and then five weeks at home. Whenever he got back, we had a family get-together since everyone wanted to see him again. My mother almost invariably made her slow roasted brisket. In fact, it became kind of a joke, because if Simon was home again, we must be having brisket. Fortunately, he loved it. Her recipe was simple. Cover the brisket with onion powder, salt and pepper and roast, covered first with foil and then the lid of your roaster, until tender. Of course, the time varied with the size of the brisket but you were looking at a minimum of three or four hours.

When this week’s Sunday Supper theme of Man Food was posted, I knew what I wanted to make but brisket is difficult to find overseas. Butchers just seem to divide the cow up differently. I was delighted when I got a lead on the elusive cut from fellow food bloggers in Dubai. My husband and I were out running errands and I mentioned the possibility in passing to him since we were in the neighborhood of the butcher. I wish you could see how his eyes lit up. The good news was that they had one whole brisket. The bad news was that you had to buy the whole thing. I’m talking about seven kilos or almost 15 1/2 pounds of meat. That’s a lot of beef! Keep in mind that our children no longer live at home. But dear husband looked so full of hope that I found myself taking out a second mortgage and buying that brisket. (Just kidding about the mortgage. It was crazy expensive, but he’s worth it!)

I don’t have onion powder so I used fresh onions and to try to replicate the pungent sharpness of the powder, I added lots of garlic as well. It ended up tasting very much like my mom’s brisket and we were delighted. As for the copious leftovers, I’ve got a few ideas you might like to try and I’ll add those after the recipe. And if you are looking for Man Food ideas for Fathers' Day, be sure to scroll down to the bottom for a spectacular list of recipes.

Ingredients
1 whole brisket (about 15.4 lbs or 7kgs)
20 cloves or about 100g garlic
2 medium or about 300g onions
2 tablespoons flakey sea salt
1 teaspoon fresh ground pepper
1/2 teaspoon cayenne
Olive oil

Method
Take your brisket out of the refrigerator and let it warm up till it’s almost room temperature. Take any plastic wrap off and dry it thoroughly with paper towels.

Preheat your oven to 400°F or 200°C.

Put all your seasoning ingredients into a food processor and process until they become a rough paste.


Put the brisket in your large roaster (preferably one with a tight fitting lid), fat side down. Spread half the paste all over the meat and give it a good drizzle of olive.


Turn the brisket over so it is now fat side up and spread the rest of the paste on the meat. Drizzle generously with olive oil.


Roast uncovered for 30 minutes in your preheated oven. Cover well with foil and then put the lid on nice and tight. Reduce the heat to 275°F or 135°C. Cook for three and a half or four hours and then check for doneness. Baste with the drippings every couple of hours.

See all that juice that is created? Some of it is fat that can be skimmed off. The rest is a lovely gravy.


Brisket is done when you can practically cut it with a dinner knife that isn’t even sharp or shred it with a fork. I ended up cooking mine for almost seven hours. No joke. It was a very large piece, or maybe New Zealand brisket isn’t as tender as Texas brisket. All I know is when I took it out again at seven hours, it was falling apart. So good! Best part is, it makes its own gravy.

According to my husband, brisket is best served with potatoes and gravy and a side of buttered peas the first night. So that’s what we had.


In the following days, it also turned up 1. In omelets with added chopped tomatoes and onions and cheese.


2. Sliced in brisket sandwiches on baguette with whole grain mustard, mayo, sliced tomato and greens.


3. Reheated in a skillet with added taco spices and served as brisket fajitas with caramelized onions, salsa, cheddar cheese and avocados in flour tortillas.


4. Reheated in a skillet with added ground cumin and coriander and served with tabouli and hummus in pita bread for lunch with a little Middle Eastern flair.


5.  Reheated in a skillet with barbecue sauce and served on a bun with extra slices of onion for a delicious barbecue sandwich. I forgot to take a photo of the original sandwiches but because it's Father's Day weekend, you know we slow roasted another brisket here in Texas yesterday.


And, finally, a confession, 6. I froze a big chunk in its gravy because the man left town on business and I just couldn’t look at it anymore. Someday it will be cottage pie, which is another of his favorite meals.

If you are looking for Man Food inspiration for Fathers’ Day, we’ve got you covered. Our Sunday Supper host this week is the talented and fabulous Susan from The Girl in the Little Red Kitchen who just happens to be running a Kickstarter campaign right now and will bake you cookies if you contribute.

Check out all the wonderful recipes this week! Never mind the men, I want to eat them all!

Manly Starters
Manly Mains:
Manly Desserts: