Showing posts with label main course. Show all posts

Wednesday, June 5, 2024

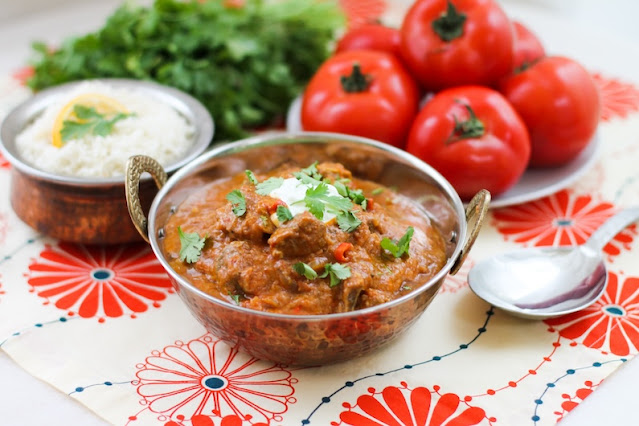
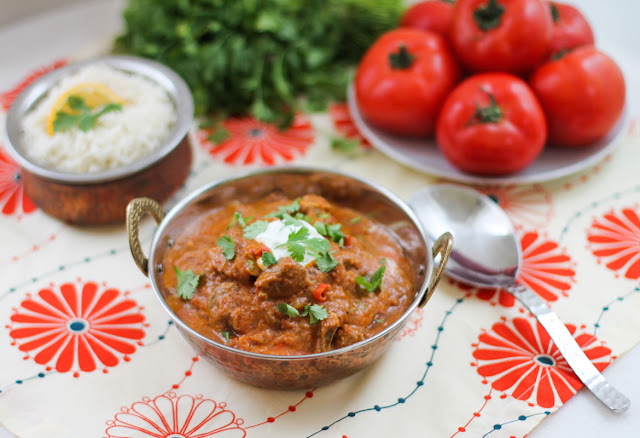
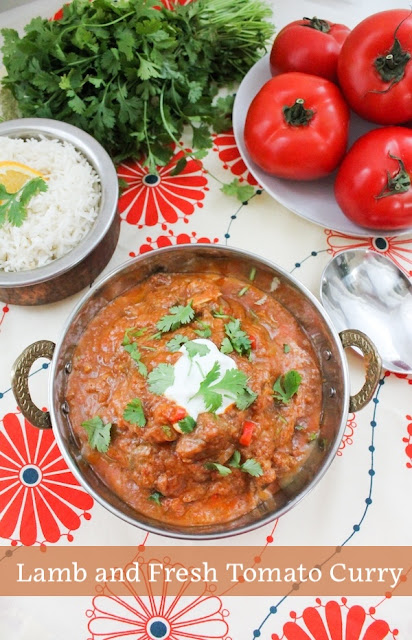
Easy Lamb and Fresh Tomato Curry

Ripe, juicy tomatoes add a wonderful fresh zing to the fragrant sauce in this easy lamb and fresh tomato curry. Cook it down slowly to intensify the flavors.

Food Lust People Love: Ripe, juicy tomatoes add a wonderful fresh zing to the fragrant sauce in this easy lamb and fresh tomato curry. Cook it down slowly to intensify the flavors.

Many years ago, my husband and I were living in Abu Dhabi where there is a large Indian and Pakistani population so good curry restaurants abound. We either ate out or ordered in at least once a week. 

He always got the chicken jalfrezi, a relatively dry curry with lots of peppers, tomatoes and tender chicken. I always ordered the chicken maharajah, which came covered in the richest, most succulent sauce. There might well have been ground cashews in there. When I close my eyes, I can still taste it!

Here’s the rub. He always wanted some of my sauce! Nice person that I am, I did share, but not without thinking to myself that he could order his own darn sauce. Am I right?

These days I am way more likely to cook curry at home than to go out, so I always make sure it’s a saucy dish. This particular curry is full of flavor and, thanks to puréed fresh tomatoes, it has plenty of sauce to go round for all the family. 

Easy Lamb and Fresh Tomato Curry

I know that not everyone is fond of lamb. If you aren’t lovers of lamb, by all means substitute beef. For me, curry is all about the sauce and this dish is one of my favorites, whatever protein you choose.

Ingredients
1 lb 13 oz or 840g lamb ribs, chopped into bite­sized pieces 
1 teaspoon fine sea salt, plus more to taste when the dish has finished cooking
Freshly ground black pepper
1 tablespoon vinegar
4 large ripe tomatoes (1 lb 113⁄4 oz or 786g) 
1/4 cup or 60ml olive oil for browning the lamb 
1 onion, sliced
2 cloves garlic, minced
2 red chili peppers, minced
3 tablespoons curry paste
1⁄4 cup or 60g plain yogurt
Good handful cilantro, chopped

Optional for garnish:
dollop of yogurt
chopped cilantro

Method
Chop the lamb into bite-sized pieces and put them in a non-reactive bowl. Season with salt and pepper. Add vinegar and toss to coat. Set aside to marinate.


Core your tomatoes, cut them in quarters and pop them in a blender. Process until completely liquid. You might have to add about 1/4-1/2 cup of water to get them moving.

In a large skillet over a medium high heat, heat the olive oil and brown the lamb in batches, and remove to a plate.


Add the sliced onion to the pan and cook for a few minutes, until softened. Add in the garlic and chili peppers and stir.

Add in the curry paste. Stir and fry for a few more minutes.


Put lamb back in the pan, along with any juices that accumulated on the plate. Stir well to cover the lamb with the curry paste, onions and garlic.


Pour in the puréed fresh tomatoes. 


Stir well. Bring to the boil then reduce the fire to a slow simmer.

Cook covered for 45 minutes or until the lamb is tender, stirring occasionally.

Remove the lid and simmer until the liquid has reduced by half, so the sauce is thick and concentrated. This could take another 10­-15 minutes. Taste for salt and add more if necessary.

Finish by stirring through the plain yogurt and chopped cilantro.


Garnish with a dollop more of the yogurt and cilantro in your serving dish, if desired. Serve with rice or naan.

Food Lust People Love: Ripe, juicy tomatoes add a wonderful fresh zing to the fragrant sauce in this easy lamb and fresh tomato curry. Cook it down slowly to intensify the flavors.

Enjoy!

Welcome to the 12th addition to the 2024 Alphabet Challenge, brought to you by the letter L. Many thanks to Wendy from A Day in the Life on the Farm for organizing and creating the challenge. Check out all the L recipes below:


Pin this Lamb and Fresh Tomato Curry! 

Food Lust People Love: Ripe, juicy tomatoes add a wonderful fresh zing to the fragrant sauce in this easy lamb and fresh tomato curry. Cook it down slowly to intensify the flavors.

 .

Sunday, May 12, 2024

Buttermilk-Brined Roast Chicken Crown

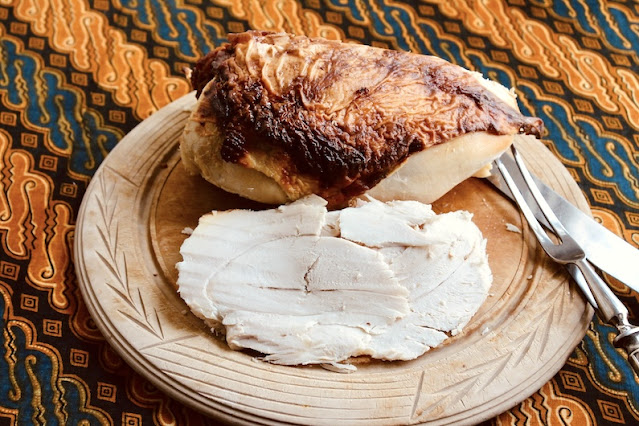
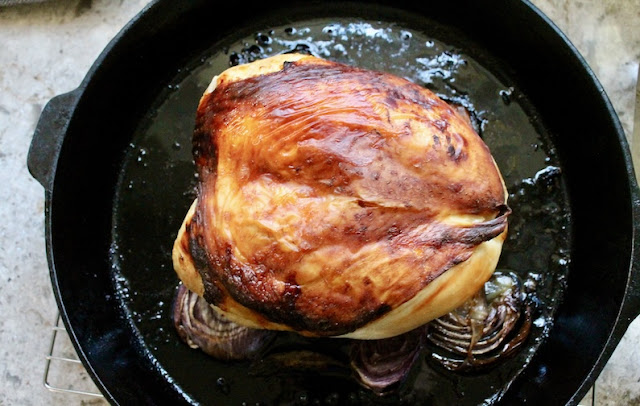
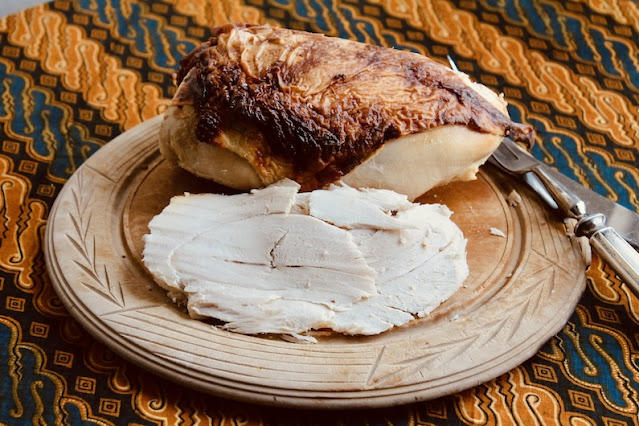
After 24 hours of marinating, and a hour + in a hot oven, this buttermilk-brined roast chicken crown is tender and juicy inside with the most delectable golden skin outside!

Food Lust People Love: After 24 hours of marinating, and a hour + in a hot oven, this buttermilk-brined roast chicken crown is tender and juicy inside with the most delectable golden skin outside!

We love a good Sunday roast dinner, especially for a special occasion like Mother’s Day and, frankly, I am much more likely to roast chicken than an expensive cut of beef. No pressure to get it exactly the right amount of rare! Add some roast potatoes, tasty onion gravy and some young peas and I’m happy. 

I don’t know why but it’s hard to find chicken crowns, an all-breast cut that still has the bones underneath left on. I was jumping around in my local grocery store when I happened to come across one, on sale no less, because my mom was never a fan of chicken legs or thighs. A chicken crown was pretty much her ideal bird for roasting. She loved this dish!

Buttermilk-Brined Roast Chicken Crown

This recipe is adapted from one on New York Time Cooking, where it was in turn adapted from the fabulous cookbook, Salt Fat Acid Heat, Mastering the Elements of Good Cooking by Samin Nosrat. If you haven’t read the book or watched the show on Netflix, I highly recommend both. 

Ingredients
1 chicken crown, weight about 4 lbs 4 oz or 1966g
Kosher salt or fine sea salt
2 cups or 480ml buttermilk (or substitute 3 tablespoons white vinegar in measuring cup filled to 2 cups with milk)
2 medium onions
1 small lemon

Method
The day before you want to roast it, season the chicken crown generously with salt and let it sit for 30 minutes.


Stir 2 tablespoons kosher salt or 4 teaspoons fine sea salt into the buttermilk to dissolve. Place the crown in a gallon-size resealable plastic bag and pour in the buttermilk. 

Seal the bag, squish the salty buttermilk all around the chicken, place on a rimmed plate, and refrigerate for 12 to 24 hours, turning the bag every once in a while. 


Pull the chicken from the fridge an hour before you plan to cook it. 

Heat the oven to 400°F or 180°C with your degrees with an iron skillet on a rack set in the center position.

Slice the onions in thick slices to act as a baking trivet. Poke the lemon all over with the sharp point of a knife. 


Remove the chicken crown from the plastic bag and scrape off as much buttermilk as you can. If the skin is riding up a little bit at the pointy end, use a toothpick or two to secure it.


Carefully lay the sliced onions in the hot cast-iron skillet. 


Place the chicken on top, tucking the lemon underneath it. Put the hot skillet back in the oven. 

If you have eagle eyes, you might notice that I also put my Meater thermometer into the chicken crown at the thickest part. (The silver thing on the top left, with the black top.) It was a Christmas gift from my husband a few years back. The Meater runs with an app and tells me when the internal temperature has reached whatever I set it on. Like magic.


After about 20 minutes, when the chicken starts to brown, reduce the heat to 350°F or 180°C and turn the pan around. Cook until the internal temperature of the crown reaches 165°F or 74°C, about another hour.  

If the skin is getting too brown before it is cooked through, use a foil tent to protect it.  

Food Lust People Love: After 24 hours of marinating, and a hour + in a hot oven, this buttermilk-brined roast chicken crown is tender and juicy inside with the most delectable golden skin outside!

Once the chicken crown is cooked to the desired temperature, take it out of the skillet and put it on a board covered with a foil tent to rest for 10 minutes.

Carve to serve. Enjoy! 

Food Lust People Love: After 24 hours of marinating, and a hour + in a hot oven, this buttermilk-brined roast chicken crown is tender and juicy inside with the most delectable golden skin outside!

It's Sunday FunDay as well as Mother's Day in the United States so my friends and I are sharing recipes for a mom pleasing brunch! Many thanks to our host, Amy of Amy's Cooking Adventures. Check out the Mother's Day brunch links:

We are a group of food bloggers who believe that Sunday should be a family fun day, so every Sunday we share recipes that will help you to enjoy your day. If you're a blogger interested in joining us, just visit our Facebook group and request to join.


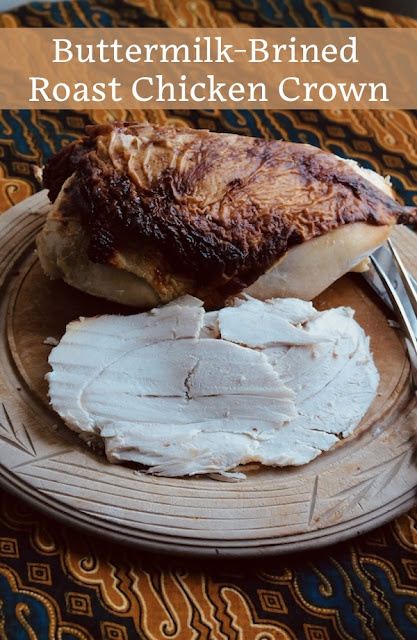
Pin this Buttermilk-brined Roast Chicken Crown!

Food Lust People Love: After 24 hours of marinating, and a hour + in a hot oven, this buttermilk-brined roast chicken crown is tender and juicy inside with the most delectable golden skin outside!

 .

Wednesday, May 8, 2024

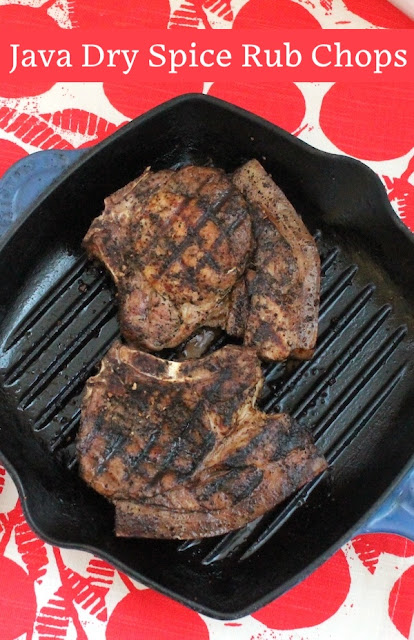
Java Dry Spice Mix Chops

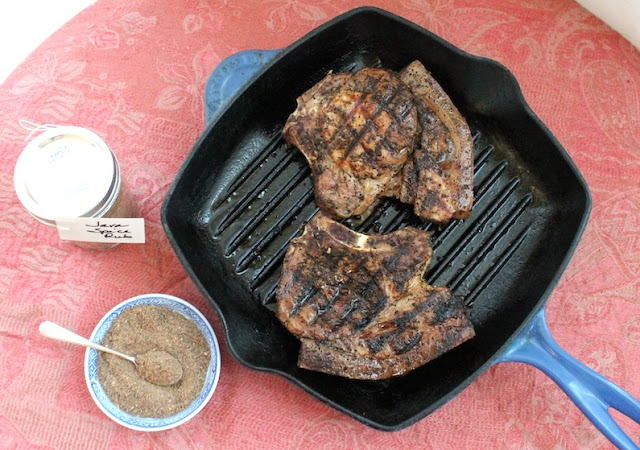
These java dry spice mix chops are seared for a few minutes in a hot grill pan, then finished off in a hot oven, which keeps them tender and juicy. The java dry spice rub is made with ground roasted coffee beans, cumin, brown sugar, smoked paprika and garlic powder. And, of course, salt! 

Food Lust People Love: These java dry spice mix chops are seared for a few minutes in a hot grill pan, then finished off in a hot oven, which keeps them tender and juicy. The java dry spice rub is made with ground roasted coffee beans, cumin, brown sugar, smoked paprika and garlic powder. And, of course, salt!

This is probably my favorite homemade spice mix. The roasted coffee really adds a depth of flavor that goes so well with pork. So well, in fact, that I also use it on whole pork roasts. If you have a sous vide precision cooker, you'll want to have a look at my sous vide java dry spice pork roast recipe. Boy, howdy, it is good! 

Java Dry Spice Mix Chops

Apologies for the lack of photos of the pork chops being cooked in the griddle pan. Lighting wasn't great but I hope I have made up for it with good instructions. Should you have a question, please leave me a comment. 

Ingredients
2 thick cut pork chops, untrimmed 
3­-4 teaspoons java dry spice rub (Get the recipe here: Java Dry Spice Rub)

Tools needed
heavy grill pan 
wooden skewers

Method
Wash the pork chops and dry them slightly with a paper towel. Sprinkle the chops liberally with the java dry spice rub and use your clean hands to rub it all over.


Cover the chops with cling film and refrigerator at least half an hour or longer if you have the time. 

When you are ready to cook the pork chops, preheat your oven to 400°F or 200°C and remove the chops from the refrigerator. 

When the oven is just about at temperature, heat your grill pan or an iron skillet over a medium high flame. 

Use several wooden skewers to pin your chops together, fat/skin side together. Once the pan is hot, stand the chops up fat/skin side down for 4­-5 minutes. 


Move them around the pan to take advantage of the heat to render the fat and get the skin a bit crispy. 

Transfer the chops to a plate and remove the skewers. 

Put the chops back in the pan, this time on their sides and set a timer for 3 minutes. 

When the timer rings, turn the chops over and set it for another 3 minutes. 

Repeat, giving the chops only 1 minute on each side. If you want to get fancy, turn the chops so the grill lines cross. 

Transfer the grill pan to your preheated oven and roast for a further 8-10­ minutes. You can cut near the bone to check for doneness. (If you have a meat thermometer, the ideal temperature is 145°F or 62.8°C.) The pork can be slightly pink. It will continue to cook as it rests. 

Remove from the oven and allow to rest for 5 minutes before serving. 

Food Lust People Love: These java dry spice mix chops are seared for a few minutes in a hot grill pan, then finished off in a hot oven, which keeps them tender and juicy. The java dry spice rub is made with ground roasted coffee beans, cumin, brown sugar, smoked paprika and garlic powder. And, of course, salt!

Enjoy! 


Welcome to the 10th addition to the 2024 Alphabet Challenge, brought to you by the letter J. Many thanks to Wendy from A Day in the Life on the Farm for organizing and creating the challenge. Check out all the J recipes below:


J: Java Dry Spice Mix Chops - this post!


Pin these Java Dry Spice Rub Chops!

Food Lust People Love: These java dry spice mix chops are seared for a few minutes in a hot grill pan, then finished off in a hot oven, which keeps them tender and juicy. The java dry spice rub is made with ground roasted coffee beans, cumin, brown sugar, smoked paprika and garlic powder. And, of course, salt!

 .

Sunday, April 28, 2024

Quiche Lorraine Filled Portabella Mushrooms

Who needs a crust when garlicky mushrooms fulfill that role gorgeously in these Quiche Lorraine filled Portabella Mushrooms with Gruyère cheese and bacon! 

Food Lust People Love: Who needs a crust when garlicky mushrooms fulfill that role gorgeously in these Quiche Lorraine filled Portabella Mushrooms with Gruyère cheese and bacon?!

It’s not often that I find four reasonably equal large portabella mushrooms so when I do, I like to make a recipe that puts them center stage. I can’t bear to cut up such beautiful specimens and destroy their perfect shape and size. 

While I’ve made quiche Lorraine, that typical French recipe with bacon and Gruyère cheese, feel free to substitute your favorite cheese and perhaps ham, chicken or a cooked vegetable for the bacon.

Quiche Lorraine filled Portabella Mushrooms

I use store-bought already cooked bacon crumbles here but you can certainly fry up two or three strips of bacon then chop them with a sharp knife. These make a special first course or side for any meal. We actually ate them this time as a main course with salad and steamed baby broccoli on the side. A lovely meal!

Ingredients
4 large portabella mushrooms
2 cloves garlic
Olive oil
Fine sea salt
Freshly ground black pepper
1 egg
1/4 cup or 60ml cream
1/2 cup or 50g Gruyère cheese, grated, plus extra for topping
1/4 cup or 30g crispy bacon crumbles
Optional garnish: chopped chives

Method
Preheat your oven to 410°F or 210°C. 

Cut the stems off of the mushrooms, discarding any hard ends. If you have a vegetable stock bag in the freezer, pop the rest of the stems in there. 


Mince the garlic. Put the mushrooms cap side up in a baking pan.  Add the garlic and a drizzle of olive oil. Sprinkle lightly with salt and pepper. 


Roast in the hot oven for about 10-12 minutes. 

Meanwhile, in a mixing bowl, whisk the egg and add the cream. 


Stir in the grated cheese and bacon crumbles. 


Remove the filled mushrooms from the oven and leave to cool for about five minutes. 


Divide the quiche filling between the mushroom and sprinkle with a little extra grated cheese and some black pepper. 


Bake for 8-10 minutes or until the filling is just setting. Turn your oven on to broil for a few minutes to brown the tops. Keep a very close eye on the filling to make sure it doesn’t burn. 


Leave to set for a few minutes then garnish with a few chopped chives, if desired. Serve warm or at room temperature. 

Food Lust People Love: Who needs a crust when garlicky mushrooms fulfill that role gorgeously in these Quiche Lorraine filled Portabella Mushrooms with Gruyère cheese and bacon?!

Enjoy! 

It’s Sunday FunDay and today my blogger friends and I are sharing mushroom recipes! Check out the links below:


We are a group of food bloggers who believe that Sunday should be a family fun day, so every Sunday we share recipes that will help you to enjoy your day. If you're a blogger interested in joining us, just visit our Facebook group and request to join.


Pin these Quiche Lorraine Filled
Portabella Mushrooms!

Food Lust People Love: Who needs a crust when garlicky mushrooms fulfill that role gorgeously in these Quiche Lorraine filled Portabella Mushrooms with Gruyère cheese and bacon?!

 .

Sunday, March 31, 2024

My Ideal Birthday “Cake” (is Meatloaf!)

A savory dish made with ground meat, my ideal birthday cake is meatloaf! This one is filled with curried carrots and covered with buttery cream potatoes. Happy Easter to all who celebrate and an early Happy April Fool's Day to all!

Food Lust People Love: A savory dish made with ground meat, my ideal birthday cake is meatloaf! This one is filled with curried carrots and covered with buttery cream potatoes.

We all love a good prank for April Fool’s Day but I can’t remember the last time I actually pulled one. Probably when our girls still lived at home and that’s was a very long time ago – COVID days excepted. 

If you’ve been reading my posts for a while, you probably know that I’m not much of a sweet eater so when our Sunday FunDay host for this week challenged us to make a dish that looked like something else for April Fool’s Day, I knew I’d make a savory dish. 

I also wanted to make a fun recipe that we could actually enjoy for a main course. I created this meatloaf recipe to fit the bill. Doesn’t it look like cake?!!!

My Ideal Birthday Cake is Meatloaf

I used two 6-in or 15cm round “smash” cake pans to bake the meatloaf layers. A tradition that started well after my two girls had turned one, smash cakes are little cakes baked so the birthday baby can put her whole face in. I presume there’s another cake for the rest of the guests at the birthday party.


Ingredients
For the “cake” layers:
2 slices sandwich bread (brown or white)
1/4 cup or 60ml milk
1 small onion or 1/2 medium onion
1 lb or 450g ground beef
1/2 lb or 225g ground pork
2 eggs
1/4 cup or 60ml ketchup
2 teaspoons dry mustard powder (like Colman’s)
1/2 teaspoon fine sea salt

For the cream potato “frosting”:
4 medium Russet potatoes (weight peeled: about 1 lb 6 oz or 625g)
1 teaspoon fine sea salt to boil, plus extra after mashing, if needed
1/2 cup or 120ml whipping or heavy cream
1/4 cup or 57g butter
1/2 teaspoon white pepper

For the savory carrot filling: 
3 medium carrots (weight peeled: about 7 3/4 oz or 215g)
1/4 medium onion
2 tablespoons butter
1 teaspoon curry powder
1/4 teaspoon salt  

For decorating:
1 teaspoon paprika
Large piping tip
Piping bag

Method
Preheat your oven to 350°F or 180°C.

Cut the bread into small squares and pour the milk over it in a small bowl, pushing the pieces down into the milk. Soak until all the milk is absorbed.


Mince your onion finely. I usually use a small food processor for this to make sure there are no big bits because no one wants to bite into a big bit of onion.

In a large bowl, add your onion, ground beef, ground pork, eggs, ketchup, mustard powder and salt. Mash the soggy bread with a fork till it falls apart and then add it to the large bowl with all of the other ingredients.  Mix well.


Divide the mixture in half and press it into the smash cake pans. My whole mixture weighed 1062g so each pan holds 531g.


Bake for about 30-35 minutes or until the meatloaf is browned nicely and cooked through to a safe internal temperature of 160°F or 71°C.

While your layers are baking, make the filling and "frosting." Peel your potatoes and cut them into chunks. Boil them until tender with the teaspoon of salt. 

Warm the cream and butter together till the butter is just melted. I do this in a microwaveable vessel, with quick zaps, watching carefully so it doesn’t boil over. 

Drain the potatoes and mash them right away. I find they mash with fewer lumps while still hot. Add in the melted butter/cream and the white pepper. 


Stir well till combined. Taste and add more salt if needed. 

Peel and cut the carrots into chunks. Finely mince the onion (or use a processor) for the filling. 

Boil the carrots until very tender then drain and mash them right away. 


Transfer the carrots to a heat -proof bowl and melt the butter in the pot you used to boil them. Sauté the curry powder and chopped onions in the butter until the onions are translucent and very soft. 


Add the carrots back into the pot with the 1/4 teaspoon of salt and mix well. Set aside.


When they are done, remove the meatloaf layers from the oven and leave to cool for a few minutes. Run a silicone spatula around the edge to loosen. Carefully remove them to plates.


Top one meatloaf layer with the carrot filling. 


Carefully put the second meatloaf layer on top. 


Cover the “cake” with the cream potatoes. 


You should have plenty left over so don't be shy.


Add the paprika to 3/4 cup or 170g of the cream potatoes and mix well.


Fit a large tip on your piping bag and use a spatula to add the paprika potato down the insides of the bag in stripes. Spoon the rest of the cream potatoes in the middle of the piping bag. Decorate the “cake” by piping on little rosettes or stars.


I did a row around the bottom, then a row around the top. And because more is more, I piped rosettes to cover the top. You do you. 


(You will probably have potato leftover at the end unless you choose to cover the whole cake with rosettes. Eat it as is or follow these instructions to make baked Marquis potatoes with the rest. 

I must confess that by the time I finished assembling the “cake” it was closer to room temperature than hot so we sliced it up and warmed it by the slice in the microwave. Delicious! 

Food Lust People Love: A savory dish made with ground meat, my ideal birthday cake is meatloaf! This one is filled with curried carrots and covered with buttery cream potatoes.

If you make one to trick your family, I’d love to hear about it!

Enjoy! 

It’s Sunday FunDay and, as mentioned above, we are sharing April Fool’s Day recipes. Many thanks to our host, Camilla from Culinary Cam. Check out all the illusion recipes below:

We are a group of food bloggers who believe that Sunday should be a family fun day, so every Sunday we share recipes that will help you to enjoy your day. If you're a blogger interested in joining us, just visit our Facebook group and request to join.


Pin My Ideal Birthday Cake!

Food Lust People Love: A savory dish made with ground meat, my ideal birthday cake is meatloaf! This one is filled with curried carrots and covered with buttery cream potatoes.


Wednesday, February 28, 2024

Everything Pizza Tartin

This Everything Pizza Tartin aka Upside Down Pizza is baked with the crust on top, so you can load up on "toppings" like Italian sausage, onion, artichokes, jalapeños and olives and still have a crunchy crust. 

Food Lust People Love: This Everything Pizza Tartin aka Upside Down Pizza is baked with the crust on top, so you can load up on "toppings" like Italian sausage, onion, artichokes, jalapeños and olives and still have a crunchy crust.

Back when I had an oven heated by bottled gas, I struggled to get it hot enough to bake a loaded pizza crust crunchy on the bottom. Putting too many toppings – a particular problem I have – meant my crust was often soggy. Sure, I could put fewer toppings but no one wants a skimpily topped pizza, do they? 

Then suddenly a solution occurred to me. Everything Pizza Tartin is baked upside down, French apple pie style, with ALL of my favorite ingredients, so the thick crust is still extra crunchy. Just flip to serve!
 
Here it is, straight out of the oven, before flipping. 


I use this particular pan because it can go from stovetop to oven. I brown the Italian sausage, then I take it off the heat to layer on the rest of the ingredients, finally tucking the dough in on top.

But you can cook the sausage then bake your everything pizza tartin in a large pie plate or a well-seasoned cast iron skillet. You do not want a pan that sticks. And don’t forget to cut some slits in your crust to let the steam escape. No soggy tops, or rather, bottoms!

I cannot tell you how pleased with myself I was when I figured this out!

Everything Pizza Tartin – Upside Down Everything Pizza 

You do have to be careful to cook it just long enough so the crust is golden brown but the bottom doesn’t burn. When it’s starting to get just a little bit dark in places, it’s absolutely perfect. I figure about 25-30 minutes, depending on how many toppings you’ve added.

Ingredients

For the 10in or 26cm round thick crust:
2 1⁄4 cups or 280g flour

1 rounded teaspoon active yeast – about 4g 
3⁄4 cup or 180ml warm water

1⁄2 teaspoon salt

1 teaspoon olive oil 

For the topping: 
2 links Italian sausage, approximate weight 4 3⁄4 oz or 135g 
Olive oil

Generous handful sliced pepperoni – say 10 or 12 slices

1 cup or 110g grated mozzarella cheese 
1⁄2 cup or 120ml pizza sauce


Other possible toppings:

Small artichoke hearts, well drained and halved

Sliced jalapeños, pickled or fresh

Finely sliced onion

Black olives

Your favorite pizza topping -­ no need to limit your toppings! 

Recommended: Fresh basil leaves for serving 

Method
To make the crust, mix 1 cup or 125g flour with the yeast and add in the warm water. Leave to prove for about 5 minutes. You should see some bubbling. 


Add the salt then the rest of the flour, a little at a time, mixing continuously until you have a soft dough. You might not use quite all of the flour. Knead for about five minutes or until the ball of dough is smooth and elastic. 


Leave to prove in a warm place, covered with cling film or a damp towel, for about 45 minutes or until doubled in size. (Pizza dough can be prepared one day ahead. Leave to rise, covered, in the refrigerator. Allow to come to room temperature before rolling out and baking. You can also substitute store-­bought pizza dough.)

Preheat your oven to 400°F or 200°C when the dough has about 15 minutes rising time left. 


Meanwhile, prepare your toppings. In the bottom of your ovenproof skillet, brown the sausage in small balls, adding a drizzle of olive oil. 


Remove from the heat once browned and spoon off some of the excess fat cooking the sausages might have created. 


Sprinkle in the finely sliced onion, the artichokes, jalapeños, olives and other toppings, distributing them evenly. Top these with the pepperoni slices. 


Sprinkle on the mozzarella cheese. Spoon on the pizza sauce, spreading it around gently with the back of the spoon.


Roll or press your crust out so that it’s just a bit larger than the
diameter of your fillings in the pan. Cut three slits to allow steam to escape while it’s baking. 


Fit the crust over the fillings and tuck it in all around the sides. Use a pastry brush to brush olive oil over the top of the crust and down the tucked sides. 

Bake the pizza tartin in your preheated oven for about 25­-30 minutes or until the crust is a lovely golden color and quite crisp on the outside. When you tap it, it should sound hollow. 


Leave the pizza tartin to cool for about 5­-7 minutes then invert it carefully onto a serving plate. 


If any of the bits do stick, just scoop them off the pan and replace on the pizza tartin. 

Sprinkle with fresh basil leaves and cut in wedges and serve hot. 


Food Lust People Love: This Everything Pizza Tartin aka Upside Down Pizza is baked with the crust on top, so you can load up on "toppings" like Italian sausage, onion, artichokes, jalapeños and olives and still have a crunchy crust.

Enjoy!

Welcome to the fifth installment of our Alphabet Challenge for 2024. Today’s recipes are brought to you by the letter E. Many thanks to our challenge creator, Wendy of A Day in the Life on a Farm

Check out all the recipes brought to you by the letter E. 

Here are my posts for the alphabet challenge, thus far: 
E: today's post! Everything Pizza Tartin

Pin this Everything Pizza Tartin! 

Food Lust People Love: This Everything Pizza Tartin aka Upside Down Pizza is baked with the crust on top, so you can load up on "toppings" like Italian sausage, onion, artichokes, jalapeños and olives and still have a crunchy crust.

.