Monday, August 4, 2014

BLT (Bacon Lettuce Tomato) Muffins #MuffinMonday

Sun-dried tomatoes, crispy smoked bacon and still crunchy baby gem lettuce cooked briefly in bacon fat make a fabulous BLT muffin! Perfect for breakfast or snacking on the go.

Baby gem lettuce, quick fried in bacon fat, is a treat all on its own. Added to muffin batter with crispy bacon and sun-dried tomatoes, it makes a fabulous baked BLT that is handy for breakfast or snack time on the go.
I pride myself on being an adventurous eater. That said, the first time I encountered cooked lettuce was in the kitchen of a Dutch friend who was making lettuce soup. The sound of it didn’t appeal to me at all so I was pleasantly surprised by how tasty it was.

Since then I have enjoyed peas simmered with lettuce and butter the French way, grilled Romaine in salads and wilted lettuce cooked in bacon fat, in the Southern tradition. It wasn’t something I remember either of my grandmothers making but that doesn’t stop me from adopting it now.

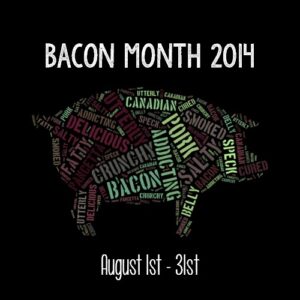
For this week’s Muffin Monday and the start of Bacon Month, a BLT muffin with baby gem lettuce seared in bacon fat seemed like the obvious choice! I used my easy to make homemade sun-dried tomatoes but store bought would work just as nicely.

BLT (Bacon Lettuce Tomato) Muffins


Ingredients
4 1/2+ oz or 130g streaky smoked bacon (I used two thick cut slices and two normal slices because that’s what I had on hand.)
3/4 oz or 20g sun-dried tomatoes
3 small baby gem lettuces – about 7oz or 200g in total
2 cups or 250g flour
1 teaspoon sugar
1 tablespoon baking powder
1 teaspoon salt
1/2 teaspoon English mustard powder
Black pepper
1/4 cup or 60ml bacon fat and/or canola or other vegetable oil
1 egg
1 cup or 240ml milk

Method
Soak the sun-dried tomatoes in hot water and set aside to plump.


Fry the bacon until crispy and pour the fat into a 1/4 cup or 60ml measuring cup. Top up, if necessary to the full amount with oil.  Set aside. Do not wash the residual grease out of the pan! We are going to fry the lettuce in it. Drain the bacon on some paper towels.


Trim the brown end off of your baby gem lettuces, being careful to leave enough of the cores so they don’t fall apart. Now cut them each into halves.


Heat the bacon pan until quite hot and lay the baby gems in it, cut side down. Fry just a few minutes until browned and then turn them over carefully.

Brown the other side. Remove from the heat and allow to cool.


Cut the cores out of the lettuces and chop the leaves. I ended up with about 1 cupful of lettuce.


Drain the tomatoes and chop them into smaller bits, reserving 12 bigger pieces to garnish the muffins, if desired. Chop the crispy bacon finely, once again reserving 12 bigger pieces to garnish the muffins, if desired.


Preheat your oven to 350°F or 180°C and prepare your 12-cup muffin pan by lining it with paper muffin cups or by greasing it thoroughly.

In a large mixing bowl, combine your flour, baking powder, sugar, salt and mustard powder plus a few good grinds of fresh black pepper. My grinder actually has a mix of peppercorns, if you are wondering about the pink and green flecks.


In a smaller mixing bowl, whisk together the egg, milk and room temperature bacon fat/oil.

Pour the wet mixture into the dry ingredient bowl and mix slightly.


Add in the chopped bacon, chopped lettuce and chopped tomatoes. Fold gently to combine.


Divide the batter evenly between the muffin cups. Top with reserved bacon and tomato, if you kept some aside.


Bake for 20-25 minutes or until golden brown. Remove from the oven and cool slightly in the pan. Transfer the muffins to a wire rack to cool completely.


Enjoy!


*This is an Amazon affiliate link. If you buy after clicking on the link, I earn some small change for referring you to Amazon, at no extra cost to you.


Friday, August 1, 2014

How to Make a Classic Bacon Butty

This classic British sandwich is mobile breakfast fare at its finest, often served out of a food van at car boot sales, weekend markets and school sporting events. The bacon butty is simple deliciousness: Crispy back bacon, piled high on a bread roll and topped with lashings of brown sauce.The best ones come with heaps of bacon.


In the spirit of bacon making everything better, even hotter-than the hinges-of-the-gates-of-hell August in Dubai, I’ve joined a great group of bloggers for a month of bacon recipes! Organized by Julie of White Lights on Wednesday,  this second annual Bacon Month will include bacon-centric recipes, both sweet and savory.

But, meanwhile, I couldn’t make a Bacon Month announcement without sharing some bacon goodness. I had my first bacon butty in Aberdeen many years ago, while visiting some dear friends from our Brazil years. It was an early Sunday morning and as we arrived at the Thainstone Market, the excitement of the treasure hunt was in the air, along with the fabulous aroma of frying bacon. I have never had a bacon butty to match that one, although I’ve been trying to ever since. A floury bun filled with bacon is the best!

Ingredients
Olive oil
5-6 slices back bacon
1 floury round roll, halved
Butter (optional)
1-2 tablespoons HP or other brown sauce

Method
Drizzle a little olive oil in your pan. Add bacon and cook, until browned and crispy.


Meanwhile, butter your bread roll, if desired.

Place bacon on the bottom half of your roll and top with HP Sauce. Yes, it's a lot of bacon for one sandwich. No, it's not too much. There can never be enough bacon.


Cover with roll top.


That’s it! Simple, bacon-full and delicious. Enjoy!


Bacon Month is going to be epic!


Wednesday, July 30, 2014

No-Bake Berry Cheesecake #NationalCheesecakeDay

Despite the richness of the ingredients, this no-bake cheesecake tastes light and fresh, especially with sweet summer berries on top and the crunchy oat-y crust underneath. 

Happy Cheesecake Day! Today I am celebrating with a fabulous group of food blogger friends and we have cheesecakes and cheesecake related recipes galore for you! Make sure to scroll to the bottom of this post to see all the links.

I don’t have a problem turning the oven on when it is summertime and temperatures are soaring. If I want to bake, I’m going to bake. (I offer into evidence, this week’s vibrant pink beet cornbread muffins. That said, when it’s not necessary to heat up the kitchen, I am grateful. This week I’m on Jersey, the largest of the Channel Islands and we are having brilliant summer weather. Some edibles are produced on the island, notably Jersey Royal potatoes and fresh super creamy dairy products from the famous Jersey cows, but much of it is imported from either France or the United Kingdom by ferry. A couple of weeks ago, one of the boats ran aground so supermarkets are struggling to fill their shelves with the now limited incoming stock. Such are the vagaries of island life but the shortage meant that I couldn’t find enough raspberries to cover my cheesecake. Feel free to increase the amount of berries and completely cover yours.

Ingredients
For the crust:
11 Hobnobs or other crunchy cookie or biscuit (6 oz or 170g by weight)
1/3 cup or 75g unsalted butter, melted and cooled
4 1/2 teaspoons sugar
Pinch salt

For the filling:
1/2 cup or 120ml heavy cream
8 oz or 225g cream cheese, at room temperature
1/2 cup or 60g confectioners' or icing sugar
1/2 cup or 125g Greek yogurt (full-fat)
1 teaspoon pure vanilla extract
Pinch salt

For topping:
1 cup fresh berries (or more to cover the cheesecake)
Optional garnish: one sprig of mint

Method
Put your Hobnobs or similar cookies in a plastic bag and use the side of meat tenderizing mallet or a rolling pin to crush them into fine crumbs.


Put them in a small mixing bowl and add 4 1/2 teaspoons granulated sugar and a healthy pinch of salt. Pour in the melted butter and mix thoroughly.


Cut a piece of waxed paper or parchment to fit your nine-inch or 23cm square springform pan.


Press the buttery crumbs evenly onto the bottom and up the sides.


Using the whisk attachment of your stand mixer or electric beaters, whip your cream until stiff peaks form.

Check out the color of my Jersey cream! It is so full of fat that it whips extremely quickly and is pale yellow, almost like butter.

If you are using a stand mixer, transfer the whipped cream to another bowl because you will need that one again for the next step. If you are using electric beaters, proceed accordingly.

Beat the cream cheese, powdered sugar, yogurt, vanilla, and a pinch of salt until smooth.


With a rubber spatula, gently fold the whipped cream into the cream cheese mixture.


Pour the mixture into the crust.


Spread it around evenly, making sure to get it right into the corners.

Cover and refrigerate until firm. Mine took just a couple of hours.

Top with fresh berries of your choice and perhaps a sprig of mint for contrast.

Carefully remove the sides of your springform and pour some Champagne for the celebration.


Cut into slices, making sure each person gets some side crust. Try not to fight over the crunchy corner pieces.


Enjoy!


Are you a lover of cheesecake? This is your day! Start celebrating!

Baked Cheesecakes: No Bake Cheesecakes: Cheesecake Beverages: Cheesecake Cookies and Bars: Cheesecake Desserts and Treats: Frozen Cheesecakes and Treats: