Thursday, November 19, 2020

Walnut Butter Bundt Cake #BundtBakers

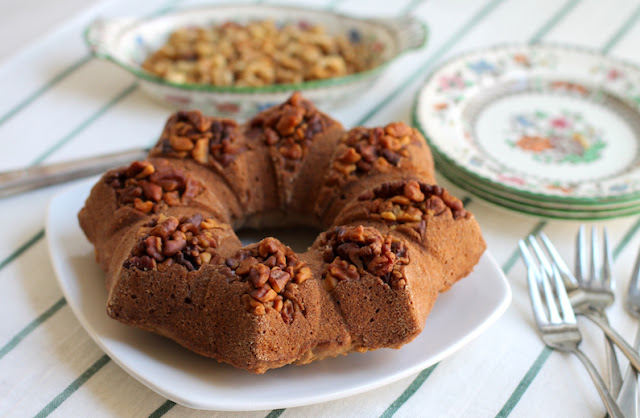
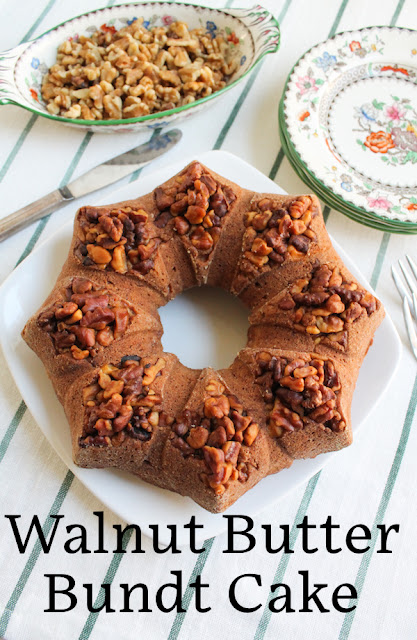
This walnut butter Bundt cake is delightfully flavored with homemade toasted walnut butter, which is super easy to make. The walnuts at the bottom of the pan are a pretty topping when the cake is turned upright. 

Food Lust People Love: This walnut butter Bundt cake is delightfully flavored with homemade toasted walnut butter, which is super easy to make. The walnuts at the bottom of the pan are a pretty topping when the cake is turned upright.

Recipes abound on the internet for homemade nut butters but I must confess that I have never made any. We don’t have any nut allergies and good ole Jif has been my go-to peanut butter since time eternal. If I had a dime for every jar I’ve hauled overseas in my suitcases over the last thirty plus years, I’d be a wealthy woman. 

That said, the last place I lived outside of the US was Dubai and Jif was blessedly available there. Even in Kuala Lumpur and Singapore it turned up on occasion. Anyhoo, no good reason to make my own nut butter until now. 

This month’s Bundt Baker theme is Nut Butters so I decided to be brave and try something new. I have this to say: Toasted walnut butter is fabulous. Such lovely flavor! Who knew it would be so easy to make.

Walnut Butter Bundt Cake

If you have an allergy to walnuts, I daresay you could substitute any nut you can tolerate but I highly recommend not skipping the toasting step. It adds a lot of depth to the nut butter. I used a 10-cup Bundt pan to bake this because I love the way the bottom of the Nordic Ware Fleur de Lis pan holds the extra walnut pieces in an almost diamond pattern, but it would fit in a 6 or 8 cup one as well, for a smaller taller Bundt.  

Ingredients
1 1/2 cups or 190g all-purpose flour, plus extra for the pan
1 teaspoon baking powder
1/4 teaspoon salt
1/3 cup or 75g butter, at room temperature, plus extra for the pan
1 teaspoon vanilla extract
1/3 cup or 75g fine sugar
2 large eggs
2 tablespoons milk
4 1/4 oz or 120g walnut pieces

Method
Turn your oven on to preheat to 350°F or 180°C. Put the walnuts on a baking pan and pop them in the preheating oven. Keep a close eye on them as the oven heats up and give the pan a shake every few minutes. Remove the walnuts from the oven when they start smelling toasted.


Grease your Bundt pan with butter and lightly flour. (As mentioned above, mine is the Nordic Ware Fleur de Lis <Amazon affiliate link with a good price. I paid almost $12 more back in 2015! Dang it.)

Process half of the toasted walnuts in your food processor until they become a fairly smooth paste. 


Beat together the butter and sugar till fluffy and pale. Add in the eggs one at a time.


Cream well until well combined before adding another one. 


Beat in the walnut butter, vanilla extract and milk.


Sift in the flour, baking soda and salt. Fold well to combine. 


Put the remaining half of the toasted walnuts into the bottom of your prepared Bundt pan. 


Spoon in the batter. 


Gently use the bottom of a spoon to smooth the top out. You don't want to dislodge the nuts.


Bake for 25-30 minutes or until a cake tester inserted into the walnut butter cake comes out clean. If you are a person who uses an instant read thermometer, the King Arthur Flour website says the internal temperature of a baked cake should be between 200-210°F or 93-99°C.

Remove the cake from the oven and let cool for about 10 minutes. 

Food Lust People Love: This walnut butter Bundt cake is delightfully flavored with homemade toasted walnut butter, which is super easy to make. The walnuts at the bottom of the pan are a pretty topping when the cake is turned upright.

Loosen the cake from the Bundt pan and invert it onto a serving plate. 

Food Lust People Love: This walnut butter Bundt cake is delightfully flavored with homemade toasted walnut butter, which is super easy to make. The walnuts at the bottom of the pan are a pretty topping when the cake is turned upright.

Slice to serve with tea, coffee, hot cocoa or a cold glass of milk.

Food Lust People Love: This walnut butter Bundt cake is delightfully flavored with homemade toasted walnut butter, which is super easy to make. The walnuts at the bottom of the pan are a pretty topping when the cake is turned upright.

 Enjoy! 

As mentioned, this month’s Bundt Bakers theme is Nut Butters. Many thanks to our host, Wendy of A Day in the Life on the Farm. Check out the other recipes using nut butters in the batter, icing or glaze below. 


BundtBakers

#BundtBakers is a group of Bundt loving bakers who get together once a month to bake Bundts with a common ingredient or theme. You can see all of our lovely Bundts by following our Pinterest board. We take turns hosting each month and choosing the theme/ingredient. Updated links for all of our past events and more information about BundtBakers can be found on our home page.

Pin this Walnut Butter Bundt Cake! 

Food Lust People Love: This walnut butter Bundt cake is delightfully flavored with homemade toasted walnut butter, which is super easy to make. The walnuts at the bottom of the pan are a pretty topping when the cake is turned upright.

 .

Monday, November 16, 2020

Sous Vide Whole Stuffed Turkey

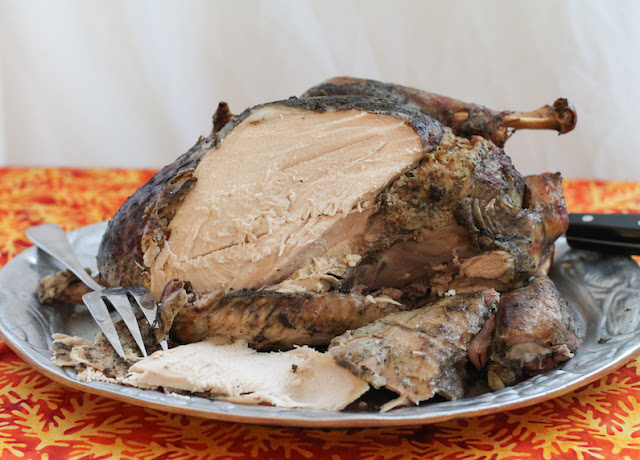
This sous vide whole stuffed turkey is full of flavor from the sausage stuffing within and crispy without from a quick roast in the oven. Its spicy rubbed golden skin is divine! 

Food Lust People Love: This sous vide whole stuffed turkey is full of flavor from the sausage stuffing within and crispy without from a quick roast in the oven. Its spicy rubbed golden skin is divine!

As I mentioned in my recipe post for sous vide roast leg of lamb, with a sous vide precision cooker you will never, ever suffer through a dried out roast again. 

In fact even turkey, notorious for uneven cooking, results in tender moist dark AND light meat. It is easy if you follow my recipe below, cooking your bird long and slow, followed by a quick oven roasting to get that golden skin everyone fights over.

The secret to cooking a whole bird with a sous vide precision cooker is the stuffing, which not only adds flavor and moisture but, almost as importantly, fills the cavity which makes it possible for the turkey to remain submerged. 

If you are a fan of sous vide precision cooking, you might want to take a look at my chicken crown roast and tender sliceable pork roast as well.

Sous Vide Whole Stuffed Turkey

Very important: you must start one day ahead of when you want to roast and serve your turkey. It is essential to allow time for the seasonings to become one with the bird and for the skin to dry out before using the sous vide precision cooker, if you want crispy golden skin. And who doesn't? 

Ingredients
For the turkey:
1 fresh or frozen turkey (completely thawed - Approx weight 8 lb 5 oz or 3.8kg)
Dry rub (See below)
1/2 teaspoon poultry seasoning
1/2 teaspoon baking soda

For the dry rub:
2 tablespoons poultry seasoning 
(if poultry seasoning is unsalted) 1 teaspoon fine sea salt
1/2 teaspoon freshly ground black pepper
1/2 teaspoon cayenne

For the stuffing:
2 medium onions
2-3 ribs celery
3 slices smoked bacon
2 tablespoons butter
1 1/2 cups or 135g fresh breadcrumbs
1 1/2 lb or 700g sausage meat
2 teaspoons poultry seasoning
1/2 teaspoon crushed red pepper
1/2 teaspoon freshly ground black pepper
zest 1/2 orange
salt to taste*

Extra equipment:
Sous vide precision cooker
Large vessel that can hold enough water to cover your turkey. I used my Coleman cooler/ice chest, which works beautifully if you have something big to sous vide.

Method
Clean the turkey, removing the top part of the tail and any stray feathers inspector 12 might have missed. I have needle-nose jewelry pliers that work great for removing feathers (and, by the way, pin bones in fish.)

Season the turkey inside and out with the dry rub.  


Mix the 1/2 teaspoon of the poultry seasoning with the 1/2 teaspoon of baking soda and sprinkle it on the top of the bird from a great height, so you get an even layer. According to Serious Eats, this helps the skin dry so it will super crispy when roasted. 


Place your turkey in a casserole dish, breast up, uncovered in the refrigerator for 24 hours. 

You can now prepare the stuffing. 

Cut the bacon into small pieces. Fry it until crispy in a medium sized pan. Meanwhile, finely chop your onions and celery. 

Remove the bacon from the pan and set aside. Add the butter to the pan and sauté the chopped vegetables in the butter and bacon fat until softened. Leave to cool. 


In a large bowl, combine the bacon, sausage meat and the rest of the stuffing ingredients, along with the sautéed onion and celery. 


Fry a small piece of the stuffing and check the salt. Add salt to the stuffing, if necessary, and mix well. Refrigerate the stuffing until needed. 

The following day, use the stuffing to fill the cavity and the neck. 


Tuck the skin flaps in to cover the stuffing as best you can. 


The stuffing is essential to displace air and conduct heat through the bird as well as adding flavor. 

Use poultry string or silicone bands to truss the legs of the turkey together and to hold the wing tips close to the bird. 


Place the turkey in a 2 1/2 gallon bag and submerge it carefully in water to remove as much of the air inside as possible. If there is still some air inside of the turkey, it might want to float. If your bird wants to float, put a brick in a plastic bag and lean it against the turkey to keep it submerged. I’ve cooked various whole birds with this method and sometimes they need a brick and sometimes they don’t! As you can see, this particular turkey behaved without one. 


Sous vide at 160°F or 71°C for six hours.

When the timer goes off, remove the bag from the water bath. Carefully remove the turkey from the bag, holding it legs down so liquid can drain out of it and back into the bag. Reserve any juice left behind to add to gravy later. It's not so attractive right now but worry not! After roasting it will be much prettier. 

Food Lust People Love: This sous vide whole stuffed turkey is full of flavor from the sausage stuffing within and crispy without from a quick roast in the oven. Its spicy rubbed golden skin is divine!

Heat your oven to 450°F or 232°C. Remove the silicone bands or string and pat the bird dry with paper towels, being careful not to break the skin. 

Heat a large iron skillet on the stovetop and place the turkey in it. Roast in your very hot oven for 8-10 minutes to brown the skin, turning the pan around midway through to ensure even browning. 

Food Lust People Love: This sous vide whole stuffed turkey is full of flavor from the sausage stuffing within and crispy without from a quick roast in the oven. Its spicy rubbed golden skin is divine!

Let it rest for 10 minutes, carve and serve.

Food Lust People Love: This sous vide whole stuffed turkey is full of flavor from the sausage stuffing within and crispy without from a quick roast in the oven. Its spicy rubbed golden skin is divine!

Enjoy! 

It’s Multicooker Monday when I join a group of blogger friends sharing recipes using small kitchen appliances. Check them out! Many thanks to our host and leader, Sue of Palatable Pastime


Multicooker Monday is a blogger group created by Sue of Palatable Pastime for all of us who need encouragement to make better use of our small appliances like slow cookers, Instant Pots, Air Fryers, rice cookers and sous vide machines. We get together every third Monday of the month to share our recipes. If you are a food blogger who would like to post with us, please request to join our Facebook group.

Pin this Sous Vide Whole Stuffed Turkey! 

Food Lust People Love: This sous vide whole stuffed turkey is full of flavor from the sausage stuffing within and crispy without from a quick roast in the oven. Its spicy rubbed golden skin is divine!
 .

Sunday, November 15, 2020

Roasted Bruschetta Pattypan Squash

This roasted bruschetta pattypan squash - filled with ripe tomatoes, garlic and basil splashed with balsamic vinegar - makes a delicious and gorgeous main course for any special occasion. Added bonus: Even your vegetarian and vegan family and friends can enjoy it!

Food Lust People Love: This roasted bruschetta pattypan squash - filled with ripe tomatoes, garlic and basil splashed with balsamic vinegar - makes a delicious and gorgeous main course for any special occasion. Added bonus: Even your vegetarian and vegan family and friends can enjoy it!

I can’t tell you how excited I was when I came across two lovely large pattypan squash grown by a local farmer. I didn’t even know they grew that big! Prior to these, the pattypans of my experience were either tiny baby squash or more typically, they were about four or five inches across. 

Special squash deserves to be made into a special dish. I couldn’t bring myself to cut it up and spoil its beauty. Stuffing seemed to be the best answer. With the tomatoes so wonderful and ripe, I wanted them to shine too. 

Except for the chopped squash, this stuffing is exactly the same topping I put on toasted baguette slices for our family favorite classic bruschetta, hence the title. The wonderful bruschetta filling infuses the squash with great flavor as it roasts to golden perfection. 

Roasted Bruschetta Pattypan Squash

If you can’t find large pattypan squash, use whatever squash is your favorite. Don’t worry about the weight of your tomatoes. A little more or less won’t really matter. 

Ingredients
1 large pattypan or scallop squash (mine weighed 1 lb 9 oz or 650g)
For the filling: 
1 large clove garlic
4 small tomatoes (mine weighted about 9 oz or 260g)
7-8 leaves fresh basil, plus extra for garnish, if desired
2 tablespoons olive oil, plus a little extra for the baking pan
1 tablespoon best quality balsamic vinegar
1/4 teaspoon fine sea salt
Freshly ground black pepper

Optional to serve: 
Freshly grated Parmesan cheese

Method
Cut the top off of the squash. Use a spoon to scrape the seeds and fibers out of the middle.


Use a sharp knife to trim off the squash to enlarge the cavity. Chop the squash bits you trim off and set them aside. We’ll add these to the bruschetta filling.


Preheat your oven to 350°F or 180°C. Lightly grease a baking pan or iron skillet. 

Remove the cores from the tomatoes and chop them into small pieces. Put a couple of paper towels on your cutting board to catch the juice that will inevitably pour off. Otherwise you’ll find it dripping off the work surface onto your feet. Not that that has ever happened to me. 

Mince the garlic. Roll the basil leaves together and slice them thinly into strips. Then chop the rolled slices roughly. 


Put the tomatoes, chopped squash bits, garlic and basil into a small mixing bowl. 

Add in the olive oil, vinegar, salt and several good grinds of black peppers. Stir well to combine. 


Spoon the filling into the pattypan squash.

Food Lust People Love: This roasted bruschetta pattypan squash - filled with ripe tomatoes, garlic and basil splashed with balsamic vinegar - makes a delicious and gorgeous main course for any special occasion. Added bonus: Even your vegetarian and vegan family and friends can enjoy it!

Roast in your preheated oven for 55-60 minutes or until the squash is cooked through. 

Remove from the oven. Sprinkle with basil strips. 

Food Lust People Love: This roasted bruschetta pattypan squash - filled with ripe tomatoes, garlic and basil splashed with balsamic vinegar - makes a delicious and gorgeous main course for any special occasion. Added bonus: Even your vegetarian and vegan family and friends can enjoy it!

Cut the squash into quarters to serve and let your guests add grated Parmesan, as desired. 

Enjoy! 


Happy Sunday FunDay, where we share recipes your families will love every Sunday. Today our theme is Squash it to me! - perfect for the season. Many thanks to our host, Rebekah of Making Miracles

Pin this Roasted Bruschetta Pattypan Squash!

Food Lust People Love: This roasted bruschetta pattypan squash - filled with ripe tomatoes, garlic and basil splashed with balsamic vinegar - makes a delicious and gorgeous main course for any special occasion. Added bonus: Even your vegetarian and vegan family and friends can enjoy it!

 .