Tuesday, May 10, 2022

Mixed Grain Sourdough Soda Bread #BreadBakers

This mixed grain sourdough soda bread is delicious when freshly baked but is also great toasted. Serve it with your favorite jam, cheese or salad. 

Food Lust People Love: This mixed grain sourdough soda bread is delicious when freshly baked but is also great toasted. Serve it with your favorite jam, cheese or salad.

Last fall, when the weather was starting to turn just a little bit cooler, I got a text from a dear friend inviting me over for a casual lunch outside on her patio. The menu was chicken salad, cheese and fruit. She already had a dessert planned as well so I decided to bake some healthy bread to accompany our lovely lunch.

When our Bread Baker host chose "no knead bread" for this month's theme, I realized that I had never shared the recipe. It is adapted from one on the King Arthur Baking site and calls for their “King Arthur Harvest Grains Blend, or other seeds and grains of your choice.” 

I used a mix of quick cook grains from Central Market, a Texas grocery store, that includes farro, barley, brown rice, wheat and oat groats so I chose to soak them briefly first before baking. If you are using a mix like the one sold by King Arthur Flour, meant to be baked in bread, by all means, skip this step. 

Mixed Grain Sourdough Soda Bread

This loaf is the perfect accompaniment to chicken or tuna salad but equally, we loved it with a swipe of butter and jam. Best of all, it’s full of flavor from the sourdough starter but is quick to make and bake. 

Ingredients
1 1/2 cups or 180g whole wheat flour
2/3 cups or 83g flour
1/4 cup or 45g mixed grains
1/2 teaspoon baking soda
1/2 teaspoon salt
2/3 cup or 150g sourdough starter, ripe (fed) or discard
1/2 cup or 120ml milk, plus extra as needed
2 tablespoons butter, melted
2 tablespoons honey

Optional, but recommended, for after baking: melted butter for brushing on top

Method
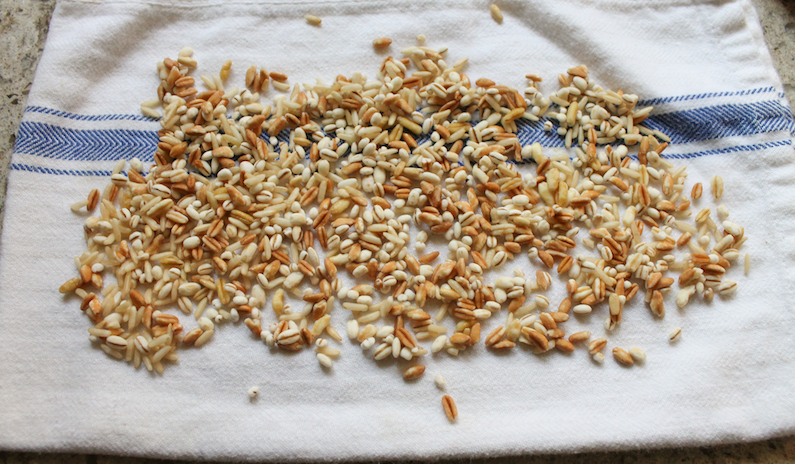
Pour boiling water over your mixed grains in a small bowl. Soak for about 3 minutes then drain and pour them onto a clean kitchen towel to dry them out.  Separate out a teaspoon or two and reserve for topping. 


Preheat the oven to 400°F or 200°C. Lightly grease a 9 in or 23cm round springform pan or line it with baking parchment. 

In a medium-sized mixing bowl, whisk together the flours, the larger pile of grains, baking soda, and salt.


In a separate bowl, whisk together the sourdough starter, milk, butter and honey. 


Pour this mixture into the dry ingredients and stir to combine. I use a Danish dough whisk for this step which makes mixing it much easier. 


The dough will be a bit crumbly. If it's too dry to hold together when you squeeze it, you can add a tablespoon or two more of milk. 


Press the dough into a nice round ball shape. Flatten the ball slightly, and press the reserved grains into the top. Put it in your prepared pan.


Use a sharp knife or lame to cut a cross in the top about 1/2 in or 1 cm deep. 


Bake the loaf for 30 to 40 minutes, until it’s golden brown and a cake tester or toothpick inserted into the center comes out clean. 

Remove the loaf from the oven, and brush the top with melted butter, if using.

Food Lust People Love: This mixed grain sourdough soda bread is delicious when freshly baked but is also great toasted. Serve it with your favorite jam, cheese or salad.

Pop it onto a cutting board. 

Food Lust People Love: This mixed grain sourdough soda bread is delicious when freshly baked but is also great toasted. Serve it with your favorite jam, cheese or salad.

Cool completely before slicing. 

Food Lust People Love: This mixed grain sourdough soda bread is delicious when freshly baked but is also great toasted. Serve it with your favorite jam, cheese or salad.

Enjoy! 

As I mentioned above, our Bread Bakers theme this month is No Knead Breads. Many thanks to Sneha of Sneha’s Recipe for hosting. Check out what we've been baking below: 


#BreadBakers is a group of bread loving bakers who get together once a month to bake bread with a common ingredient or theme. Follow our Pinterest board right here. Links are also updated each month on this home page. We take turns hosting each month and choosing the theme/ingredient.


Pin this Mixed Grain Sourdough Soda Bread!

Food Lust People Love: This mixed grain sourdough soda bread is delicious when freshly baked but is also great toasted. Serve it with your favorite jam, cheese or salad.

 .

Sunday, May 8, 2022

Fresh Peach Cream Pie

This old-fashioned fresh peach cream pie is lighter than a custard pie but still rich and sweet enough to be a delightful dessert. Make it with fresh peaches, if you have them and canned or frozen peaches if you don’t.

Food Lust People Love: This old-fashioned fresh peach cream pie is lighter than a custard pie but still rich and sweet enough to be a delightful dessert. Make it with fresh peaches, if you have them and canned or frozen peaches if you don’t.

Not long after my maternal grandmother died back in 2001, my great aunt Joy asked my grandfather for her sister’s recipe file. It was a small metal file box with a bunch of index cards, many handwritten or typed out by my grandmother or other family members. The sisters had always had a small rivalry going over their cooking and baking prowess so the rest of us were pretty upset that he’d handed it over. 

I knew I couldn’t flat out ask Aunt Joy for it back but I finally got up the nerve and asked if I could borrow it for a while, just to look through. Well, wouldn’t you know it, but the file box was nowhere to be found! 

Until finally, a few years ago, Aunt Joy’s daughter sent me a message to say she had something for me. I assumed it was her mom's pepper sauce but was even more pleasantly surprised that it was the long-lost recipe box. I just about burst into tears!

This fresh peach cream pie recipe was on one of those cards. It’s a treasure. 


Fresh Peach Cream Pie

Many older recipe call for scalded milk, as this one does. All that means is milk that has been heated to just below the boiling point. For more information on that, I highly recommend this informative post from my friend, pastry chef Jenni Field wherein she gives you the how and why of scalded milk.

Ingredients
For the filling:
1 1/2 cups or 355ml milk
2 eggs
1/4 cup or 50g sugar
1/2 teaspoon vanilla
1/4 teaspoon ground nutmeg
3 fresh peaches (approx. weight 1 lb 3.5 oz or 550g)
1 pie crust from this recipe or your own favorite (ingredients needed for mine below)

For the pie crust:
1 1/4 cups or 156g all-purpose flour  
1⁄4 cup plus 2 tablespoons or a little shy of 70g shortening (I prefer Crisco, when I can get it.)
1/2 teaspoon fine sea salt 
2 to 3 tablespoons cold water

Method
Scald the milk and set it aside to cool. Instructions here: https://pastrychefonline.com/how-to-scald-milk/

Preheat oven to 375°F or 190°C. Make the pie crust by following these instructions or your own favorite.

Roll out the pie crust and fit it into a pie plate. Crimp the edges and dock the bottom and sides with a fork. 


Bake the pie crust in the preheated oven for five minutes. Remove from the oven and set aside. 

In a mixing bowl, whisk the eggs, sugar, vanilla and nutmeg together. 


The scalded milk should be just slightly warm by now. Pour it into the egg mixture slowly, whisking continuously as you do. 


Peel, pit and slice the peaches. 


Arrange them to cover the sides and bottom of the pie crust. 


At this point, I put the pie in a large pan to make transfer to the oven less fraught with the possibility of spillage. Pour the milk mixture over the peaches. 


Carefully transfer the pie to the oven. 

Bake for 55-60 minutes or until the custard is just set (a knife will come out clean) and the pie crust is golden. My oven heats unevenly so I turn the pie around midway through. 


Leave to cool completely on a wire rack. 

Cut in slices to serve. Enjoy!

Food Lust People Love: This old-fashioned fresh peach cream pie is lighter than a custard pie but still rich and sweet enough to be a delightful dessert. Make it with fresh peaches, if you have them and canned or frozen peaches if you don’t.

It’s Sunday FunDay and today we are sharing recipes for Mother’s Day! Check out all the links below. Many thanks to our host, Wendy of A Day in the Life on the Farm.

 
We are a group of food bloggers who believe that Sunday should be a family fun day, so every Sunday we share recipes that will help you to enjoy your day. If you're a blogger interested in joining us, just visit our Facebook group and request to join.

Pin this Fresh Peach Cream Pie!

Food Lust People Love: This old-fashioned fresh peach cream pie is lighter than a custard pie but still rich and sweet enough to be a delightful dessert. Make it with fresh peaches, if you have them and canned or frozen peaches if you don’t.

 .

Wednesday, May 4, 2022

Homemade Cheese Cracker TIE Fighters

These homemade cheese cracker TIE fighters are cartoonish compared to the real thing but they are so delicious that I hope you will be willing to forgive my artistic license. 

Food Lust People Love: These homemade cheese cracker tie fighters are cartoonish compared to the real thing but they are so delicious that I hope you will be willing to forgive my artistic license.

For today’s Foodie Extravaganza party, our host chose a Star Wars theme since it’s May the Fourth and all day long folks will be saying "May the Fourth be with you" and memes will abound. 

I must confess that I’m not a big Star Wars fan. In fact, the only movie of the series I have seen in its entirety is Episode VII: The Force Awakens. That said, the whole franchise is such a huge part of popular culture that there is no way to avoid knowing the characters and general story. Unless you live under a rock. 

In case you don’t know what a TIE fighter is, here’s a photo for you. They are star fighters in the Star Wars universe usually piloted by the Imperial force. TIE stands for "Twin Ion Engine.” This is what I tried to make out of cheese crackers and little cheese balls. 

Star Wars tie fighter - two flat hexagonal sides connected by a sphere in between. They are star fighters in the Star Wars universe usually piloted by the Imperial force, i.e. the good guys.


I think mine are pretty cute but I also understand that “cute” is probably not supposed to be an adjective pertinent to TIE fighters. So sue me! At least I tried. 

Homemade Cheese Cracker TIE Fighters

The chilling time is essential to make sure the crackers hold their shape. Because everyone knows that TIE fighters are hexagonal. I bought this hexagon cookie cutter on Amazon: Hexagon Cookie Cutters <affiliate link. It was a bit smaller than I was hoping for but it was simple to use and wasted very little dough. I got about 48 crackers out of this dough recipe. So 24 TIE fighters. 

Ingredients
For the crackers:
1/2 cup or 63g all-purpose flour
1 teaspoon cornstarch
1/4 teaspoon smoked paprika
pinch fine sea salt
3 oz or 84g extra sharp cheddar cheese
3 tablespoons or 43g unsalted butter, cold and cut into cubes
1 tablespoon cold water

For assembling the TIE fighters:
2 oz or 56g extra sharp cheddar cheese
2 oz or 56g cream cheese, softened
1/4 teaspoon smoked paprika

Method
In a large mixing bowl, whisk together the flour, cornstarch, smoked paprika and pinch of salt. 


Grate the cheddar cheese for the crackers finely into the flour bowl. Toss till well combined. Add the mixture to your food processor along with the cold bits of butter. 


Process about 20 seconds, until the mixture looks like damp sand. 


Add the cold water and pulse until the mixture looks like clumps of dough. 


Transfer the dough to a large square of cling film. Fold the sides over and press the dough down into a neat square about 6 in or 15cm across. 


Fold the ends of the cling film over to keep the dough from drying out. Refrigerate for at least 45 minutes (or up to two days.)

Meanwhile, grate the cheddar for the TIE fighters and combine it thoroughly in the food processor with the cream cheese and paprika. 


Divide it into 1/2 teaspoon portions and roll them in balls. Cover with cling film and refrigerate with the cracker dough. You are going to end up with a few leftover cheese balls but they are delicious on their own so no worries. 


Preheat oven to 350°F or 180°C and prepare your baking pan by lining it with baking parchment or a silicone liner.  (I couldn’t quite fit all my crackers on one pan so I baked them in two lots, one after the other.)

Remove the dough and the cheese ball from the refrigerator. Open the cling film around the dough, lay another piece of cling film on top, and use a rolling pin to roll it into a rectangle 8x9 in or 20x23cm.   

Use the hexagon cutter to cut the dough into crackers. 


Re-roll out any remaining dough to make the rest. If the dough feels too soft to transfer easily to the baking pan, chill it in the freezer for 5-10 minutes before attempting the move. It is already so hot here in Texas that the extra chill time was essential in my warm kitchen. 

Place the hexagons on your prepared baking pan. Use a skewer or chopstick to poke a hole through the center of each. The first batch was 35. The second batch was only 13 for a total of 48.


Bake until golden brown around the edges, about 18-20 minutes, rotating the baking pan halfway through baking.

Remove from the oven and leave to cool completely before assembling the TIE fighters. 


I was impatient so I transferred mine to a wire rack so they'd cool faster. 

To assemble the TIE fighters, gently press one cheese ball onto one cracker. Top with another cracker and press gently. Turn it sideways to balance on the crackers. Repeat until all the TIE fighters are assembled. 


Enjoy! And may the force be with you.

Food Lust People Love: These homemade cheese cracker tie fighters are cartoonish compared to the real thing but they are so delicious that I hope you will be willing to forgive my artistic license.

As I mentioned above, the theme for today's Foodie Extravaganza party is Star Wars! Many thanks to our host, Camilla of Culinary Adventures with Camilla. Check out all the fun Star Wars recipes below. 


Foodie Extravaganza is where we celebrate obscure food holidays by cooking and baking together with the same ingredient or theme each month. Posting day is always the first Wednesday of each month. If you are a blogger and would like to join our group and blog along with us, come join our Facebook page Foodie Extravaganza. We would love to have you! If you're a spectator looking for delicious tid-bits check out our Foodie Extravaganza Pinterest Board.


Pin these Homemade Cheese Cracker TIE Fighters! 

Food Lust People Love: These homemade cheese cracker TIE fighters are cartoonish compared to the real thing but they are so delicious that I hope you will be willing to forgive my artistic license.

 .