Showing posts with label yeast dough. Show all posts

Wednesday, September 6, 2017

Blackberry German Butter Cake - Brombeere-Butterkuchen #FoodieExtravaganza

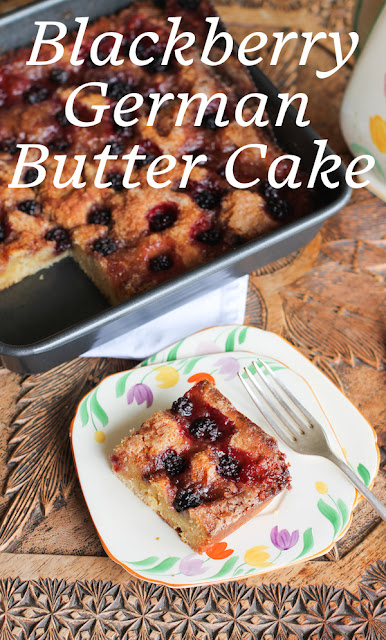
Butterkuchen or German butter cake is baked with a butter enrich yeast dough, that is topped with sugar and yet more butter. In this version I've named Brombeere-Butterkuchen or Blackberry German Butter Cake, I’ve also added some wild blackberries to the topping.

Food Lust People Love: Butterkuchen or German butter cake is baked with a butter enrich yeast dough, that is topped with sugar and yet more butter. In this version, I've named Brombeere-Butterkuchen or Blackberry German Butter Cake, I’ve also added some wild blackberries to the topping.

If you’ve never had butterkuchen or German butter cake, let me assure you that the name is well-deserved. This rich cake swims in the butter topping when it comes out of the oven. As the cake cools, the butter sinks in, making it super moist and delectable.

This month my Foodie Extravaganza friends are sharing German recipes to celebrate the Oktoberfest which, despite its name, starts on Saturday, 16 September in Munich, extending only slightly into October with an end date of October 3rd this year.  Make sure to scroll down to see the dishes we’ve made in anticipation.

Meanwhile, you might want to check out my cheese-filled pretzels, homemade spicy German beer mustard and the obatza cheese spread I recreated for Sunday Supper, all three perfect for your Oktoberfest party.

This time around, I chose a sweet dish since every good and hearty meal should end with dessert, don’t you think? I'm pretty sure all German meals are good and hearty.

Blackberry German Butter Cake (Brombeere-Butterkuchen) 

This recipe is adapted from several I found on the internet. Here are three: ChefKoch.de, Lecker.de and GermanFood.org. Don't let the yeast scare you! This cake is really quite simple to make.

Ingredients
For the sponge:
1/4 cup or 31.25g flour
1 1/2 teaspoons dry yeast
1/2 cup or 120ml lukewarm milk (110°F or 43°C.)
1/2 teaspoon sugar

For the cake dough:
2 cups or 250g flour
1 large egg, at room temperature
7 tablespoons or 100g butter, softened, plus a little for buttering your baking pan
3/4 cup or 150g sugar
1/4 teaspoon salt

For the topping:
1/2 cup or 75g fresh berries, rinsed and drained
1/2 cup or 100g sugar
1 teaspoon cinnamon
9 tablespoons or 127g butter, softened

Method
To proof the yeast, we first make a sponge. Place flour in a large mixing bowl or stand mixer. Sprinkle in the dry yeast and add the teaspoon of sugar. Mix in the lukewarm milk.


Let the sponge sit in a warm place for 15 minutes. It should get foamy and increase in size. If it doesn’t, toss it out and start again with new yeast.

Assuming you have good, active yeast, add in the flour, egg, the softened butter, sugar and salt to the yeast mixture.

That's the foamy "sponge" on the bottom right. Good yeast! 


Mix until the dough is smooth and forms a ball.

One of the recipes I consulted online says to add up to 1/2 cup additional flour if necessary but I decided to leave my dough slack to make it more cake like, and less bready. So it didn’t really form a stiff ball. This probably makes it unauthentic, but, hey, I’m not even a little bit German plus I’ve added wild Jersey blackberries, so that makes it unauthentic already.


Cover the bowl with a damp cloth and leave to rise for 30 minutes in a warm place.

Press the dough out into a lightly buttered 8x8in or 20x20cm pan. Let it rest again for 15 minutes while heating oven to 375°F or 190°C.

Wet your hands slightly (so they don’t stick to the dough) and use your fingers to create dimples in the top of the dough.


Mix the sugar and cinnamon together with the berries and sprinkle evenly over dough.


Cut topping butter into small pieces and dot them evenly all around the cake. Mine was pretty soft so it was more a matter of spooning small bits on.

Food Lust People Love: Butterkuchen or German butter cake is baked with a butter enrich yeast dough, that is topped with sugar and yet more butter. In this version, I've named Brombeere-Butterkuchen or Blackberry German Butter Cake, I’ve also added some wild blackberries to the topping.

Bake in your preheated oven for about 25 minutes or until the cake is golden brown and the sugar on top has caramelized. There is still going to be quite a bit of butter bubbling on top but don’t worry, it will sink in as the cake cools.

Food Lust People Love: Butterkuchen or German butter cake is baked with a butter enrich yeast dough, that is topped with sugar and yet more butter. In this version, I've named Brombeere-Butterkuchen or Blackberry German Butter Cake, I’ve also added some wild blackberries to the topping.

Enjoy!

Food Lust People Love: Butterkuchen or German butter cake is baked with a butter enrich yeast dough, that is topped with sugar and yet more butter. In this version, I've named Brombeere-Butterkuchen or Blackberry German Butter Cake, I’ve also added some wild blackberries to the topping.


Many thanks to this month’s host, Sue of Palatable Pastime for choosing our theme and her behind the scenes work. It’s almost time for Oktoberfest! How will you celebrate?


Foodie Extravaganza celebrates obscure food holidays or shares recipes with the same ingredient or theme every month.

Posting day is always the first Wednesday of each month. If you are a blogger and would like to join our group and blog along with us, come join our Facebook group Foodie Extravaganza. We would love to have you!

If you're a reader looking for delicious recipes, check out our Foodie Extravaganza Pinterest Board!


Pin it!
Food Lust People Love: Butterkuchen or German butter cake is baked with a butter enrich yeast dough, that is topped with sugar and yet more butter. In this version, I've named Brombeere-Butterkuchen or Blackberry German Butter Cake, I’ve also added some wild blackberries to the topping.
.

Tuesday, November 8, 2016

Rustic Parsnip Bread #BreadBakers

Mashed parsnips add a sweet earthy flavor to this rustic parsnip bread. Caramelized parsnips on top of the loaf bring a little wow factor, making this a great bread for your holiday table.


This may sound silly to a bunch of you but I didn’t discover parsnips till I was an adult. I remember the first time I saw them in a Sydney market and I assumed they were pale carrots until I read the little sign in front of them. Parsnips. The name helped me not one bit.

But I am adventurous cook and eater so I bought a bunch and took them home. Those were the days before internet but I did have a paperback cookbook from the Australian Women’s Weekly series with traditional Australian recipes to consult. Parsnips could essentially be used anywhere a carrot could. In sweet cakes or savory stews. My favorite way of eating them is roasted in the oven or caramelized in a hot pan. Either way emphasizes their native sweetness.

This rustic parsnip bread features parsnips two ways, mashed in the dough for flavor and moisture and tucked in slits on top for flavor and decoration. This recipe is adapted from Julia Child’s rustic potato bread, which I first made more than fours ago, back when I had just moved to Cairo and found myself in a freezing cold house without a working heater. An ideal time to turn the oven on! Read that post for tips if you are trying to get yeast dough to rise in a cold kitchen.

Ingredients
For the dough:
3/4 lb or 340g firm parsnips
2 teaspoons salt
1/4 cup or 60ml tepid reserved parsnip water (80 – 90°F or 26.7 – 32.2°C)
1 1/2 teaspoons dry yeast
1 tablespoon extra-virgin olive oil
2 1/4 – 2 1/2 cups or 280g – 310g flour

For the optional topping:
1 parsnip about 3 1/2 oz or 100g
1 tablespoon olive oil
1/2 teaspoon sugar
1/2 teaspoon flakey sea salt

Method
Peel your parsnips for the dough and cut them into cubes. In a small pot, cover the parsnips with water and add 1 teaspoon of the salt.


Cook until they are fork-tender. Reserve 1/4 cup or 60ml of the parsnip water and then drain the parsnips well in a colander.  Pop them back in the pot and mash them with a potato masher while they are still warm, getting them as lump free as possible. Set aside to cool.


When the parsnips are cool, stir the yeast into the parsnip water, warming it again if necessary. It needs to be warm enough to activate the yeast. Leave for about five minutes.

Meanwhile, put your cool mashed parsnips in the mixer and beat briefly to loosen them up.

Add in the olive oil, the yeast/water mixture and the last teaspoon of salt. Mix until the liquids are incorporated into the mashed parsnip.


Change your mixer attachment to the dough hook and start adding in the flour.  This mixture is going to be very dry at the beginning.

Just trust and keep mixing. That said, you may not use quite all the flour. I had a few tablespoons left when I decided that the dough was a good springy texture. Knead for by machine for a few more minutes.

For the first rise, put a bit of cling film on the top of the mixing bowl and allow the dough to rest for 20-30 minutes at room temperature.

To caramelize the last parsnip, peel it and cut it into thin, short pieces.

Drizzle the olive oil in a small non-stick pan and gently fry the parsnip pieces until they are golden on all sides.


Sprinkle in the sugar and keep cooking the parsnips till the sugar has melted and started to brown a little. Remove from the heat and leave to cool.

Once your first rise is done, roll the dough into a ball and then press out into a round disk.  Starting at the end closest to you, roll the dough into a tube.  When you get to the last turn, make sure the seam side is down and fold the sides under.


Place the roll of dough on a lined baking pan and use a sharp knife to cut slits in the top.  Tuck the caramelized parsnips into the slits. Drizzle any oil left in the pan over the top then sprinkle on some flakey sea salt.


Cover the loaf loosely with cling film and put in a warm place to rise for about 30 minutes.

Meanwhile, preheat your oven to 350°F or 180°C.

Put a pan in the bottom of the oven about halfway through the preheating process. This pan gets really hot and a little water added just as you put in the loaf creates enough steam for a lovely crust.

When the second rising is done, put the baking pan with the loaf in the oven. Quickly pour a 1/2 cup or 120ml water into the pan at the bottom and close the oven immediately.

Bake for about 45-50 minutes or until the crust is nice and brown and the loaf sounds hollow when thumped.  Check halfway through and rescue any parsnips that have fallen off so they don’t burn on the pan, which would be a terrible waste when you could be eating them. Cover the loaf loosely with foil for the remainder of the baking time if you feel the parsnips or the bread is browning too fast.


If you are so inclined, you can check the internal temperature to see if the rustic parsnip bread is cooked throughout. It should be about 200°F or 93°C. in the middle.

Enjoy!


This month my Bread Bakers are baking breads with root vegetables of all kinds, with thanks to our host Karen of Karen’s Kitchen Stories. We've got both sweet and savory bakes for you today, so something for everyone!
BreadBakers
#BreadBakers is a group of bread loving bakers who get together once a month to bake bread with a common ingredient or theme. Follow our Pinterest board right here. Links are also updated each month on this home page.

We take turns hosting each month and choosing the theme/ingredient.

Pin it! 

.


Friday, April 29, 2016

Mushroom Feta Tart with Feta Thyme Crust #FridayPieDay


 This lovely mushroom feta tart is filled with mixed mushrooms, seasoned with thyme and white wine and sharp feta, baked in a yeast dough crust.  

Here’s a little news for those of you who think mushrooms can only grow in humid, dark places. The mushrooms I used in today’s tart were all grown here in the sunny United Arab Emirates.  Yeah, I know, I know, they are farmed and not wild, but still. The farms here are a testament to the persistence and dedication of many dreamers who have worked hard to see their dreams fulfilled. Emirates Mushrooms is fully organic and, according to their website, they have a growing capacity of 8000kg of mushrooms per week! Which I find incredible. And, no, this is not a sponsored post – I just thought I’d share a little of my world with you.

It’s Friday Pie Day again so let’s get on with the pie.

Ingredients
For the crust:
1/2 teaspoon active dry yeast
1/2 teaspoon sugar
3/4 cup or 180ml warm water
1/2 teaspoon salt
About 2 1/4 cups or 280g all-purpose flour
1 3/4 oz or 50g feta, crumbled
Thyme leaves off a few fresh sprigs, maybe two teaspoons
Olive oil for bowl

For the filling:
3-4 cloves garlic
1 medium onion (Mine was 90g.)2 tablespoons butter (or olive oil)
2 teaspoons fresh thyme leaves plus a sprig or two for garnish, if desired
2lbs + or 950g mixed mushrooms
1/2 cup or 120ml dry white wine
Salt
Freshly ground black pepper
3 1/2 oz or 100g feta, crumbled

Method
First we’ll make the dough for the crust. Put the warm water in a bowl with the yeast and sugar and leave to prove. The yeast should turn foamy if it’s active. If not, go buy some more yeast and start again.

Assuming you’ve got foam in your bowl, add in 2 cups or 250g of the flour along with the thyme and salt. Mix well until you have a nice wet dough. You can knead by hand but this will be easier with a dough hook if you have a stand mixer.


Add in the crumbled feta and about one more tablespoon of flour and keep kneading with the dough hook until it’s incorporated.


Turn it out onto a floured surface and knead for a few good turns by hand, adding just a little more of the flour if necessary. Form the dough into a ball.

Oil your mixing bowl and put the ball of dough in. Turn it over to coat with oil. Set aside in warm place until doubled in size.


To make the filling, clean your mushrooms, making sure to remove any dirt that clings to them.

Slice the garlic and onion finely and pull the thyme leaves off of the stems.


Melt the butter in a very large pan and sauté the garlic, onion and thyme over a low heat, until they are very soft. Stir occasionally.


Meanwhile, cut your mushrooms in two if they are small and in quarters if they are larger.


Add the mushrooms to the onion pan. Raise the flame under the pan and cook the mushrooms, stirring often, until the water comes out of them.


Continue cooking until the water all evaporates and they are dry. Cook over a high flame until the mushrooms start to brown. Keep stirring.

Add in the white wine and keep cooking until it has all evaporated and the mushrooms are almost completely dry again.


Remove the pan from the stove. Set aside a few crumbles of feta to add to the top before baking then add the rest to the pan.  Give it a few good grinds of black pepper and then stir.

Season to taste with salt. I added just a couple of pinches since the feta is quite salty. Leave the filling to cool.

Preheat your oven to 400°F or 200°C and line a baking pan with parchment or a silicone liner.

Punch down the dough and tip it out onto a lightly floured surface.

Roll it out into a circle about 13 1/2 in or 34cm wide.


Carefully transfer the circle to your prepared baking pan.

Heap the mushroom filling in the middle then spread it around until it’s about 2 in or 5cm from the edge.


Fold the sides in to contain the filling. Top the mushrooms with your few reserved feta crumbles and a couple of small thyme sprigs, if desired.


Bake in your preheated oven for about 25-30 minutes or until the crust is golden brown.

Remove and allow to cool on a wire rack for about 15-20 minutes before cutting.


Enjoy!


My friend and creator of Friday Pie Day, Heather, over at All Roads Lead to the Kitchen was thinking outside the box this month. She's sharing a cherry pie milkshake today!


I am pleased to join her on the last Friday of each month for pie and crust recipes, techniques, tools of the trade, and other inspiration.

For more information and recipes, please check out her #FridayPieDay page!

.

Sunday, August 18, 2013

Madam Wong’s Pizza Rolls

Imagine a soft dough, shaped like cinnamon rolls, but savory, baked up with pizza sauce and mozzarella. Madam Wong's Pizza rolls are delicious and portable. Perfect in a lunchbox!

Food Lust People Love: Imagine a soft dough, shaped like cinnamon rolls, but savory, baked up with pizza sauce and mozzarella. Madam Wong's Pizza rolls are delicious and portable. Perfect in a lunchbox!

Our family moved to Kuala Lumpur at the end of 2001 so our daughters started school mid-year at the International School of Kuala Lumpur in early January.  This was right after September 11 and the school decided that it would be a good idea to make sure that everyone on campus - students, teachers, administrators and parents alike - had photo identification cards.  And, while they were at it, a new system was put in place where parents could add monetary value to the cards and elementary students could use them to buy lunch and snacks in the canteen.

Within the first few days, we had met Madam Wong.  A diminutive Malaysian Chinese woman, Madam Wong was the ultimate lunch lady, kind-hearted to a fault and a very good cook and baker.  She managed to keep track of which child belonged to which mother, who wasn’t eating their lunch and who was buying all his or her friends snacks on the ID card after school.  She was not beyond chiding a child into choosing a healthier option.

When a student’s credit balance got low, parents were sent an email asking them to top it up.  If there was a delay and the child ran out completely, Madam Wong would still feed him or her, keeping a separate ledger of debts.  Technically this was against the rules but she just couldn’t bear to see a child go hungry.

Madam Wong in her normal attire -
Photo credit: Sandy Fuda

Madam Wong was also the official caterer for Girl Scout events, giving us leaders a price that I am sure left little margin for profit.  She never failed to have a kind word and a cold Diet Coke for us, even when soft drinks were banned on campus.  Needless to say, we adored her for that.  And she provided the snacks for the monthly PTA meetings.

She made a great selection of sweet and savory items but my favorite were her pizza rolls.  Soft yeast dough, rolled out flat and covered in delicious garlicky tomato sauce and cheese and then rolled up, cinnamon roll style, sliced and baked to tender perfection.  When I read that our Sunday Supper theme this week was lunchbox ideas, Madam Wong and her pizza rolls sprang to mind.  Why not make a larger version of her rolls, perhaps with added pepperoni?  These make the perfect, portable take-along lunch.  In fact, I wrapped them up and we ate them on the road, in the car, as we zipped along the highway to Abu Dhabi on Saturday. Divine.

Ingredients for eight large rolls
For the dough
2 cups or 500g strong bread flour plus extra for rolling out the dough
1 packet dried yeast (1/4 oz or 21g) – I used Fleischmann’s Rapid Rise.
1 tablespoon sugar
1/2 teaspoon sea salt
1 1/3 cups or 315ml warm (between 105° F–115° F or 41° C–46° C)  water

To assemble
1 1/2 cups or 400g pizza sauce -  I used homemade but feel free to use your favorite jarred sauce, if that makes your life easier.
1 ball fresh mozzarella (About 4 1/2 oz or 125g, drained)
1/2 cup or 50g grated mozzarella
1 3/4 oz or 50g thinly sliced pepperoni – optional
Sprinkle dried oregano - optional

Method
Pile the flour in a very large mixing bowl and make a well in the center of it.  Pour half the water into the well, then add your yeast, sugar and salt and stir them in with a fork, grabbing just a bit of flour from around the well and mixing it in.


Continue to bring the flour into the center until you get a very thick batter then add the remaining water.


Continue to mix until it's quick thick again, then you can start using your hands, gathering up all the flour and working it into the dough. Flour your hands and pat and push the dough together with all the remaining flour.


On a clean surface, knead the dough for four or five minutes, turning it and folding it over and slapping it around until you have a lovely elastic dough.


Flour the top of your dough. Put it back in the bowl, cover with plastic wrap, and allow it to proof in a warm, moist, draught-free place until doubled in size, about half an hour.   I put mine outside, in the shade but with our hot Dubai temperature, it rose like crazy, which is always my favorite part of making bread.  It’s fun to see science in action.

Before the first rising.

After the rising - it grew and grew and grew!


Line your baking pan with a little non-stick spray or oil and a bit of parchment paper cut to roughly the size of the bottom of the pan.  If you have a non-stick pan, you might skip this step.


When the dough has risen sufficiently, punch it down and roll it out into a large rectangle (about 17x13in or 44x33cm) using a light sprinkling of flour to keep it from sticking to your counter top and the rolling pin.


Spread it liberally, right to the edges, with about two-thirds of your pizza sauce.


Slice the fresh mozzarella thinly and scatter the pieces on the sauce.  Place bits of pepperoni between the mozzarella, if using.


Roll the dough up into a tube, taking care not to squeeze the sauce out the sides.  (Edit: If you are baking for small children or to make snacks, roll it up the other direction and cut 16 small rolls, instead of eight large.)


Use a serrated bread knife to slice the tube into rolls and place in your prepared pan.  Leave a little space between them so they have room for the next rising.


Top each roll with the remainder of the sauce and then sprinkle on the grated mozzarella.  Top each with a tiny pinch of dried oregano, if desired.


Cover the pan with cling film again and allow to rise for another 30 minutes.  Halfway through the rising time, preheat the oven to 350°F or 180°C.


Bake in your preheated oven at oven for 20 minutes, until golden and scrumptious-looking.

Food Lust People Love: Imagine a soft dough, shaped like cinnamon rolls, but savory, baked up with pizza sauce and mozzarella. Madam Wong's Pizza rolls are delicious and portable. Perfect in a lunchbox!

Enjoy!

Eat straight out of the oven.

Food Lust People Love: Imagine a soft dough, shaped like cinnamon rolls, but savory, baked up with pizza sauce and mozzarella. Madam Wong's Pizza rolls are delicious and portable. Perfect in a lunchbox!
Or package up for lunch on the go.


If you are looking for some great ideas to make lunchboxes tasty and interesting, and who isn’t, have a look at these inspiring ideas from my fellow #SundaySupper bloggers, hosted today by the lovely Liz of That Skinny Chick Can Bake:

Munchies, Salads and Sides
Sweet Treats