Sunday, September 11, 2011

Pasta with Spinach and Baked Camembert


A fabulously easy option for entertaining, this Camembert baked with garlic and rosemary is set on the table where guests can help themselves to a spoonful or two to drizzle over pasta that's been tossed with baby spinach. 

Last night it was my distinct and utmost pleasure to cook dinner for my elder daughter and her friends. Their cozy hallway kitchen had all the necessary tools despite its compact size and the company was superb.


Our menu included the pasta, fresh Rhode Island-grown grape tomato salad and strawberries and cream.


The fun for me started in Eastside Marketplace where I got to peruse their fresh produce and extensive selection of dried goods. I can see why it has been voted best local market for so many years. With a large Whole Foods in one direction and Eastside Marketplace in the other, the Brown and RISD students are spoiled for choice.

This recipe comes originally from one of Jamie Oliver’s books. I think it might have been Ministry of Food, but don’t quote me.

Ingredients
1 X 250g box of Camembert cheese – you want one with the wooden box
2 cloves of garlic
1-2 sprigs fresh rosemary
Sea salt and freshly ground black pepper
Extra virgin olive oil
100g of Parmesan
16 oz or 500g dried rigatoni or penne pasta
150g or three good handfuls of fresh spinach

Method
Preheat over to 180°C (350°F) degrees. Open the box of cheese and unwrap it. Place it back in the wooden container. (I suggest lining with foil first! The first time I made this, my box popped the side and my cheese melted all over the foil-lined pan that I had put it in.) Score a circle in the top of the skin, then lift it off and discard.

Peel and finely slice the garlic. Pick the rosemary leaves off the woody stalk. Lay the garlic slices on top of the cheese, sprinkle with some pepper and drizzle with a little extra virgin olive oil.


Scatter over the rosemary leaves and gently pat with your fingers to coat them in the oil. Grate the Parmesan.


Place the box of cheese on a baking tray and put it into the preheated oven for 25 minutes, until golden and melted.


(Mine was well melted after only 20 minutes so watch it.) Meanwhile, bring a large pan of salted water to the boil. When your cheese has 10 minutes left to cook, add the pasta to the pan and cook according to the packet instructions. When the pasta is cooked, add the spinach to the pan – it only needs cooking for 10 seconds or so. Drain the pasta and spinach in a colander over a large bowl, reserving some of the cooking water. (I forgot to add the spinach before I drained the pasta and found that it wilted just as nicely when added to the pot of hot pasta with the lid on.)


Drizzle with a couple of good glugs of olive oil and add the grated Parmesan. (I probably should review a recipe before I decide to make it again after many months, but I didn’t. Anyhow, I also completely forgot this part yesterday and didn’t even buy Parmesan, but in the past I have left out the last part of this step anyway and let everyone add Parmesan at the table. Some like it, some don’t in my family.) If you do add the grated Parmesan here and the sauce is too thick, add a splash of the reserved cooking water to thin it out a bit. Season with salt and pepper and give it a good stir. Remove the cheese from the oven.

Divide the pasta between your serving bowls. Either drizzle the melted Camembert on top or pop the box of cheese on the table and let everyone help themselves to a lovely, gooey spoonful.

Enjoy!

Everyone served themselves last night and then fought over the last vestiges of cheese while doing the dishes. We finished the evening sipping red wine, sharing funny stories and listening to Johnny Cash. Bliss.


Saturday, September 3, 2011

Filo Pastry with Raspberries and Whipped Cream


My mother called me the other night, all excited. She had been watching PBS and Julia Child was on with a guest chef, Gale Gand.  I have DirecTV so I don’t get her same PBS and I had to find the episode online. I don’t know if folks outside the US can watch this, but I am still in Houston, so I could.  This show first aired 15 years ago on 11 September 1996 and young pastry chef Gand made a filo pastry ice cream sandwich.  I love filo for several desserts so I was instantly intrigued. I pretty much followed her instructions for the raspberries but decided to add whipped cream to the top instead of ice cream. Also, each person would get one filo pastry “crust” instead of two, as in an ice cream sandwich.  I also didn’t bother with the berry anchor sticks since I didn’t need to hold another filo pastry circle on top.  If you can’t see the video, don’t worry. I’ll tell you what I did do!

In retrospect, this looks very much like my Meringues with Berries and Whipped Cream but is way less time consuming than making meringues so it was perfect for an impromptu visit to my sister’s.  (I had just been to the imaging center for my mammogram or “the annual mashing,” as I like to call it, so I needed cheering up and nothing cheers me up like a visit to Whole Foods and cooking something for family. Next month is Breast Cancer Awareness Month. If you haven’t been for a mammogram yet this year, consider this is your reminder to make an appointment now!)  

3 -6 oz packages of raspberries
1/4 cup of melted butter
2 tablespoons sugar plus a little extra for sprinkling
1 1/2 cups heavy whipping cream
Half package of filo pastry

I preheated my oven (actually sent youngest daughter a text from Whole Foods asking her to preheat the oven so it would be ready when I got home and finished the prep) to 400 °F or 200 °C.

I did follow Gand’s example and cut the filo into fettuccine-width strips.  As she did, I left the plastic on and pulled it all out at the same time as I fluffed up the pastry.


Then I made mounds of the pastry on a parchment covered baking sheet and drizzled them with melted butter and then sprinkled them very lightly with sugar.  I popped them into the oven and baked until golden, about 12 minutes.


While my pastry was in the oven, I prepared the berries. I had three 6 oz packages. I pureed the first one with two tablespoons of raw sugar (but white caster or fine sugar will work) and then folded in the other two packets, to coat the raspberries with the pureed mixture.


Next I whipped 1 1/2 cups of heavy whipping cream until soft peaks formed and stored it, covered, in the fridge.


When you are ready to serve, each person gets one filo pastry round, a heap of berries and a goodly scoop of whipped cream. (I ended up serving this at my sister’s house so please excuse the paper plate.) Delicious!


Enjoy!

Tuesday, August 30, 2011

Omelets with Super Powers*


Traditional omelets are made with eggs - of course! - but often include cheese, meat and vegetables in various proportions. Make your omelet suit your tastebuds and use whatever you have leftover in your refrigerator. 

When time is short and the fridge is full of leftovers no one really wants to see again, an omelet (perhaps with a green salad on the side?) is just the perfect meal. Anything and everything is fair game for an omelet. I have been known to add leftover chicken, pork, beef, mashed potatoes, baked potatoes, rice and every kind of cooked vegetable known to man. Add a little cheese and you have a meal worth eating.

First, check out the potential additions. What’s in your fridge? A chicken leg, fajita meat, one last pork chop? Any fresh herbs in the garden? Bits and ends from the cheese drawer? If you only have cheese, don’t despair. Cheese omelet is a classic.

Approximate ingredients to feed two - mix and match as your taste and leftovers dictate
Olive oil or butter for greasing the pan
1 cooked potato or other starch - My grandmother loved to use leftover rice!
Healthy handful cooked vegetables (about 1/2 cup or 75g)
Healthy handful cooked chicken, beef, pork roast, etc. (about 1/2 cup or 75g)
2-3 large eggs
2 tablespoons milk
Small handful fresh herbs of your choice
Fine sea salt
Black pepper
1 3/4 oz or 50g cheese or more! (about 1/3 cup, grated)

For instance, yesterday, I had a small baked potato that needed eating, one breast leftover from a roasted chicken and some Brussels sprouts from an entirely different meal.

Method
I chopped the potato, chicken and sprouts up and warmed them in my non-stick skillet with a little butter. You can also substitute olive oil.


Meanwhile, I whisked the eggs with the milk in a small bowl and grated some cheddar cheese.

For an omelet like this, any cheese you have will do. I have used feta and chèvre and various blues and Brie and Camembert and Tomme and many others. If your cheese won’t grate, just slice it up or crumble it instead.

I also headed out to my little backyard herb garden and harvested a bunch of green onion tops. I chopped the onion tops and added them to the eggs.


Once your vegetables or meat or whatever are warmed through, add the eggs, sprinkle with sea salt and black pepper. Turn the fire down to its lowest setting and cover the pan.


With the heat on low it may take a few minutes for the omelet to cook through. If you are feeling brave, you can try to flip it halfway through but, with the lid on and a low enough heat, this won’t be necessary.


Once the eggs are just about cooked, top with the grated or sliced cheese, turn the stove off, and put the lid back on till it melts. This happens pretty quickly.


Serve with a lightly dressed green salad. And, a glass of wine if it's dinnertime.


Enjoy!


* They clean your fridge.

Breakfast Plátano

Pan-fried in butter and sprinkled lightly with sugar, breakfast platano or plantain is a delicious meal in the morning or snack any time of day.

Plátano, or plantain as is called in the US, comes from the banana family but it is much more starchy than our every day eating bananas and can be cooked either sweet or savory.  In South America and Southeast Asia, I find it frequently sliced very thinly and fried up like a potato chip. Sometimes the cook (or manufacturer in the case of bagged chips) has chosen to sprinkle the chips with sugar, sometimes with salt, so if you have a preference (mine is always salt) read your ingredient list carefully.

Plantains are ripe when their skins are very dark, sometimes even black.  The riper they are, the sweeter they become.  Green plantains are hard and inedible unless they are cooked thoroughly. Imagine eating a cloying, very dry, raw potato.  We prefer the ripe ones.

Breakfast Plátano

This is how we cook ripe plátano or plantains for breakfast. It’s simple, nutritious (if you don't heap the sugar on) and delicious.

Ingredients
1 large, ripe plantain - the darker, the sweeter
1-2 tablespoons butter
2-3 teaspoon sugar

Method
Using a sharp knife, cut a slit down one side of the plantain and then the other, so you can peel the skin off the top half of the fruit. 

Cut the plantain into diagonal slices, making sure not to cut all the way through the bottom skin.

Place the slices in a non-stick skillet with a couple of pats of butter and a drizzle of oil to raise the burning temperature of the butter. Plain butter alone scorches easily which will give you an undesirable burnt flavor.  (I always add a tiny bit of oil whenever I sauté in butter.)


Turn the heat down to low and let the plantains cook, covered, for several minutes.  As they start to brown, turn them over.

Continue to cook them with the lid on until both sides are browned and the plantains are fork-tender, meaning you can poke a fork in them with no resistance at all. 

Turn them over once more so that the original side is up again. Sprinkle lightly with sugar, or to taste.  Let the sugar melt and then turn them over and sprinkle more sugar on the other side. You can put the lid on again at this point to make sure the sugar melts. When it is all melted, serve.  Who says a hot breakfast has to be oatmeal or eggs?


Enjoy!

Thursday, August 25, 2011

Roasted Golden and Purple Beets with Sauteed Greens

I am a lover of purple beets but had never tried golden beets. They remind me of parsnips and I would definitely buy and cook them again. Roasting seems to bring out the best in both colors.

These beets, greens attached, were bought at the farmer's market in Houston called Eastside. I love that place and go whenever I can. I originally posted this recipe along with the roast chicken a couple of weeks back but I decided to give it its own post, in case anyone is looking for a great way to cook beets. Seriously. Try roasting them. And don't waste the greens! They are delicious!

Ingredients
3 purple beets with greens
3 golden beets with greens
2 cloves of garlic
Olive oil
Sea salt
Black pepper

Method
Preheat your oven to 400°F or 200°C and grease a large baking pan with a little olive oil. 

Cut the greens off the beets and trim the stalks, leaving just the leaves. The stalks can be discarded or to the pot when you are making vegetable stock. 


Rinse the leaves several times in a full sink of water until you are sure all the dirt and sand are gone. Scrub the beets and rinse as well. Any dirt will make for a gritty mouthful so you want to clean these suckers longer than you would think necessary to make sure. 

Slice your garlic very thinly. 

 Cut the beets in half and put them in a bowl big enough to allow stirring and/or tossing. I left a little bit of the stalks on, because I think they look pretty.


Drizzle with olive oil, white or dark balsamic vinegar, sea salt and freshly ground black pepper. By stirring or tossing, make sure the beets are completely coated.


Tip the beets onto it your prepared baking pan. Turn them to expose the cut sides and pop them into your preheated oven.


Meanwhile, heat a little olive oil in a skillet and gently fry the sliced garlic with a little olive oil. 

Add the beet greens and let them cook just a few minutes until they wilt. Add a little sea salt and freshly ground black pepper and cook a few minutes more. Spread the greens around on the serving platter and put the garlic slices on top.


After 15 minutes, turn the oven down to 350°F or 180°C and cook the beets until they are fork tender, turning halfway through so that the cut sides face the pan. I ran out of time for the beets because my chicken needed to be on a middle shelf. It was browning much too quickly up higher, with the beets down below, so I ended up taking the beets out after about 45 minutes and putting them back in their mixing/tossing bowl which was glass and microwaving their already well-roasted selves into fork-tenderness. You should cook them the whole time in the oven, if you can! 

Then I arranged them lovingly on the bed of greens. 

Absolutely delicious! A little sweet, a little salty and with the hint of balsamic still showing. This may even win over a non-beet person. 


Enjoy! 


Thursday, August 18, 2011

Neen’s Stuffed Crab

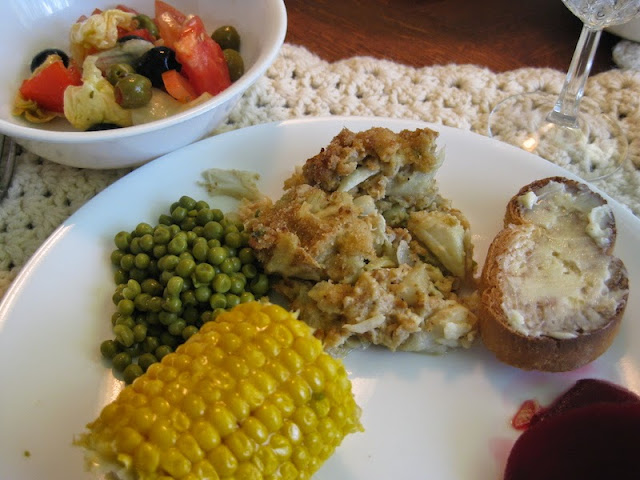
Straight from the pages of The Shadows on the Teche cookbook from New Iberia, Louisiana, Neen's Stuffed Crab is made with fresh picked lump crab meat. It's rich and delicious.
 
Food Lust People Love: Straight from the pages of The Shadows on the Teche cookbook from New Iberia, Louisiana, Neen's Stuffed Crab is made with fresh picked lump crab meat. It's rich and delicious.


From Susie Pharr in the Shadows on the Teche cookbook

This recipe is a tribute to extended family. My Aunt Nonnie, our lovely hostess for the weekend in New Iberia, was blessed with a wonderful sister-in-law named Susie Pharr. Susie’s reputation as a great cook, gracious hostess and generous friend is known far and wide. 

Sadly, we lost Susie to cancer a couple of years back but her legacy of recipes remains because she generously contributed to the Shadows on the Teche cookbook, even as she willingly shared her recipes with friends and family.  This recipe goes back even farther, as it came to her from her husband Mark’s Aunt Neen, who raised him. Passing on recipes is what family is all about.  Cooking together and eating together make that all the more special.  

Neen’s Stuffed Crab
My aunt follows the recipe exactly so she uses margarine but I substitute butter when I make this at home because I never buy margarine. You do you. 

Ingredients
2 medium onions, finely chopped
3 cloves garlic, minced
2 stalks celery, finely chopped
1 medium bell pepper, finely chopped
1/2 pound margarine 
3 stale or day-old hamburger buns
1 cup evaporated milk
2 eggs, beaten
2 pounds crabmeat
1 teaspoon Accent (Monosodium glutamate or MSG)
1/2 cup dried breadcrumbs (I like to use half panko half regular dried)
Butter for topping

Method
Sauté onions, garlic, celery and bell pepper in 1/2 pound margarine until very, very soft.


Crumble hamburger buns and add milk, let soak about one minute.


Add eggs to hamburger buns and milk. 


Add crabmeat to the sautéed seasonings and mix gently.  

Fresh picked, never frozen - it makes all the difference!


Add hamburger bun mixture and heat thoroughly.  


Season to taste.  This filling may be put into crab shells or into a casserole with bread crumbs on top. (Aunt Nonnie also got me to add a few pats of butter.) 

Bread crumbs going on.

My only contribution - the pats of butter.

Bake at 350°F for about 20 minutes.

Food Lust People Love: Straight from the pages of The Shadows on the Teche cookbook from New Iberia, Louisiana, Neen's Stuffed Crab is made with fresh picked lump crab meat. It's rich and delicious.

Enjoy!

Food Lust People Love: Straight from the pages of The Shadows on the Teche cookbook from New Iberia, Louisiana, Neen's Stuffed Crab is made with fresh picked lump crab meat. It's rich and delicious.


Even before the meal itself, the best part of getting together with family is the opportunity to hear the old stories. We laughed until we cried at the foibles of family members as youngsters.  Unfortunately, I cannot share those stories because said relatives are now successful adults and would undoubtedly sue. :)