Tuesday, January 15, 2013

Citrus Lust Mini Bundt Cakes with Lemon Curd for #BundtaMonth

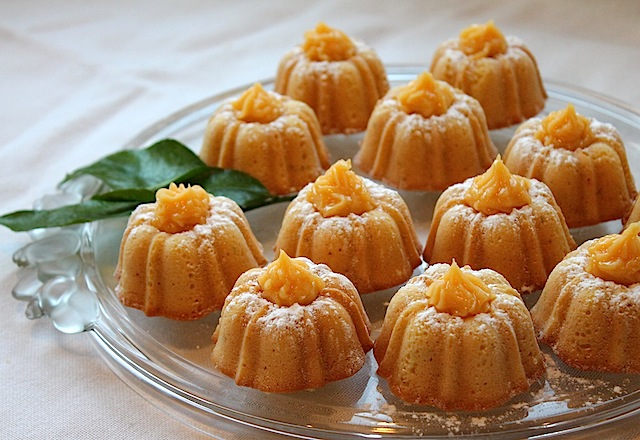
Citrus Lust Mini Bundt Cakes are topped with homemade lemon curd for a gorgeous and deliciously sweet and tart dessert that will delight fancy guests and family alike.

Food Lust People Love: Citrus Lust Mini Bundt Cakes are topped with homemade lemon curd for a gorgeous and deliciously sweet and tart dessert that will delight fancy guests and family alike.

I’m just wondering if anyone out there still has lemon curd left over.  You did all make some, right?  Because I have one more recipe that calls for lemon curd.

Last year when I was still living in Cairo, I left a comment on someone’s blog about the cute paper cupcake liners she had used.  The author responded that they were Wilton and so, she was sure I could find them in a shop nearby.  It seems she lived in some remote area of Canada and, if THEY had them, my shop surely would.  When I wrote to back to say I was in Cairo, Egypt and there were no Wilton things, much as I wished there were, she was sorry for me.  And I was sorry for me.  And, then, and then!  We moved to Dubai and take a gander at just ONE SIDE of the baking aisle in my neighborhood shop.


Not even a specialty shop, lovely people, this is the grocery store just minutes from my house.  Which is dangerous.  They’ve got Wilton paper liners and gel colors and baking pans and decorating tips and, what’s more, they even have Nordic pans!  Woo hoo!  Which brings me to my recent purchase and the recipe at hand.  This month’s BundtaMonth theme is citrus so I decided to let what was available make the decision for me.  I came home with grapefruit, lemons, limes and large clementines.  And a mini Bundt pan.   And so, I give you Citrus Lust Mini-Bundt Cakes with Lemon Curd.


Ingredients
1 3/4 cups or 220g flour
1/2 teaspoon baking powder
1/2 teaspoon baking soda
1/4 teaspoon salt
1/3 cup or 85g butter, room temperature
3/4 cup or 170g sugar
2 large eggs
2 tablespoons citrus zest (I used a 1/2 tablespoon each of clementine, grapefruit, lemon and lime.)
1/2 cup freshly squeezed citrus juice
(I used:
1/8 cup freshly squeezed clementine juice
1/8 cup freshly squeezed lemon juice
1/8 cup freshly squeezed lime juice
1/8 cup freshly squeezed grapefruit juice)

For topping:
About 1/2 cup or 115ml lemon curd
Powdered or icing sugar for sprinkling, optional

Method
Preheat oven to 350°F or 180°C.  Grease and flour a 12-cup mini-Bundt pan.  (I just used Pam spray because the Nordic pans release quite easily.  If your mini-Bundt pan sticks a lot, do use flour as well.)

In a medium bowl, whisk together flour, baking powder, baking soda and salt.


Zest your fruit.


Juice your fruit and transfer the needed amounts into measuring jug.

Juicing - the aftermath
In a large mixing bowl, cream together the butter and sugar until fluffy.


Beat in the eggs, one at a time.


Next add in the citrus zests.


Continue beating, adding in about one-third of the flour mixture and then one-third of the juice.  Scrape down the sides of the bowl.  Continue beating and alternating until all the flour and juice is in the batter.


Pour the batter into your prepared pan.  I find it less messy and easier (aside from having one more thing to wash) to transfer my batter from the wide-mouth mixing bowl to a narrow measure vessel for pouring.  Or you could choose to ladle it in.


Bake for 20-25 minutes in your preheated oven or until a toothpick inserted into the center of the mini cakes comes out clean.


Let the cakes cool for about five minutes, then turn out to cool completely.  There is an ad for the pan at the bottom of this post.  I am new to this (my first Google Affliates ad!) but I think if you buy one, I make some small change.


If yours have risen up over the top of the pan, as mine did, cut the bottoms off with a serrated knife so that the mini Bundts can stand upright.  Whatever you cut off is yours to eat immediately.  No questions asked.


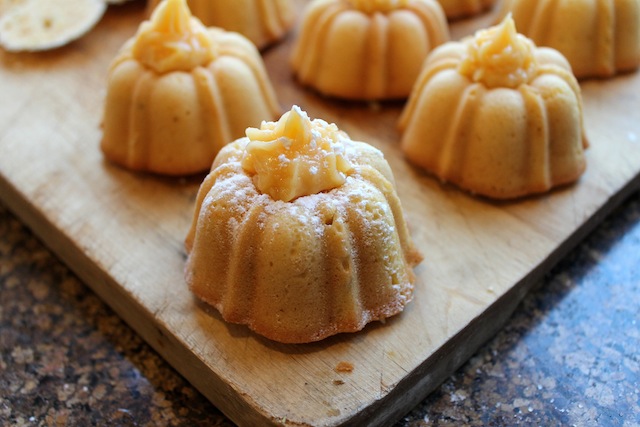
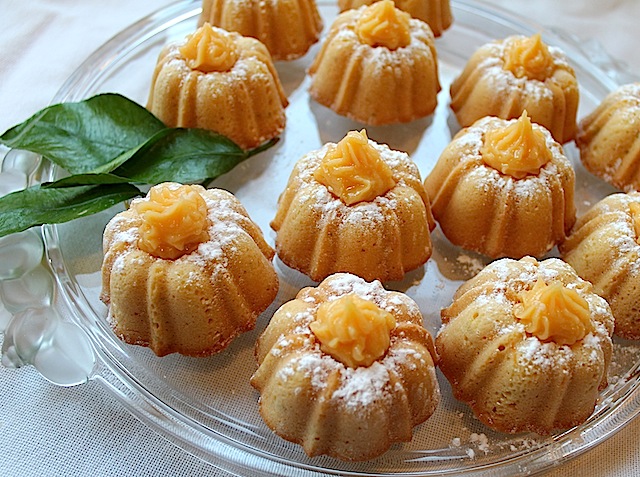
Use a pastry decorating bag to pipe the lemon curd into the hole on the top of the little cakes.

Food Lust People Love: Citrus Lust Mini Bundt Cakes are topped with homemade lemon curd for a gorgeous and deliciously sweet and tart dessert that will delight fancy guests and family alike.

Sprinkle with a little powdered or icing sugar, if desired.

Food Lust People Love: Citrus Lust Mini Bundt Cakes are topped with homemade lemon curd for a gorgeous and deliciously sweet and tart dessert that will delight fancy guests and family alike.

Enjoy!

Food Lust People Love: Citrus Lust Mini Bundt Cakes are topped with homemade lemon curd for a gorgeous and deliciously sweet and tart dessert that will delight fancy guests and family alike.

Food Lust People Love: Citrus Lust Mini Bundt Cakes are topped with homemade lemon curd for a gorgeous and deliciously sweet and tart dessert that will delight fancy guests and family alike.

Have a look at all of the wonderful Tangy January Bundts we’ve baked this month. You may notice that one of our wonderful hosts is missing this month. Sending love out to Lora from Cake Duchess whose family suffered a huge loss earlier this month. Our thoughts and prayers are with you, Lora. XOXO


Pin these Citrus Lust Mini Bundt Cakes with Lemon Curd! 

Food Lust People Love: Citrus Lust Mini Bundt Cakes are topped with homemade lemon curd for a gorgeous and deliciously sweet and tart dessert that will delight fancy guests and family alike.

 .

Monday, January 14, 2013

Apple Raisin Almond Muffins #MuffinMonday

Amaretto-soaked golden raisins are nestled along with chopped tart apples and almond slivers in a delicious muffin batter and baked to golden perfection.


Here’s the thing.  I’m not a big fan of pears (can’t bear the grittiness between my teeth - is it just me?) OR dates (except for in sticky toffee pudding where you don’t even KNOW that there are dates) and that’s what today’s Muffin Monday original recipe was all about.

So then I start to substitute.  What DO I like that is similar to pears.  Apples, of course.  And for the dates?  How about some raisins?  Yeah, golden raisins would be nice.  But that seemed so bland.  What about if I soaked the raisins in something?  Now we were talking!  So I soaked the raisins in Amaretto, which led me to add almonds to the batter as well.  As I told Muffin Monday organizer, Anuradha, when I sent her my link, these muffins evolved on their own!  And all I can say is, Good job, guys!  Now I am just gonna sit back and see what my dinner ingredients do.  Further bulletins as events warrant.

Apple Raisin Almond Muffins


Ingredients
3 1/2 oz or 100g golden raisins
1/4 cup or 60ml Amaretto
1 1/8 cup (tightly packed) or 235g light brown sugar
1 1/2 cups or 185g flour
2 1/2 teaspoons baking powder
1/2 teaspoon salt
1/4 cup or 60g butter, melted and cooled
1/4 cup or 60ml milk
2 eggs
3/4 cup or 50g slivered almonds, divided
2 small green (or other tart) apples

Method
Soak the raisins in the Amaretto for an hour or two or overnight if you are organized.


Preheat your oven to 350°F or 180°C.  Line a standard 12-cup muffin pan with paper cases or grease liberally.  (You may actually get more than 12 muffins out of this batter, depending on your cup size and your apple size.  My batter ending up being enough for 16 muffins.)

In a large bowl, mix together your flour, light brown sugar, salt and baking powder.


In a smaller bowl, whisk your eggs, butter and milk.

Drain the Amaretto that hasn’t soaked into the raisins into this bowl too and whisk again.


Peel, core and dice your apples.


Pour the wet ingredients into the dry and mix until just moistened.


Add in the raisins and two-thirds or about 1/2 cup of the almonds, reserving the rest for topping, and mix gently.


Fold in the apple pieces.  This is going to look like way too much apple and way too little batter, but it works.  Trust.


Divide the batter into the muffin cups.


Sprinkle the tops with the reserved slivered almonds.


Bake in your preheated oven for 20-25 minutes, or until a toothpick inserted into a muffin comes out clean.


Allow the muffins to cool for a few minutes in the muffin tin and then remove to a rack to cool completely.


Enjoy!


Sunday, January 13, 2013

Jalapeño Popper Chicken Chili


Doing a little research on one of my favorite appetizers, the jalapeño popper, I discovered that some form of deep-fried cheese-stuffed jalapeño has been around since at least the 1960s, where it was being served in restaurants in Baja California, specifically Ensenada, which Wikipedia informs me is nicknamed La Cenicienta del Pacífico or Cinderella of the Pacific.  With no further information on that, by the way.

Is it because Ensenada is the pretty stepsister that everyone abuses?  Does it have sister cities that get better press despite their ugliness?  A little further reading revealed that Ensenada does indeed have sister cities: Newport Beach, Redondo Beach and Riverside.  Each pretty and amazing in its own right.  So, no wiser about the nickname, let’s just get on to the recipe.  (And this is why your teachers tell you not to use Wikipedia as a reference, people: Gaps.)

This week Sunday Supper turns one year old!  In celebration of that momentous occasion, we have each chosen a recipe from another #SundaySupper blogger that caught our fancy during the past year, to give it a try.  Our Dubai weather has turned a bit chilly in the last couple of days (Yeah, I know, not actually chilly when compared to northern climes but BBC Weather is projecting a low of 45°F or 7°C on Wednesday night!  That’s COLD for us, folks!) so I chose to adapt a wonderfully warming recipe from Hezzi-D’s Books and Cooks, based on the aforementioned favorite, jalapeño poppers.

Jalapeño Popper Chicken Chili

I left in the seeds and membranes from the peppers so that upped the warmth factor quite a bit but you can totally take them out if you can't do spicy. This chili gets a 10 out of 10 at our house and I will definitely be making it again. Perhaps even for Super Bowl Sunday. I’m kind of even thinking it could be eaten as a hot dip with tortilla chips.  It’s that seriously good.

Ingredients

Olive oil
1 small onion
1 red bell pepper
4 fresh jalapeño peppers
4 garlic cloves
Sea salt
Black pepper
1 1/4 lb or 600g boneless, skinless chicken breasts
2 teaspoons chili powder
1 tablespoon ground cumin
1 teaspoon smoked paprika
1 (15 oz or 425g) can diced or chopped tomatoes in juice
1 1/2 cups or 355ml chicken broth
2 cans (14 oz or 400g each) cannellini beans
2 cups or 300g frozen corn
8 oz or 225g cream cheese
5 slices bacon
1/2 cup or 50g sharp cheddar cheese
Handful green onion tops, optional for garnish


Method
Cut the stem end off of your jalapeños.  If you want to remove the seeds and membranes, to lessen the spicy factor, cut the peppers in half lengthwise and scrape them out with a teaspoon.

Cut your onion into halves.  Cut the tops off of the red bell pepper or capsicum Remove the seeds and membrane.  Cut it into quarters.


Pop all three into your food processor along with the cloves of garlic or chop them all with a sharp knife, until they are finely minced.


In a pot large enough to eventually hold all of your ingredients, sauté the vegetable mixture in a good drizzle of olive oil for about five to seven minutes, or until they are soft and the onion is translucent.


Cut your chicken breasts into bite-sized pieces and season them lightly with salt and black pepper.


Drain and rinse your cans of cannellini beans.


Push the vegetables to the side of the pot and add in the pieces of chicken.  Lightly brown the chicken on all sides.


Add in the chili powder, cumin, and smoked paprika.  Stir to thoroughly coat the chicken with the spices and vegetables.


Add the can of chopped tomatoes, rinsed beans and corn to the chicken pot.  Stir well and then add the chicken stock.  When it starts bubbling again, lower to a simmer and cook for 30 minutes.  Stir occasionally.


Meanwhile, grate your sharp cheddar cheese and fry your bacon until crispy.  Cut the bacon into little pieces.   Chop your onion tops, if using.


Cut your cream cheese in slices if it comes in one big block.  Smaller pieces will melt faster into the chili.  As you can see from my photo, our cream cheese, brand name: Kiri, comes in small blocks so, while it was a process to open up enough little packets, the cutting was not necessary.


Add in the cream cheese and stir until it is completely melted, about five minutes.  Remove from heat.


Ladle the chili into a bowl and top with crumbled bacon and cheese, adding a sprinkle of chopped onion tops for color, if desired.


Enjoy!


Have a look at some of the other Happy Birthday, #SundaySupper dishes that are being posted today! So much deliciousness!

Sunday Supper Appetizers:

Sunday Supper Soups and Breads:

Sunday Supper Main Dishes: 

Sunday Supper Veggies: 

Sunday Supper Desserts and Snacks: 

Sunday Supper Breakfast Faves:

Sunday Supper Wine Pairings by ENOFYLZ Wine Blog