Showing posts with label British recipes. Show all posts

Sunday, February 25, 2024

Mini Scones

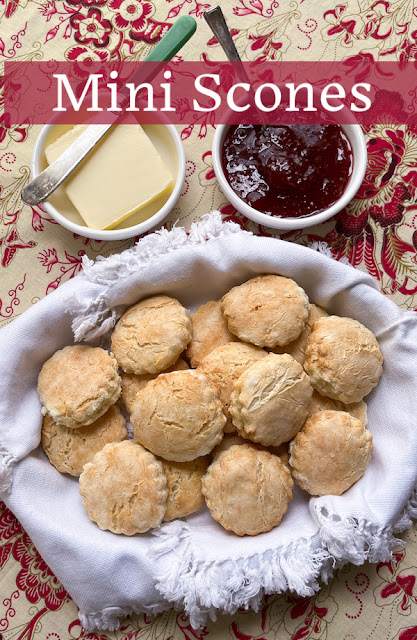
These fluffy two-bite mini scones are a wonderful addition to your breakfast table. Serve them hot so that pat of butter will melt inside when you split them in two!

Food Lust People Love: These fluffy two-bite mini scones are a wonderful addition to your breakfast table. Serve them hot so that pat of butter will melt inside when you split them in two!

This recipe is based on one that a Scottish friend shared with me. She uses self-rising flour and cream to make hers a two-ingredient dough and didn’t have any measurements to offer! “Just add enough of each to make a proper scone dough,” said she. Challenge accepted! (In her defense, she went to culinary school so this stuff is second nature to her.)

Don’t panic though. I’m going to give you ingredient amounts so you can replicate these little mini scones. I used a 2 in or 5cm cookie cutter. You can use a bigger cookie cutter to make larger scones. You’ll just have to pat the dough out a little thicker so that they are proportional and bake them a little longer.

Gillian would appreciate this, she of no actual recipe: One time I didn’t have cream so I started making these with full fat Greek yogurt instead. I do love experimenting! It adds a lovely flavor and works fabulously. That is the recipe I'm sharing today.

Mini Scones

If you have self-rising flour you know is active, by all means, use it instead of the cake flour, baking powder, baking soda and salt, adding an extra 2 teaspoons of flour. I don’t often buy self-rising flour because I find it gets old if not used up in a timely manner. I keep the baking powder in the refrigerator so it’s always active well past its sell by date.

Ingredients 
1 cup or 245g full fat Greek yoghurt
1 3/4 cups or 218g flour
1 1/2 teaspoons baking powder
1/4 teaspoon baking soda
1/4 teaspoon fine sea salt

To brush on before baking: 2-3 tablespoons milk

Method
Preheat the oven to 350°F or 180°C. Line a large baking sheet with baking parchment or a silicone liner. 

In a mixing bowl, mix together the flour, baking powder, baking soda and salt. 

Fold the yoghurt and flour mixture together until fully incorporated. If the mixture is too dry or too wet, add more flour or more yogurt accordingly. You are looking for a soft dough that isn’t too sticky.


Press the scone mixture flat until it’s about 1/2 in or 1cm thick, then use a small cookie cutter to make circles. 


Patch together the leftover dough, trying not to knead it much and pat it out again. 


Cut out more scones. Place them on the lined baking tray, almost touching. Use a pastry brush to brush the tops with a little milk. 


Bake for 15-20 minutes, or until the scones are risen, golden, and cooked through. 


I like to split them in two right when they come out of the oven and add a pat of butter. 


Or serve with jam and butter or cream while still warm.

Food Lust People Love: These fluffy two-bite mini scones are a wonderful addition to your breakfast table. Serve them hot so that pat of butter will melt inside when you split them in two!

Enjoy!

It’s Sunday FunDay and today we are sharing recipes to celebrate National Hot Breakfast Month. We hope to inspire you to get in the kitchen and cook a hot breakfast for yourself or someone you love before February ends. Check out the links below: 

 
We are a group of food bloggers who believe that Sunday should be a family fun day, so every Sunday we share recipes that will help you to enjoy your day. If you're a blogger interested in joining us, just visit our Facebook group and request to join.


Pin these Mini Scones!

Food Lust People Love: These fluffy two-bite mini scones are a wonderful addition to your breakfast table. Serve them hot so that pat of butter will melt inside when you split them in two!

 .

Sunday, June 12, 2022

Classic Eton Mess

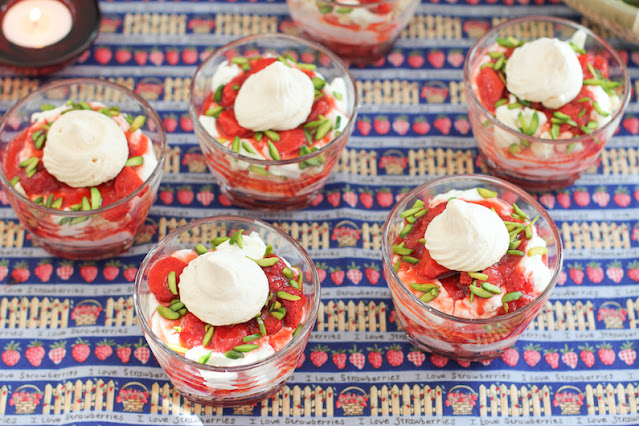
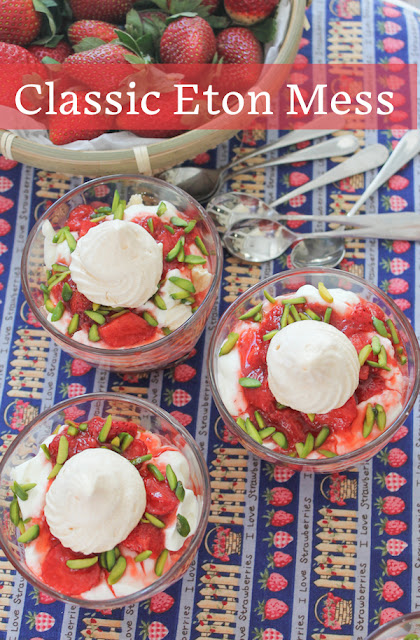
A Classic Eton Mess has three essential ingredients, beautifully ripe strawberries, meringue and whipped cream. It can easily be made with store-bought meringues, for a simple yet lovely dessert, pretty enough for company.

Food Lust People Love: A Classic Eton Mess has three essential ingredients, beautifully ripe strawberries, meringue and whipped cream. It can easily be made with store-bought meringues, for a simple yet lovely dessert, pretty enough for company.

The folklore behind the quintessential English dessert, Eton Mess, is that it was created when a group of Etonians, students at that famous school, were headed out for a picnic, a meringue topped with whipped cream and berries stashed in the car. The story goes that one of their dogs stepped on the dessert, crushing the meringue and generally making a mess of it. They ate it anyway and declared it delicious.

But if Wikipedia is to be believed, the truth is rather less romantic. The classic Eton mess was first mentioned in print back in 1893. To quote that source, “Eton mess was served in the 1930s in the school’s ‘sock shop’ (tuck shop), and was originally made with either strawberries or bananas mixed with ice-cream or cream. Meringue was a later addition. An Eton mess can be made with many other types of summer fruit, but strawberries are regarded as more traditional.”

Classic Eton Mess

This can be made in one big bowl from which you will serve with a spoon or in six individual bowls. The pistachios are not traditional but they add a lovely pop of green to the Classic Eton Mess. If you are making your own meringues, start one day ahead of assembling and serving this dessert to leave plenty of time for the meringues to dry out and get crunchy. 

Ingredients
1 1/2 lbs or 680g ripe strawberries
1/2 cup or 100g sugar
Pinch salt
1­-2 tablespoons orange liqueur (e.g. Triple Sec, Cointreau or Grand Marnier)
1 1⁄2 cups or 360ml whipping cream 
18 small meringues­ - homemade or store-bought 
2 tablespoons pistachio slivers, optional

Method
Hull and chop the strawberries roughly.


Put half of the chopped strawberries in a small pot with the sugar, a good pinch of salt and a tablespoon of water. 


Cook over a medium heat for about 3­-4 minutes, crushing the strawberries lightly with a fork or potato masher when they start to soften. Cook at a low boil for another 3­-4 minutes, until the strawberries and syrup that is created have thickened somewhat.


Put the hot strawberries in a heatproof bowl, stir in the orange liqueur and leave to cool. 


Stir in the rest of the strawberries. Cover with cling film and refrigerate until completely chilled.


Once the strawberries are cold, whip the cream into stiff peaks. Divide it in half and fold one quarter of the strawberries into half of the cream.

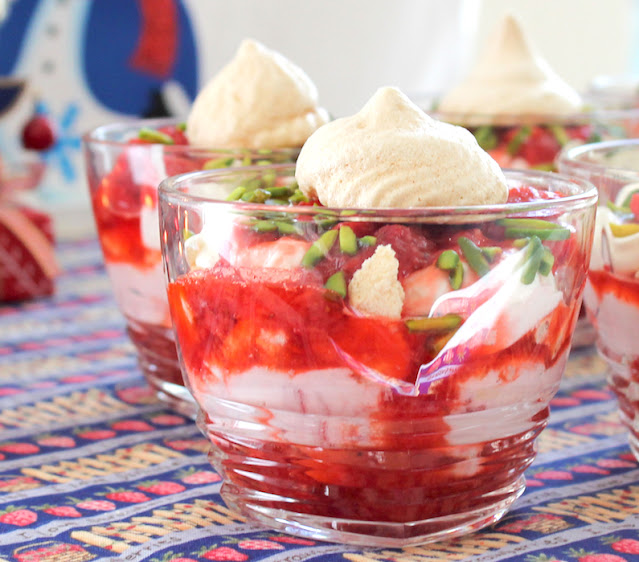
To serve, make small layers from the bottom: 
1. strawberries 
2. pink cream (with strawberries)
3. 2 small meringues, crumbled roughly 
4. white cream (plain)
5. strawberries 
6. slivered pistachios (if desired) and a whole mini meringue on top.

Food Lust People Love: A Classic Eton Mess has three essential ingredients, beautifully ripe strawberries, meringue and whipped cream. It can easily be made with store-bought meringues, for a simple yet lovely dessert, pretty enough for company.

Enjoy! 

Food Lust People Love: A Classic Eton Mess has three essential ingredients, beautifully ripe strawberries, meringue and whipped cream. It can easily be made with store-bought meringues, for a simple yet lovely dessert, pretty enough for company.


It’s Sunday FunDay and what could be more fun than some great dessert recipes. Check them all out below. Many thanks to our host, Sneha of Sneha’s Recipe

 
We are a group of food bloggers who believe that Sunday should be a family fun day, so every Sunday we share recipes that will help you to enjoy your day. If you're a blogger interested in joining us, just visit our Facebook group and request to join.


Pin this Classic Eton Mess!

Food Lust People Love: A Classic Eton Mess has three essential ingredients, beautifully ripe strawberries, meringue and whipped cream. It can easily be made with store-bought meringues, for a simple yet lovely dessert, pretty enough for company.


Wednesday, July 7, 2021

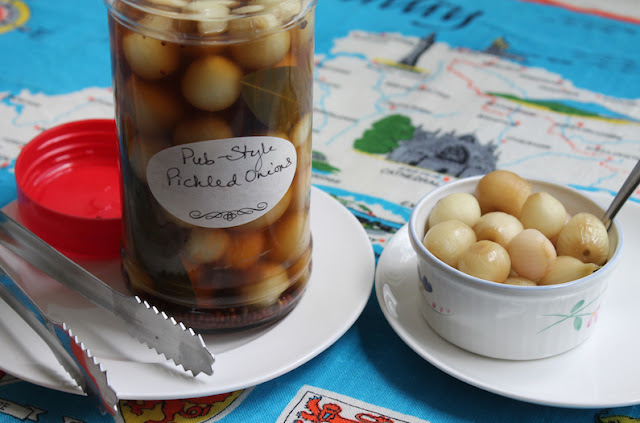
Homemade Pub-Style Pickled Onions

Homemade pub-style pickled onions are easy to make, crunchy and sour with a hint of sweetness, perfect with sharp cheddar cheese or in a dirty martini. 

Food Lust People Love: Homemade pub-style pickled onions are easy to make, crunchy and sour with a hint of sweetness, perfect with sharp cheddar cheese or in a dirty or dry martini.

Any pub in the UK worth its salt will have jars of pickled onions to serve with a ploughman’s lunch of cheese, bread and ham. The better ones will offer you pickled onions they’ve made themselves. Honestly, it’s so easy, they really all should. 

The only fiddly thing is peeling the tiny onions and that is made easier by covering them in boiling water and then refreshing them in iced water. The skins just slip right off. Save them to throw in your next stockpot so they don’t go to waste. 

Homemade Pub-Style Pickled Onions

Ideally, you should make this using genuine Sarson’s Malt Vinegar or, failing that here in the States, at least make sure you use malt vinegar. This recipe is adapted from one on the Sarson’s website.

Ingredients
2 cups or 475ml malt vinegar
1 lb or 450g small pickling onions 
2 tablespoons fine sea salt
1/2 cup or 100g granulated sugar
10 peppercorns
2 teaspoons mustard seeds
1 teaspoons coriander seeds 
2 bay leaves

Method
Put the onions in a large heatproof bowl. Cover them with boiling water and stir for about 30 seconds. Drain them in a colander them return them to the bowl and cover with iced water. Drain again. 


To peel them cut off the stem end and squeeze the little onion out of its peel. Or if you tend to lose another layer of onion this way, you can cut off both end and use a sharp knife to remove the skins. 


Once the onions are peeled, put them in non-reactive bowl and sprinkle them with the salt. Cover the bowl with a upturn plate or some cling film and leave overnight or up to 24 hours. When you think about it, give the onions a good shake to make sure they are all equally as salted.


Meanwhile pour the vinegar and sugar into a large saucepan with the peppercorns, mustard seeds and bay leaves. My bay leaves are fresh but you can certainly use dried ones. The Sarson recipe didn't specify. 


Put the lid on the pan, bring to the boil then remove from the heat and set aside to allow the spices to infuse.


The following day rinse the onions with cool running water and then pat them dry.

Pack the onions into a sterilized 20 oz or 600ml jar with the bay leaves. 


Pour over the vinegar, along with the mustard, peppercorns and coriander. Completely cover the onions with the liquid. Seal and leave to pickle in a cool place for 6 weeks. Since it’s a warm summer where I am right now, I left mine to pickle in the kitchen for three days and then refrigerated the jar for the rest of the time. 

Food Lust People Love: Homemade pub-style pickled onions are easy to make, crunchy and sour with a hint of sweetness, perfect with sharp cheddar cheese or in a dirty or dry martini.

Enjoy these pub-style pickled onions with cheddar and ham or in a dry martini. 

It’s the first Wednesday of the month and that means it’s time for our Foodie Extravaganza party. This month we are celebrating National Pickle Month. Check out of the great pickle recipes below. Many thanks to our host, Camilla of Culinary Adventures with Camilla


Foodie Extravaganza is where we celebrate obscure food holidays by cooking and baking together with the same ingredient or theme each month. Posting day is always the first Wednesday of each month. If you are a blogger and would like to join our group and blog along with us, come join our Facebook page Foodie Extravaganza. We would love to have you! If you're a spectator looking for delicious tid-bits check out our Foodie Extravaganza Pinterest Board.

Pin these Homemade Pub-Style Pickled Onions!

Food Lust People Love: Homemade pub-style pickled onions are easy to make, crunchy and sour with a hint of sweetness, perfect with sharp cheddar cheese or in a dirty or dry martini.
 .

Wednesday, April 1, 2020

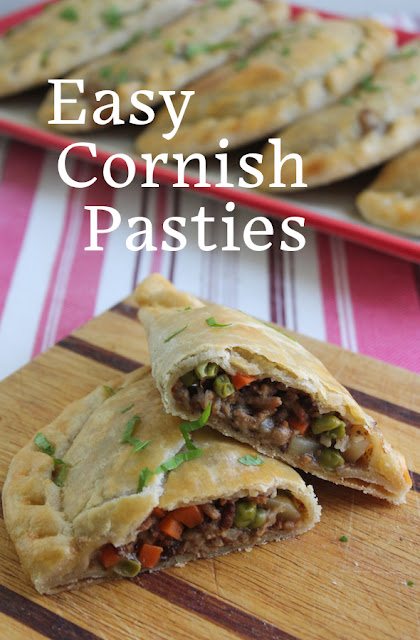
Easy Cornish Pasties #FoodieExtravaganza

Made with ground beef instead of tough stewing beef, the filling for these easy Cornish pasties is ready much more quickly, which means you will be munching on these beauties in record time.

Made with ground beef instead of tough stewing beef, the filling for these easy Cornish pasties is ready much more quickly, which means you will be munching on these beauties in record time.

Let me start by saying that these are not traditional Cornish pasties. Those are made with stewing beef cut in small pieces, cooked long and slow until tender. After making ground lamb version of a Lancashire Hot Pot, it occurred to me that Cornish pasties could get the same treatment. Like ground lamb, ground beef cooks much more quickly since it’s tender already!

One other difference from classic Cornish pasties is the shortcrust I used. We prefer a thin flaky crust but that means that that these guys are challenging to eat by hand unless you cut them in half. That’s probably high treason in Cornwall but I think it’s worth it! Hey, I’d eat these with a knife and fork if need be. Traditionally, Cornish pasties were made from a sturdier dough so they could be taken to work by tin miners, fishermen and farmers. The crimped side crust was actually discarded! If you'd like to read more about them, this article in the Guardian is short but interesting.

Easy Cornish Pasties

The filling for my easy Cornish pastries is very similar to what I make for cottage pie, except for the Worcestershire sauce. If you double the recipes, you can even use it to stuffed baked potatoes.

Ingredients
For the shortcrust dough:
312g flour
140g shortening (I use Crisco.)
1 teaspoon salt
6-7 tablespoons ice water

For the filling:
1 medium onion, peeled and finely chopped
2 garlic cloves, peeled and minced
1 medium size potato, peeled and cut in cubes
1 medium carrot, diced to pea-size cubes
2 tablespoons olive oil
8 oz or 225g ground beef
2 tablespoons flour
2 cups or 480ml beef stock
fine sea salt to taste – depends on how salty your beef stock is!
freshly ground black pepper
1/2 cup or 70g frozen peas
chopped parsley to garnish

To bake the Cornish Pasties:
1 egg, beaten
1 tablespoon water
Method
First, make the shortcrust pastry: In medium bowl with fork, lightly stir together flour and salt
With pastry blender, cut in shortening until mixture resembles coarse crumbs.


Sprinkle in cold water, a tablespoon at a time, mixing lightly with a fork after each addition until pastry just holds together.


Shape the pastry into a ball then press it flat. Wrap it in cling film and refrigerate at least 30 minutes.


Soak the carrot and potato in cool water so they don’t discolor.

Heat the oil in a large pot. Pop the ground beef in and fry it until it’s browned, even crispy in places, if possible. Add a little more oil if need be. Break up the beef into little pieces as it cooks. 


Add in the onion and garlic and cook for a few more minutes until they soften. 


Drain and add potato and carrot fry for a couple of minutes.

Add flour stir well and pour the beef stock over, and a generous pinch of freshly ground black pepper and stir some more. 


Reduce the heat, partly cover and leave to simmer for about 15-20 minutes or until the carrot and potato are almost completely cooked, stirring occasionally.

When the filling is cooked, taste and add more salt and pepper if needed. I found my beef broth salty enough so I didn’t add any salt. Stir in the peas. 


Leave the filling to cool completely. I put mine in a bowl in the refrigerator so it would cool more quickly.

Preheat the oven to 350°F or 180C. Line a baking pan with baking parchment.

Separate the shortcrust pastry into six equal pieces. Roll each piece out into a circle of about 7 in or 19cm. Brush around the edges with water.


Put 1/6th of the filling on one half of the circle. 


Fold the pastie in a half and seal it by crimping the edge all the way around. 


Place the pasties on the lined baking pan and glaze them with the egg beaten with the water to loosen.


Bake them in your preheated the oven for about 30 minutes or until the outsides are golden and the insides are bubbling hot.

Made with ground beef instead of tough stewing beef, the filling for these easy Cornish pasties is ready much more quickly, which means you will be munching on these beauties in record time.


Cool them and enjoy warm or cold. I like them the best warmed, whether when just baked or after a short spell in an oven to rewarm. 

Made with ground beef instead of tough stewing beef, the filling for these easy Cornish pasties is ready much more quickly, which means you will be munching on these beauties in record time.


Enjoy!

This month my Foodie Extravaganza friends are sharing empanada recipes at the instigation of our host, Sue of Palatable Pastime. Sue was kind enough to allow us the latitude of sharing any empanada-shaped pastry so I chose these Cornish Pastries. Same shape, different filling.

Check out all the other lovely empanadas or empanada-inspired recipes we are sharing this month:


Foodie Extravaganza is where we celebrate obscure food holidays by cooking and baking together with the same ingredient or theme each month. Posting day is always the first Wednesday of each month. If you are a blogger and would like to join our group and blog along with us, come join our Facebook page Foodie Extravaganza. We would love to have you! If you're a spectator looking for delicious tid-bits check out our Foodie Extravaganza Pinterest Board!

Pin these Easy Cornish Pastries!

Made with ground beef instead of tough stewing beef, the filling for these easy Cornish pasties is ready much more quickly, which means you will be munching on these beauties in record time.
 .

Friday, June 24, 2016

Staffordshire Yeomanry Pudding #FridayPieDay

Staffordshire Yeomanry Pudding is a classic British dessert. It’s essentially a pie with two flakey sweet crusts, top and bottom, baked with an almond custard filling. 

Join me down the rabbit hole, where one book leads to another book, leads to another book.

Five years ago today, I wrote my first post on this blog, created initially to give me a place to join my two loves, cooking and writing. Over the years, as readership grew, it also became a place to connect with the world at large and make friends both in and outside the blogging community. My interest in food, culture and the history of recipes was fueled by my travels and the many countries I’ve called home. Also, I’m a sucker for any memoir that includes food or cooking as a focus.

Last year I came across the memoir, Brian Turner – A Yorkshire Lad, my life with recipes at a used book sale. I had never heard of Turner, apparently a world famous chef with his own restaurant and a successful career on television, but that didn’t stop me from buying the book. His early years were the best part of the story. I love reading about how others grew up and the poor Yorkshire lad who went off to London with just £20 in his pocket did not disappoint.

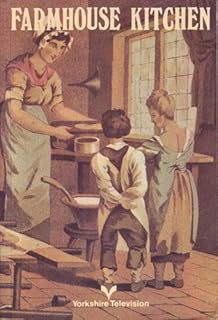
In the reading of that book, I came across another that seemed worth owning. Farmhouse Kitchen is based on the independent television series of the same name, presented by Dorothy Sleightholme on Yorkshire Television, starting in the early '70s. I found Farmhouse Kitchen online in a used book store and had it mailed to an address in the United States, knowing I wouldn’t get it till I went home in May.

Now I’m back in Dubai again and am finally having a chance to read it. It’s short on descriptions but long on recipes, one after another after another, for classic – read: old-fashioned, down home – British fare. Many use ingredients that were possibly common at the time but harder to come by now, like wood pigeon and lambs’ hearts. On the other hand, a lot of the recipes can be made with store cupboard ingredients. The Staffordshire Yeomanry Pudding is one example.

I always keep ground almonds in my freezer because they are an excellent addition to many baked cakes or cookies. (Why the freezer? The cold keeps nuts from turning rancid in a warm kitchen.) The other ingredients, flour, eggs, butter, sugar, jam, everyone will have. But where did the recipe originate and why the unusual name? Mrs. Sleightholme offers no information whatsoever, nor does the contributor of the recipe, one Miss P. M. Cherry of Penkridge.

As an initially all-volunteer unit in the queen’s own army, Staffordshire Yeomanry has a long and illustrious history of defending the crown’s interests, dating back from 1794. The Wikipedia page is full of information about its roles over the years but not once does it mention the pudding that bears the same name.

Clearly more research was necessary which led me to this post on Book Cottages where I learned that the Staffordshire Yeomanry Pudding recipe was possibly first developed "during the height of the Boer War, when wives would bake for their returning husbands a luxurious welcome home spread, comprising of the best cakes and sweetmeats they could possibly afford."

But still no mention of why the pudding was named such. Curiouser and curiouser. I had to keep digging. I must confess that I’m still none the wiser, but deep into the rabbit hole of recipe research and book buying, I’ve just ordered Good Things in England: A Practical Cookery Book for Everyday Use first published in 1932, with 853 recipes, some dating back to the 14th century. Once it arrives, I’ll be sure to report back if any light is shed on the origins of Staffordshire Yeomanry Pudding. If you happen to know more about it, please leave me a comment.

Meanwhile, if you’ve followed me down the rabbit hole thus far, you deserve some sweet pie! If you've been reading my blog since the beginning five years ago, I owe you much more, but pie and a great big Thank You will have to do.

Ingredients
For the sweet shortcrust pastry:
1 3/4 cup or 220g plain flour
1/2 cup or 113g butter
1 tablespoon sugar
1/2 teaspoon salt
1 egg yolk
1 tablespoon cold water

For the filling:
 1/2 cup or 113g butter
1/2 cup or 100g sugar
1/4 cup or 28g ground almonds
1/2 teaspoon vanilla
1/4 teaspoon salt
2 egg yolks
1 egg white
2 tablespoons jam

Method
Add the flour and the cold butter, cut into pieces, into your food processor. Pulse several times, until the flour and butter are combined and look like big crumbs.


Add in the sugar and salt and pulse again.


 Add in the egg yolk and water.

Pulse again, scraping down the sides of the food processor in between pulses, until the dough just comes together.

Turn it out of the processor and wrap tightly with cling film. Pop the wrapped dough in the refrigerator to chill.

Start your oven preheating to 350°F or 180°C and make the filling.

In the bowl of your processor or with electric beaters, cream the butter and sugar together until they turn pale yellow.

Mix in the extract, salt and ground almonds. Add in the whole egg and one egg yolk and process until the mixture is well combined, scraping down the side of the processor occasionally.


Roll out 2/3 of the dough and fit it into your pie plate. Spoon in the jam and spread it around evenly on the bottom.


Pour the custard filling on top of the jam and smooth it out.


Roll the other piece of the dough out in a circle and top the filling with it. Push down around the edges to seal the two crusts together. Trim the crusts to end about one inch or 2 centimeters above the filling.

Fold the two crusts over together to seal the pie and form an edge and cut three slits in the top crust.


Bake in your preheated oven for about 40 minutes or until the crust is golden and the custard inside is set.


Cool on a wire rack for at least 20-25 minutes before cutting and serving.


Enjoy!


My friend and creator of Friday Pie Day, Heather, over at All Roads Lead to the Kitchen has made another classic dessert with a funny name, but from the United States, shoofly pie! Head on over and pay her a visit.


I am pleased to join her on the last Friday of each month for pie and crust recipes, techniques, tools of the trade, and other inspiration.

For more information and recipes, please check out her #FridayPieDay page!


.

Friday, August 1, 2014

How to Make a Classic Bacon Butty

This classic British sandwich is mobile breakfast fare at its finest, often served out of a food van at car boot sales, weekend markets and school sporting events. The bacon butty is simple deliciousness: Crispy back bacon, piled high on a bread roll and topped with lashings of brown sauce.The best ones come with heaps of bacon.


In the spirit of bacon making everything better, even hotter-than the hinges-of-the-gates-of-hell August in Dubai, I’ve joined a great group of bloggers for a month of bacon recipes! Organized by Julie of White Lights on Wednesday,  this second annual Bacon Month will include bacon-centric recipes, both sweet and savory.

But, meanwhile, I couldn’t make a Bacon Month announcement without sharing some bacon goodness. I had my first bacon butty in Aberdeen many years ago, while visiting some dear friends from our Brazil years. It was an early Sunday morning and as we arrived at the Thainstone Market, the excitement of the treasure hunt was in the air, along with the fabulous aroma of frying bacon. I have never had a bacon butty to match that one, although I’ve been trying to ever since. A floury bun filled with bacon is the best!

Ingredients
Olive oil
5-6 slices back bacon
1 floury round roll, halved
Butter (optional)
1-2 tablespoons HP or other brown sauce

Method
Drizzle a little olive oil in your pan. Add bacon and cook, until browned and crispy.


Meanwhile, butter your bread roll, if desired.

Place bacon on the bottom half of your roll and top with HP Sauce. Yes, it's a lot of bacon for one sandwich. No, it's not too much. There can never be enough bacon.


Cover with roll top.


That’s it! Simple, bacon-full and delicious. Enjoy!


Bacon Month is going to be epic!