Tuesday, March 14, 2023

French Onion Soup Rolls #BreadBakers

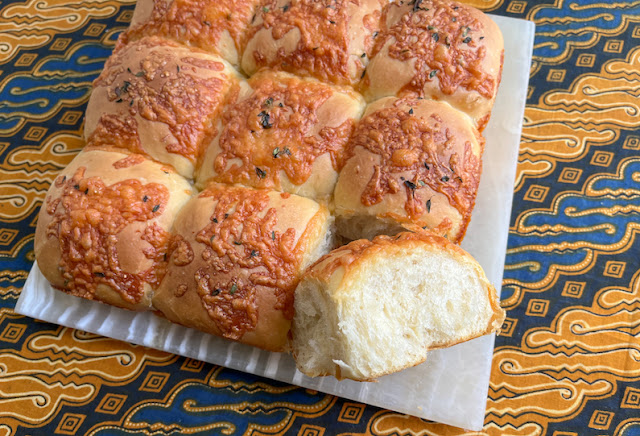
These French onion soup rolls have all the flavor of French onion soup in bread form! They are a great snack or accompaniment to any soup or stew. Or split them like a bun to use them for special sandwiches. The cheesy onion "jam" inside is fabulous.

Food Lust People Love: These French onion soup rolls have all the flavor of French onion soup in bread form! They are a great snack or accompaniment to any soup or stew. Or split them like a bun to use them for special sandwiches. The cheesy onion "jam" inside is fabulous.

Who doesn’t love a hot bowl of French onion soup, topped with crusty bread and melted cheese? I know it’s one of our favorites to eat at home and certainly to order in any French bistro. 

When this month’s Bread Baker’s host decided on the allium family as our theme for today’s event, I had what I thought was the brilliant and unusual idea of turning the flavors of French onion soup into a yeasty bread. Initially I was going to make a rolled loaf filled with cheese and caramelized onions but, as it turns out, my idea wasn’t so unusual. 

There are lots of recipes for French onion soup flavored bread! Who knew? The one I ended up adapting was for stuffed rolls and I must say, they are delicious! We ate them plain, with sliced corned beef roast and, one morning, I even made a fried egg sandwich with one. So good! 

French Onion Soup Rolls

This recipe is adapted by one from A Cozy Kitchen. The original makes a 9x13 pan full so I halved the recipe and also changed up the method. The rolls bake up fluffy and soft!

Ingredients
For the dough:
2/3 cup or 157ml milk, lukewarm
2 teaspoons sugar
2 1/4 teaspoons or 7 grams active dry yeast 
2 1/4 cups or 281g all-purpose flour
1/2 teaspoon fine sea salt
2 tablespoons unsalted butter (melted and cooled), plus extra for the baking pan
1 large egg
1 teaspoon olive oil for the dough bowl

For the caramelized onions:
1 tablespoon unsalted butter
2 large sweet onions, peeled and thinly sliced (I used a mandoline!)
Leaves from 2-3 sprigs fresh thyme
Fine sea salt

For the rolls:
3 oz or 85g gruyere or cheddar cheese, grated 
Fresh thyme leaves for garnish

Method
Butter a 9x9 in or 23x23cm baking pan. Add the yeast and sugar to the warm milk and set aside to proof for about five minutes. The yeast should get bubbly. If it does not, you need to buy new yeast and start over. 


Mix together the flour, milk/yeast mixture, melted butter and salt in the bowl of your stand-up mixer (with the hook attachment.)
 

Add the egg to the flour mixture and knead with the mixer on medium speed for about 5 to 7 minutes, until smooth and elastic.


Rub a medium bowl with the teaspoon of olive oil and transfer the soft, wet dough to the bowl. 


Cover it with cling film and leave to rise for 30-40 minutes. (If your kitchen is cold, as mine is right now, you can put the dough bowl in another bowl or your sink filled with warm water.)

While the dough is rising, we’ll caramelize the onions. Add the butter to a wide-rimmed pan set over medium heat and add the sliced onions, thyme, and season lightly with salt.  


Reduce the heat to medium-low, add a tablespoon or two of water and cover the pan for 15 minutes to soften the onions.

Remove the lid and stir every few minutes, until the onions are caramelized. I kept the fire pretty low so mine took quite a while. 


A higher flame will caramelize the onions faster but you really have to be stirring a lot to make sure they don't scorch. Remove the onions from the heat and transfer them to a plate, spread out to cool. 

Punch down the dough. 


Divide it into 9 equal pieces and roll them into balls. If you want them to be the same exact size, you can weigh them out. Each piece of dough should weigh around 58 grams.


On your plate, divide the caramelized onions into 9 equal portions. Using HALF of the grated cheese, top each portion of caramelized onions with about 1/9 of the cheese. 


Use your hands to press each dough ball into a circle and put the onion/cheese mixture in the middle. 


Pinch up the sides to securely close the dough around the mixture. 


Place the ball, seam down, in your buttered pan and repeat with the remaining dough balls.


Cover the baking pan with a cling film and let the rolls proof for about 1 to 1 1/2 hours. The rolls should at least double in size.

When your rolls are almost finished the second rise, preheat your oven to 350°F or 180°C. Sprinkle on the remaining grated cheese and fresh thyme leaves. 


Bake the rolls in your preheated oven until golden brown, about 25 to 30 minutes. 

Food Lust People Love: These French onion soup rolls have all the flavor of French onion soup in bread form! They are a great snack or accompaniment to any soup or stew. Or split them like a bun to use them for special sandwiches. The cheesy onion "jam" inside is fabulous.

Enjoy! 

Food Lust People Love: These French onion soup rolls have all the flavor of French onion soup in bread form! They are a great snack or accompaniment to any soup or stew. Or split them like a bun to use them for special sandwiches. The cheesy onion "jam" inside is fabulous.

As I mentioned above, it’s Bread Baker day and our theme is the allium family with includes onions, garlic, leeks and, believe it or not, about 920 species in all!  Many thanks to our host, Karen of Karen’s Kitchen Stories! Check out the list of lovely breads below: 


#BreadBakers is a group of bread loving bakers who get together once a month to bake bread with a common ingredient or theme. Follow our Pinterest board right here. Links are also updated each month on this home page. We take turns hosting each month and choosing the theme/ingredient.


Pin these French Onion Soup Rolls!

Food Lust People Love: These French onion soup rolls have all the flavor of French onion soup in bread form! They are a great snack or accompaniment to any soup or stew. Or split them like a bun to use them for special sandwiches. The cheesy onion "jam" inside is fabulous.

 .

Wednesday, March 1, 2023

Easy Ravioli Lasagna

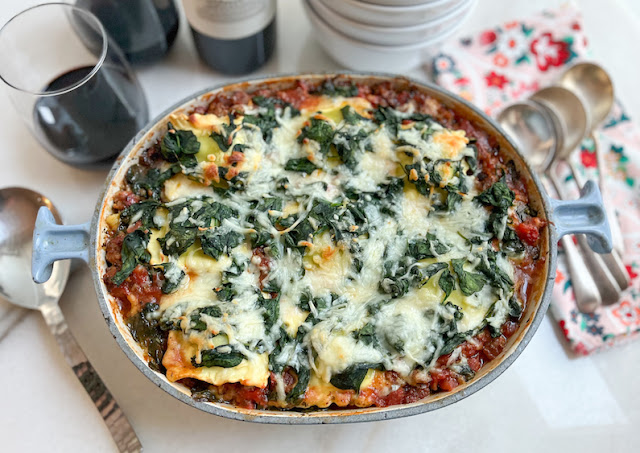
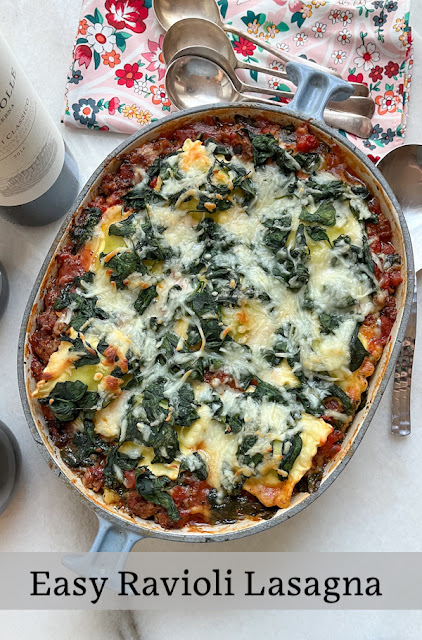
Using filled fresh ravioli instead of lasagna noodles, this easy ravioli lasagna is flavored with hot Italian sausage, spinach and a rich tomato sauce. 

Food Lust People Love: Using filled fresh ravioli instead of lasagna noodles, this easy ravioli lasagna is flavored with hot Italian sausage, spinach and a rich tomato sauce.

It’s the first Wednesday of the month so that means it’s time for my Foodie Extravaganza friends to share recipes for another obscure food holiday! March 21st is National Ravioli Day and the remit from our host said: You can make your own, use store-bought, or even ravioli components.

Well, you know I love to make and eat fresh ravioli but this month I just didn’t have the time so store-bought it would be. I usually have a pack or two of fresh filled pasta in my freezer because it’s such an easy meal on a busy day. This dish does take a bit longer than just throwing the ravioli in some boiling water, but I promise, it’s worth it. And as with most lasagna recipes, it’s even better as leftovers the next day. 

My other ravioli recipes you might like: 

Easy Ravioli Lasagna

My recipe is adapted from one on the BBC Good Food website. You can substitute your favorite fresh ravioli for the ricotta and spinach ones I used. If you can’t get Italian sausage meat, just buy Italian sausage and squeeze the meat out of the casing before frying it as in the instructions. 

Ingredients
Olive oil, for frying and greasing casserole dish
1 lb or 450g hot Italian sausage meat
3 cloves garlic, minced
1 teaspoon Italian seasonings
2 (14.5 oz or 411g) cans diced tomatoes (I like the Hunt’s petite dice, no salt added)
10 oz or 283g baby spinach, stems removed
20 oz or 567g spinach & ricotta ravioli (or any flavor you like)
8 oz or 225g grated mozzarella

Method
Heat a drizzle of oil in a pan. Fry the sausage meat until browned, using a wooden spoon to break it up. Add in the garlic and Italian spices. 


Cook for a few minutes, stirring constantly. 

Add the tomatoes and half a can of water. Give it a stir.


Bring to a boil then simmer for about 30 minutes, covered. Stir occasionally. If you have more time, it will never hurt to leave it simmering for as long as you can. Just check back and add a little water if it looks like it’s getting dry. 

Meanwhile, put the spinach in a colander. Pour over boiled water from the kettle to wilt. 


Leave to cool, then squeeze out as much of the excess water as you can.


Preheat your oven to 350°F or 180°C and prepare a medium-sized casserole dish by greasing the bottom and sides with a little oil.

Spoon one third of the sauce into the prepared pan. (I measured my sauce and it was just a titch over 5 cups so one third is 1 2/3 cups. 


Top with about one third of the ravioli.


Then a third of the spinach.


Finally, sprinkle one third of the cheese. Repeat the layers twice, making sure the final layer of ravioli is nestled into the sauce. 


Bake for 35-40 minutes in your preheated oven until the sides are bubbling and it is hot all the way through. Cover if the top starts to get too dark before the lasagna is done. 

Remove from the oven and rest for a few minutes before serving. Extra points if you serve it with a nice Chianti. 

Food Lust People Love: Using filled fresh ravioli instead of lasagna noodles, this easy ravioli lasagna is flavored with hot Italian sausage, spinach and a rich tomato sauce.

Enjoy! 

Check out all the lovely ravioli recipes my Foodie Extravaganza friends are sharing today! Which one will you make on March 21st for National Ravioli Day? 
Many thanks to our host, Karen of Karen’s Kitchen Stories. 


Foodie Extravaganza is where we celebrate obscure food holidays by cooking and baking together with the same ingredient or theme each month. Posting day is always the first Wednesday of each month. If you are a blogger and would like to join our group and blog along with us, come join our Facebook page Foodie Extravaganza. We would love to have you! If you're a spectator looking for delicious tid-bits check out our Foodie Extravaganza Pinterest Board.


Pin this Easy Ravioli Lasagna!

Food Lust People Love: Using filled fresh ravioli instead of lasagna noodles, this easy ravioli lasagna is flavored with hot Italian sausage, spinach and a rich tomato sauce.

 .


Monday, February 27, 2023

Chocolate Zucchini Muffins #MuffinMonday

Chocolate Zucchini Muffins are baked with cocoa and chocolate chips. Grated zucchini adds moisture and nutrition, not that you’ll notice it’s there flavorwise! 

Food Lust People Love: Chocolate Zucchini Muffins are baked with cocoa and chocolate chips. Grated zucchini adds moisture and nutrition, not that you’ll notice it’s there flavorwise!

It’s the last Monday of the month so that means we are celebrating Muffin Monday all day long. I had a zucchini in the fridge that was getting a little past its best and needed to be used, hence these chocolate zucchini muffins. 

Chocolate Zucchini Muffins

This recipe is for a small batch of just six muffins but it’s easily doubled if you need 12. Or even trebled. Muffins batter is very forgiving like that. 

Ingredients
1/2 medium zucchini or courgette (approx. weight 2 2/3 oz or 75g)
1/4 teaspoon salt
3/4 cup or 95g flour
1/4 cup or 20g cocoa
1/4 cup or 50g white sugar
1/4 cup, packed, or 50g brown sugar
1 teaspoon baking powder
1 egg
3 tablespoons milk
3 tablespoons canola oil
1/4 cup or 50g semi-sweet chocolate chips plus a little extra for topping, if desired.

Method
Preheat your oven to 350°F or 180°C and prepare your 6-cup muffin tin by greasing it or lining it with muffin papers.

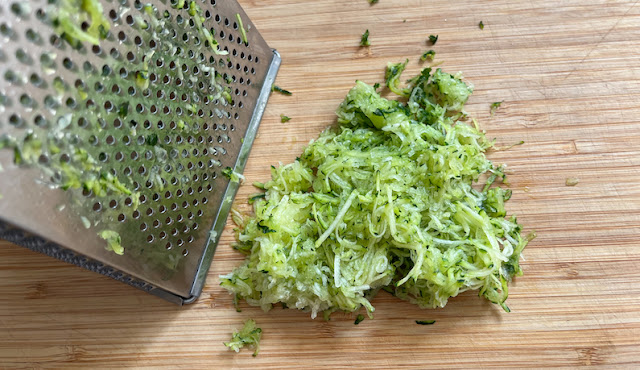
Grate the zucchini with the small holes of your grater and spread it around in a colander to drain.  Sprinkle with the 1/4 teaspoon of salt.


In a large mixing bowl, whisk together your flour, sugars and baking powder. Mix in the chocolate chips and use your clean hands to separate any that are stuck together. 


In another smaller bowl, whisk together your eggs, milk and oil. Use the back of a spoon or rubber spatula to squeeze moisture out of the grated zucchini. Add it to the wet ingredient bowl and whisk.


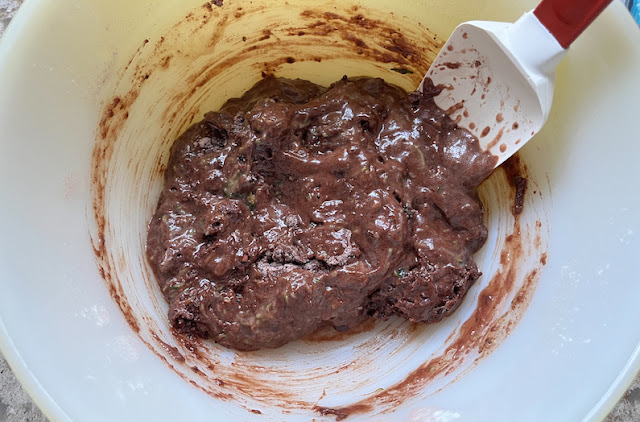
Pour your wet mixture into the dry ingredients and stir until they are just combined. There should be some dry flour still showing.


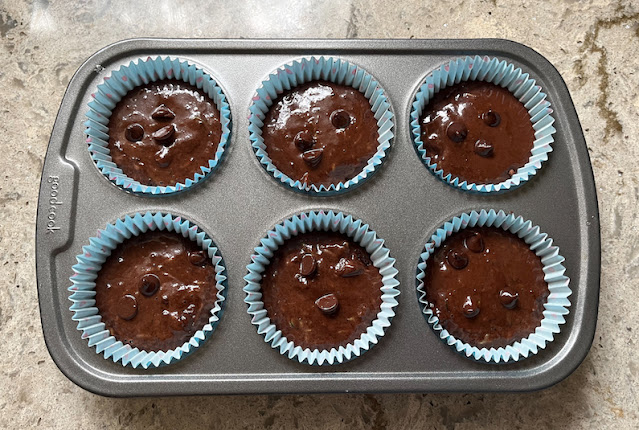
Divide the batter evenly between the muffin cups. Add a few more chocolate chips to the top, if desired.  


Bake in your preheated oven for about 20-25 minutes or until the muffins are puffed up and a toothpick comes out clean when inserted in the middle.

Remove from the oven and allow to cool for a few minutes.

Food Lust People Love: Chocolate Zucchini Muffins are baked with cocoa and chocolate chips. Grated zucchini adds moisture and nutrition, not that you’ll notice it’s there flavorwise!

Remove the muffins from the pan and cool further on a wire rack.

Food Lust People Love: Chocolate Zucchini Muffins are baked with cocoa and chocolate chips. Grated zucchini adds moisture and nutrition, not that you’ll notice it’s there flavorwise!

Enjoy!

Food Lust People Love: Chocolate Zucchini Muffins are baked with cocoa and chocolate chips. Grated zucchini adds moisture and nutrition, not that you’ll notice it’s there flavorwise!

As I mentioned above, it’s Muffin Monday! Make sure to check out all the links below to see the muffins my blogger friends are sharing. Many thanks to Wendy from A Day in the Life on the Farm for her behind the scenes help this month!


#MuffinMonday is a group of muffin loving bakers who get together once a month to bake muffins. You can see all of our lovely muffins by following our Pinterest board. Updated links for all of our past events and more information about Muffin Monday can be found on our home page.

Pin these Chocolate Zucchini Muffins!

Food Lust People Love: Chocolate Zucchini Muffins are baked with cocoa and chocolate chips. Grated zucchini adds moisture and nutrition, not that you’ll notice it’s there flavorwise!

.