Showing posts with label yeast roll recipes. Show all posts

Tuesday, November 10, 2026

Ostesnurrer - Danish Cheese Twists #BreadBakers

Lovely little rolls full of two kinds of cheese, crushed red pepper, black pepper and garlic, these ostesnurrer or Danish cheese twists are great for breakfast, snack time or dinner. 

Food Lust People Love: Lovely little rolls full of two kinds of cheese, crushed red pepper, black pepper and garlic, these ostesnurrer or Danish cheese twists are great for breakfast, snack time or dinner.

The name for these savory buns is a combination of two Scandinavian words, ost which means cheese, inherited from the Old Norse ostr, and snurrer, meaning twirls, twists or spins, referring to the method of cutting strips of dough, twisting them, and knotting them into intricate shapes.

The interwebs has soooooo many great recipes for ostesnurrer but they all contain at least one kind of cheese and are made either with wholemeal flour or a mix of wholemeal and bread flour. 

Ostesnurrer - Danish Cheese Twists

For the sugar, I used golden caster but white works just fine too. My recipe is adapted from one on Det Sote Liv and another on Skandi Baking, just two of the myriad I perused. 

Ingredients
For the dough:
1/2 cup or 120ml milk
2 1/4 teaspoons active dry yeast 
1 large egg
1 egg yolk (save the white for egg wash before baking)
1 tablespoon sugar
1 teaspoon fine sea salt
3/4 cup + 2 tablespoons or 100g whole wheat flour
2 cups or 250g bread flour
¼ cup or 57g butter, softened

For the filling:
3 tablespoons olive oil
3 cloves garlic, finely chopped or grated on a microplane
½ teaspoon crushed red pepper
Freshly ground black pepper
1 cup, grated, or 120g extra sharp cheddar cheese
1/2 cup, grated, or 60g mozzarella cheese

For egg wash before baking:
1 egg white, lightly whisked

Method
Warm the milk in the microwave or on the stovetop until it is lukewarm. If you are a thermometer using person, you are looking for somewhere between 105° to 115°F or 40.5° to 46°C. It should feel warm to the touch but not hot. 

Add your yeast to the milk and stir. Leave it for 5-10 minutes until the mixture starts to bubble up. 


Whisk the egg, egg yolk, sugar and salt together in a large mixing bowl or the bowl of your stand mixer. 


Add your yeast and milk mixture to the egg mixture and mix together then add the whole wheat flour and mix to combine. 


Add in the softened butter and mix until it’s completely incorporated. 


Measure out your bread flour in a separate bowl. Add about half of it to the dough.


Mix the dough and add more flour as needed. 


After half: 


And then a quarter more. 


And that’s it. I ended up with about 30g of flour left and switched to the bread hook for kneading. You want a soft dough that pulls away from the sides of the bowl when kneaded. 

Either by hand or using a stand mixer, knead the dough for 10 minutes until it passes the window pane test. Cover your dough with a shower cap or cling film and leave it to rise for about an hour or until doubled in size.


Right before your dough is ready, you can make the filling. Mix together your olive oil, garlic, crushed red pepper and a few generous grinds of black pepper in a bowl.


Prepare two baking pans by lining them with baking parchment or silicone liners.

Once the dough has doubled in size, turn out it out onto a floured surface and roll into a rectangle, about 12x16 inches or 30x40cm.


Spread the garlicky olive oil mixture all over your dough.


Distribute your cheeses over the top half of the dough.


Fold the bottom half of the dough over the top and press down gently. 


Cut your dough into 12 equal sized strips (about 1 inch or 2.5 cm in width).


To make the twists, start by holding one end of the dough down and twist the strip while it is still on the surface.


Once twisted, lift the strip and twist it around your index and middle finger about one and a half times. Tuck the end up through the middle of the twist. This will help keep the twists from opening as they rise then bake.


Place the twists on the prepared pans as you make them. Put any cheese that has fallen out – AND IT WILL – back on top of each twist.


Cover the twists with plastic wrap or a damp dish towel and let them rise for a second time, about 45 minutes. 

Towards the end of the rising time, preheat your oven to 350°F or 180°C.

If any of the twists have come undone, tuck the ends back in and reseal in the center of the twist. Whisk the egg white with a little water to create an egg wash. 

Gently brush the egg wash on your twists. When this knocks some cheese off, just stick it back on. Dab a little extra egg wash in the middle and in the overlapping bits to help “glue” it all together during baking.


Bake in the preheated oven for 15-20 minutes or until golden brown. The ones I cut from the middle of the folded dough were bigger, so they took longer. The ones I cut from the outside were smaller so they didn’t take quite as long, hence the time difference.


Let cool slightly on a wire rack. Enjoy warm!

Food Lust People Love: Lovely little rolls full of two kinds of cheese, crushed red pepper, black pepper and garlic, these ostesnurrer or Danish cheese twists are great for breakfast, snack time or dinner.

It’s the second Tuesday of the month so that means it’s time for me and my Bread Baker friends to share our “dinner rolls with a twist,” both literal or recipe-wise. Many thanks to our host Swathi from Zesty South Indian Kitchen. Check out the links below.

#BreadBakers is a group of bread loving bakers who get together once a month to bake bread with a common ingredient or theme. Follow our Pinterest board right here. Links are also updated each month on this home page. We take turns hosting each month and choosing the theme/ingredient.


Pin these Ostesnurrer – Danish Cheese Twists!

Food Lust People Love: Lovely little rolls full of two kinds of cheese, crushed red pepper, black pepper and garlic, these ostesnurrer or Danish cheese twists are great for breakfast, snack time or dinner.

.

Tuesday, March 14, 2023

French Onion Soup Rolls #BreadBakers

These French onion soup rolls have all the flavor of French onion soup in bread form! They are a great snack or accompaniment to any soup or stew. Or split them like a bun to use them for special sandwiches. The cheesy onion "jam" inside is fabulous.

Food Lust People Love: These French onion soup rolls have all the flavor of French onion soup in bread form! They are a great snack or accompaniment to any soup or stew. Or split them like a bun to use them for special sandwiches. The cheesy onion "jam" inside is fabulous.

Who doesn’t love a hot bowl of French onion soup, topped with crusty bread and melted cheese? I know it’s one of our favorites to eat at home and certainly to order in any French bistro. 

When this month’s Bread Baker’s host decided on the allium family as our theme for today’s event, I had what I thought was the brilliant and unusual idea of turning the flavors of French onion soup into a yeasty bread. Initially I was going to make a rolled loaf filled with cheese and caramelized onions but, as it turns out, my idea wasn’t so unusual. 

There are lots of recipes for French onion soup flavored bread! Who knew? The one I ended up adapting was for stuffed rolls and I must say, they are delicious! We ate them plain, with sliced corned beef roast and, one morning, I even made a fried egg sandwich with one. So good! 

French Onion Soup Rolls

This recipe is adapted by one from A Cozy Kitchen. The original makes a 9x13 pan full so I halved the recipe and also changed up the method. The rolls bake up fluffy and soft!

Ingredients
For the dough:
2/3 cup or 157ml milk, lukewarm
2 teaspoons sugar
2 1/4 teaspoons or 7 grams active dry yeast 
2 1/4 cups or 281g all-purpose flour
1/2 teaspoon fine sea salt
2 tablespoons unsalted butter (melted and cooled), plus extra for the baking pan
1 large egg
1 teaspoon olive oil for the dough bowl

For the caramelized onions:
1 tablespoon unsalted butter
2 large sweet onions, peeled and thinly sliced (I used a mandoline!)
Leaves from 2-3 sprigs fresh thyme
Fine sea salt

For the rolls:
3 oz or 85g gruyere or cheddar cheese, grated 
Fresh thyme leaves for garnish

Method
Butter a 9x9 in or 23x23cm baking pan. Add the yeast and sugar to the warm milk and set aside to proof for about five minutes. The yeast should get bubbly. If it does not, you need to buy new yeast and start over. 


Mix together the flour, milk/yeast mixture, melted butter and salt in the bowl of your stand-up mixer (with the hook attachment.)
 

Add the egg to the flour mixture and knead with the mixer on medium speed for about 5 to 7 minutes, until smooth and elastic.


Rub a medium bowl with the teaspoon of olive oil and transfer the soft, wet dough to the bowl. 


Cover it with cling film and leave to rise for 30-40 minutes. (If your kitchen is cold, as mine is right now, you can put the dough bowl in another bowl or your sink filled with warm water.)

While the dough is rising, we’ll caramelize the onions. Add the butter to a wide-rimmed pan set over medium heat and add the sliced onions, thyme, and season lightly with salt.  


Reduce the heat to medium-low, add a tablespoon or two of water and cover the pan for 15 minutes to soften the onions.

Remove the lid and stir every few minutes, until the onions are caramelized. I kept the fire pretty low so mine took quite a while. 


A higher flame will caramelize the onions faster but you really have to be stirring a lot to make sure they don't scorch. Remove the onions from the heat and transfer them to a plate, spread out to cool. 

Punch down the dough. 


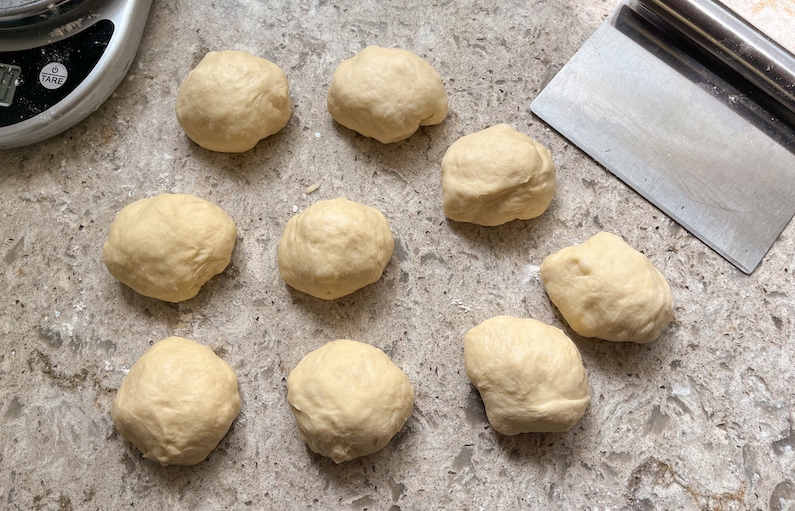
Divide it into 9 equal pieces and roll them into balls. If you want them to be the same exact size, you can weigh them out. Each piece of dough should weigh around 58 grams.


On your plate, divide the caramelized onions into 9 equal portions. Using HALF of the grated cheese, top each portion of caramelized onions with about 1/9 of the cheese. 


Use your hands to press each dough ball into a circle and put the onion/cheese mixture in the middle. 


Pinch up the sides to securely close the dough around the mixture. 


Place the ball, seam down, in your buttered pan and repeat with the remaining dough balls.


Cover the baking pan with a cling film and let the rolls proof for about 1 to 1 1/2 hours. The rolls should at least double in size.

When your rolls are almost finished the second rise, preheat your oven to 350°F or 180°C. Sprinkle on the remaining grated cheese and fresh thyme leaves. 


Bake the rolls in your preheated oven until golden brown, about 25 to 30 minutes. 

Food Lust People Love: These French onion soup rolls have all the flavor of French onion soup in bread form! They are a great snack or accompaniment to any soup or stew. Or split them like a bun to use them for special sandwiches. The cheesy onion "jam" inside is fabulous.

Enjoy! 

Food Lust People Love: These French onion soup rolls have all the flavor of French onion soup in bread form! They are a great snack or accompaniment to any soup or stew. Or split them like a bun to use them for special sandwiches. The cheesy onion "jam" inside is fabulous.

As I mentioned above, it’s Bread Baker day and our theme is the allium family with includes onions, garlic, leeks and, believe it or not, about 920 species in all!  Many thanks to our host, Karen of Karen’s Kitchen Stories! Check out the list of lovely breads below: 


#BreadBakers is a group of bread loving bakers who get together once a month to bake bread with a common ingredient or theme. Follow our Pinterest board right here. Links are also updated each month on this home page. We take turns hosting each month and choosing the theme/ingredient.


Pin these French Onion Soup Rolls!

Food Lust People Love: These French onion soup rolls have all the flavor of French onion soup in bread form! They are a great snack or accompaniment to any soup or stew. Or split them like a bun to use them for special sandwiches. The cheesy onion "jam" inside is fabulous.

 .