Showing posts with label bread recipes. Show all posts

Tuesday, November 10, 2020

Rolled Pepperoni Pizza Loaf #BreadBakers

A simple pizza dough is transformed into a rolled pepperoni pizza loaf, with mozzarella cheese, sun-dried tomatoes and garlic, freshly baked and ready to slice and serve.

Food Lust People Love: A simple pizza dough is transformed into a rolled pepperoni pizza loaf, with mozzarella cheese and sun-dried tomatoes, freshly baked and ready to slice and serve.

You’d have to have been reading here a long time (more than seven years! Anybody?) to know my inspiration for this stuffed bread loaf. Madam Wong’s pizza rolls look like cinnamon rolls, but they are rolled up with rice tomato sauce and mozzarella cheese. They are one of my favorite things in the whole wide world.

I’ve long thought it would be fun to bake a similar bread in a loaf shape instead of rolls so the filling would make a pretty spiral when it was sliced. Rather than a wet sauce, this time I’ve used soft sun-dried tomatoes and added pepperoni because, well, pepperoni is fabulous.

Rolled Pepperoni Pizza Loaf

If you don’t have fresh oregano, by all means substitute dried. Just a light sprinkle – perhaps a 1/2 teaspoon will do. 

Ingredients
For the dough:
3/4 cup or 180ml lukewarm water (not hot)
1 teaspoon active-dry yeast
1/4 teaspoon sugar
2 cups or 250g strong bread flour, plus more if needed
1 teaspoon salt
Drizzle olive oil for the dough bowl

For the filling:
3 oz or 85g sliced pepperoni
5 oz or 142g mozzarella cheese, shredded 
1/4 cup, firmly packed, or 45g soft (ready to eat) sun-dried tomatoes
2-3 sprigs fresh oregano
1 clove garlic, finely minced 

For baking:
1 egg, beaten
1 oz or 28g freshly grated Parmesan

Method
Put the yeast and sugar in a bowl. Pour in the warm water and give it a stir. Set aside for a few minutes. It should start to get foamy on top. 

In a large bowl or the bowl of your stand mixer, whisk the flour and salt together. Pour in the yeast mixture and mix well to form a soft dough.


Using the dough hook on the stand mixer, or kneading by hand against the counter, knead the dough on  until it forms a smooth, slightly tacky ball that springs back when you poke it, 5 to 8 minutes. If the dough sticks to the bowl or your hands, add a tablespoon of flour at a time until it’s easier to work with.


Avoid adding too much flour if possible. I ended up adding two tablespoons this time. This is the sort of thing that can change with your flour and the humidity in the air. 

If you're planning to make the pepperoni pizza loaf today, then give the dough a rise. Clean out the mixing bowl, coat it with a little oil, and transfer the dough back inside. Cover the bowl with plastic wrap or a damp kitchen towel and let the dough rise until doubled in size, 1 to 1 1/2 hours.

 
Alternatively, you can store the dough in the fridge and make the stuffed loaf the next day. Cover the bowl with plastic wrap and refrigerate. 

Take the dough out of the refrigerator about half an hour before you are ready to bake.


Line a 9x5 in or 23x13cm loaf pan with baking parchment. 

Pull the leaves off of your sprigs of oregano and cut the sun-dried tomatoes into skinny slices. Mix them both together with the mozzarella and garlic. 


Roll out the pizza dough into a rectangle, about 10x14 in or 25x35cm. 


Cover it almost to the sides with the cheese mixture, then the pepperoni. 


Roll up from the short side. The pepperoni don’t really roll up well but do your best. Tuck the sides over slightly to contain the filling.


 Transfer the roll to your prepared loaf pan, seam side down. 


Cover lightly with a cling film and leave to rise in a warm place for about 45 minutes. Towards the end of the rising time, preheat your oven to 375°F or 190°C. Brush the beaten egg over the top of the loaf.


 Sprinkle on the Parmesan cheese. 

Food Lust People Love: A simple pizza dough is transformed into a rolled pepperoni pizza loaf, with mozzarella cheese and sun-dried tomatoes, freshly baked and ready to slice and serve.

Bake in your preheated oven at for 20 to 25 minutes or until the top and sides are golden. Let the loaf cool on a wire rack before slicing it to serve. 

Food Lust People Love: A simple pizza dough is transformed into a rolled pepperoni pizza loaf, with mozzarella cheese and sun-dried tomatoes, freshly baked and ready to slice and serve.

Enjoy!

Food Lust People Love: A simple pizza dough is transformed into a rolled pepperoni pizza loaf, with mozzarella cheese and sun-dried tomatoes, freshly baked and ready to slice and serve.

This month my Bread Baker friends are sharing recipes for stuffed breads. Check them out below! Many thanks to our host Renu of Cook with Renu.

#BreadBakers is a group of bread loving bakers who get together once a month to bake bread with a common ingredient or theme. You can see all our lovely bread by following our Pinterest board right here. Links are also updated after each event on the #BreadBakers home page. We take turns hosting each month and choosing the theme/ingredient.

Pin this Rolled Pepperoni Pizza Loaf! 

Food Lust People Love: A simple pizza dough is transformed into a rolled pepperoni pizza loaf, with mozzarella cheese and sun-dried tomatoes, freshly baked and ready to slice and serve.
.

Tuesday, October 13, 2020

Wholemeal Soda Bread #BreadBakers

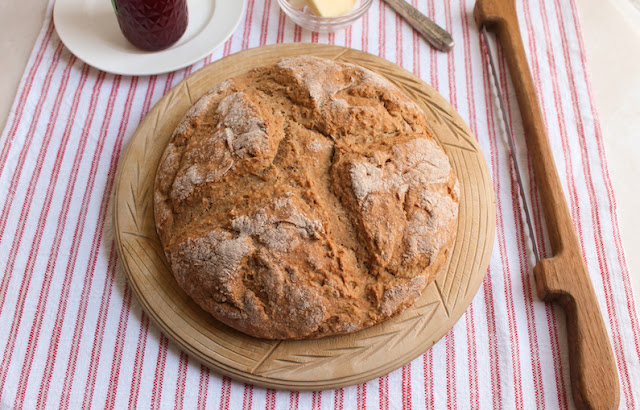
Wholemeal soda bread is simple to make, quick to bake and toasts up like a dream. It’s perfect for sandwiches or just smeared with butter and jam. 

Food Lust People Love: Wholemeal soda bread is simple to make, quick to bake and toasts up like a dream. It’s perfect for sandwiches or just smeared with butter and jam.

This recipe is adapted from one by Irish chef and founder of Ballymaloe Cookery School Darina Allen. She calls it Mummy’s Brown Soda Bread. I found it in several places on the internet, one with a note that at 82 years old (published in 2007) her mother Elizabeth O’Connell still made this loaf every day. 

Of course, that meant I had to find out if the ole gal was still baking now at a possible 95 years old, which led me to the most wonderful tribute to Mrs. O’Connell who sadly passed away on April 17, 2008. Chef Allen speaks of making this very bread as a young child in a mom-sewn apron, forming her own little loaf from a piece of her mother’s larger ball of dough. 

By all accounts, Mrs. O’Connell was a remarkable woman. Widowed at 36, she gave birth to her ninth and last child a month after losing her husband. She cooked them wholesome, healthy food, using produce from her kitchen garden, milk from the family cow and chickens she raised. Chef Allen recounts that her mother was still baking this soda bread, even after suffering a stroke, with her “good hand.” What a woman! I wish I could have met her. 

Wholemeal Soda Bread

I called this bread wholemeal soda bread since that is what whole wheat flour is called in the UK and the Republic of Ireland. Here in the US, it’s known as whole wheat flour, of course. 

Ingredients
1 tablespoon white vinegar
About 1 2/3 cups milk
1 3/4 cups or 210g wholemeal (whole wheat in the US) flour
1 3/4 cups (218g) unbleached all-purpose flour
1 teaspoon salt
1 teaspoon baking soda 
2 tablespoons butter, cut in cubes 
1 egg

Method
Preheat the oven to 425°F or 220°C and line a baking pan with baking parchment or a silicone liner. 

Put the tablespoon of white vinegar in your measuring cup then fill it to the 1 2/3 cup or 393ml milk. Set aside to sour. 

In a large bowl, whisk together the flours, salt, and baking soda. 


Add the butter in small cubes and rub it into the flour mixture with your fingertips until it resembles bread crumbs. 


Make a well in the center.

In another bowl, whisk the egg with the sour milk and pour most of the liquid into the flour mixture. 


Using one hand like a claw, bring the flour and liquid together gradually. I used my Swedish whisk and I recommend you do too, if you have one. They sure make mixing dough less messy. 


Add more of the sour milk mixture, if necessary. The dough should be quite soft, but not too sticky.


Turn the dough out onto a floured work surface and gently bring it together into a round about 2 inches or 5cm thick. I used a floured scraper for the shaping. Transfer it to your prepared baking pan.


 Use a sharp knife or a lame to  cut a deep cross on top. Chef Allen calls this blessing the bread. Next poke a small hole in each quarter. These are to allow the fairies to escape. 


Bake for  in the preheated oven 15 minutes then turn down the heat to 400°F or 200°C and bake for about 30 minutes more. 

When it is done, the loaf will sound slightly hollow when tapped on the bottom.


Remove from the baking pan and place on a wire rack to cool.


Enjoy! 


Check out all the other lovely brown breads my Bread Baker friends are sharing today. Many thanks to our host Wendy of A Day in the Life on the Farm

#BreadBakers is a group of bread loving bakers who get together once a month to bake bread with a common ingredient or theme. You can see all our lovely bread by following our Pinterest board right here. Links are also updated after each event on the #BreadBakers home page. We take turns hosting each month and choosing the theme/ingredient.

Pin this Wholemeal Soda Bread! 

Food Lust People Love: Wholemeal soda bread is simple to make, quick to bake and toasts up like a dream. It’s perfect for sandwiches or just smeared with butter and jam.

 .

Tuesday, August 11, 2020

Pain de Mie aka Pullman Loaf #BreadBakers

Pain de Mie is the sandwich bread of my childhood dreams, soft inside with very little crust. It makes great toast, grilled cheese sandwiches and it’s perfect for those little finger sandwiches we love to eat at bridal showers and parties.


This is a loaf I’ve been wanting to make for the longest time but I struggled with spending the money for a pan I might not use that often. My fellow Bread Baker Karen came to the rescue by proposing a theme of sandwich bread for this month’s challenge. Now I had a good excuse! And also a forward plan for at least one further use.

When we lived in Brazil, one of my favorite brunch dishes was something they called torta salgada or savory pie. It started with a loaf of sandwich bread that was cut lengthwise instead of in the usual square slices. You could buy it like that in the grocery store, that’s how common torta salgada was!

The long bread slices were stacked one upon the other like a layer cake but filled in between with chicken salad, ham, cheese, tuna salad, salami or sometimes even a combination of fillings. Then the whole thing was topped or covered in softened cream cheese, just like a cake, and decorated with veggies or, my personal favorite, matchstick potatoes. It was chilled then cut slices to serve. Now with my Pullman loaf pan, I’ll be able to make my own torta salgada.

Why is it called a Pullman Loaf? 
According Wikipedia: "The name "Pullman" was derived from its use in the kitchens of the Pullman railway cars. Although the Pullman Company is credited with inventing the lidded baking pans used to create the square loaves, square tin pans existed long before the railroad company. European bread makers began using the pans in the early 18th century to minimize crust. However, George Pullman chose the loaf for use on his railcars for efficiency reasons. Three Pullman loaves occupied the same space as two standard round-topped loaves, thus maximizing the use of space in the small Pullman kitchen."

This type of bread is sold in France as pain (bread) de mie (the soft crumb inside.)

Pain de Mie aka Pullman Loaf 

This recipe is adapted from one on the King Arthur Flour website. I didn’t have potato flour, so I substituted cornstarch, a KAF recommended alternative that came with the caveat that some flavor in the bread would be lacking. To add that flavor back in, I used potato water (water in which washed, unpeeled, cubed potatoes had been boiled till tender) instead the plain lukewarm water in the KAF recipe. I have to tell you that this loaf is wonderful so I don't think I'd make it any other way.

Ingredients
1 cup or 240ml lukewarm potato water
2 teaspoons active dry yeast
3 tablespoons or 37g sugar
4 3/4 cups or 567g unbleached all-purpose flour
2/3 cup or 156ml milk, warmed slightly
6 tablespoons or 85g butter, softened at room temperature
1/4 cup or 28g non-fat dry milk
3 tablespoons or 20g cornstarch
2 1/4 teaspoons salt
2-3 teaspoons canola or other light oil for oiling the dough bowl and the baking pan

Method
Add the yeast and one tablespoon of the sugar to the lukewarm potato water. Set aside for five minutes. It should start to get foamy as the yeast is activated.


In a large mixing bowl or the bowl of your stand mixer, whisk together the flour, dry milk, cornstarch and salt. Make a well in the middle and add in the yeast mixture, milk and butter and mix well.


Knead — using your hands or the stand mixer - to form a smooth, soft dough. This dough is very sticky so if you do have one, I suggest at least starting with the stand mixer and the bread hook.

Transfer the dough to a lightly greased bowl. Cover the bowl with a damp cloth and set it somewhere warm to rise for about 1 1/2 hours.


Use a little oil to lightly grease a 13" pain de mie or Pullman pan, including the inside of the lid.

When the first rise time is up, sightly grease a clean work surface and tip the dough out, pressing it gently into a large rectangle.


Fold in one third from the back and then fold in one third from the front, giving you a long tube.


Now fold each side in to the middle to make a fat log.

Ease the log into your pan, seam sides down and press the dough down gently to fill your pan.


Cover the pan with lightly greased cling film, and allow the dough to rise until the top of the middle is just below the lip of the pan, 45 minutes to 1 hour, depending on the warmth of your kitchen.

Towards the end of the rising time, preheat the oven to 350°F or 180°C.

Remove the cling film.


Place the cover on the pan. Bake the bread for 25 minutes in your preheated oven. Remove the pan from the oven. Carefully remove the lid taking care not to burn yourself.

Return the bread to the oven and bake for an additional 20 minutes, or until it tests done; a digital thermometer inserted into the center will register 190°F.

Remove the bread from the oven, and turn it out of the pan onto a rack.


Cool completely before slicing to serve.

Food Lust People Love: Pain de Mie is the sandwich bread of my childhood dreams, soft inside with very little crust. It makes great toast, grilled cheese sandwiches and it’s perfect for those little finger sandwiches we love to eat at bridal showers and parties.

Enjoy!


This month our Bread Bakers theme is Sandwich Bread.  Many thanks to our host Karen of Karen's Kitchen Stories. Check out all the lovely recipes we are sharing today


#BreadBakers is a group of bread loving bakers who get together once a month to bake bread with a common ingredient or theme. You can see all our lovely bread by following our Pinterest board right here. Links are also updated after each event on the #BreadBakers home page. We take turns hosting each month and choosing the theme/ingredient.

Pin this Pain de Mie - Pullman Loaf!

Food Lust People Love: Pain de Mie is the sandwich bread of my childhood dreams, soft inside with very little crust. It makes great toast, grilled cheese sandwiches and it’s perfect for those little finger sandwiches we love to eat at bridal showers and parties.
 .

Tuesday, May 12, 2020

Overnight Rye Buns #BreadBakers

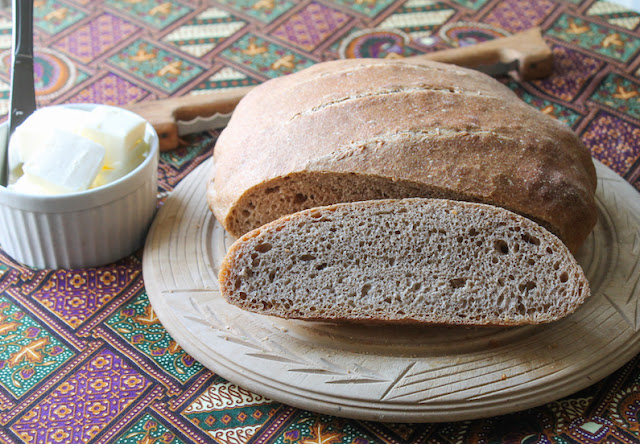
By volume, these overnight rye buns are about half unbleached bread flour, that is to say, wheat, and half dark rye flour, which means they have plenty of flavor and a lovely texture. Lighter than all rye and chewier than white bread, these buns are the perfect combination. Eat them split open and spread with creamy butter!

Food Lust People Love: By volume, these overnight rye buns are about half unbleached bread flour, that is to say, wheat, and half dark rye flour, which means they have plenty of flavor and a lovely texture. Lighter than all rye and chewier than white bread, these buns are the perfect combination. Eat them split open and spread with creamy butter!


Years ago I found a blog that I loved so much that I actually signed up to get new posts in my inbox. It’s not that the recipes were extra fabulous. I read it because the author was so funny and honest about the challenges in her life that just reading her posts cheered me up. Sadly, she stopped adding posts years ago, but I am pleased to say that she’s left the blog up. Occasionally I visit just for a laugh.

I saved this recipe way back in October of 2014 because it sounded so easy, and indeed it was. Who knows why it took so long for me to make it!

Overnight Rye Buns

I followed the recipe trail back to the person who taught Esther of the Recipe Rifle to make these buns. Her name is Maria Mayerhofer and she has made a video so you can see how easy these are!  I am wondering if the same method will work with other combinations of flour and I cannot wait to experiment.

Ingredients
1 1/2 cups or 150g dark rye flour
1 1/2 cups or 190g unbleached bread flour
1 rounded teaspoon dried yeast
1 teaspoon honey
1 teaspoon salt
2 heaped tablespoons natural yoghurt (I actually subbed probiotic cashew yogurt because that was all I had. You could also use sour cream.)
1 1/4 cups or 295ml cold water

Method
Use a wooden spoon to mix all the ingredients together in a large bowl. It's a soft and sticky dough.


Cover the bowl with cling film and pop it into your refrigerator for at least eight hours or overnight.

When you are ready to bake, preheat your oven to 400°F or 200°C and prepare a large baking pan by lining it with baking parchment. Put another large empty baking pan on the lower rack of the oven. When you put the buns in, you’ll add a cup of water to the hot pan to create steam.

Fill a small bowl with water and put two serving spoons in it.

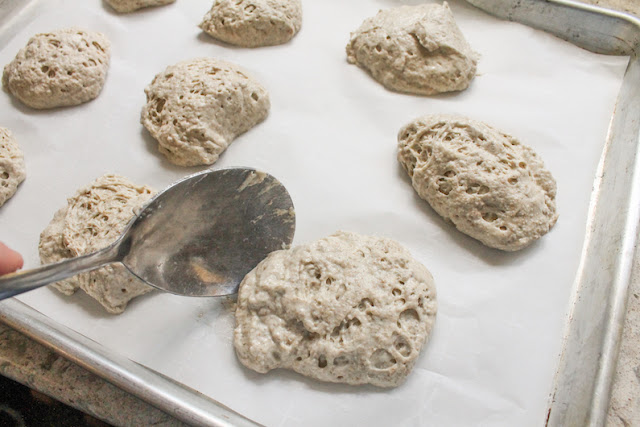
Remove the dough from the refrigerator and use the wet spoons to scoop out bun-sized dollops onto your prepared baking pan.


The goal is to keep as many of the bubbles as possible so just scoop and plop. Make sure to dip the spoons back in the water between each dollop.


Slide the baking pan into your preheated oven and add 1 cup or 240ml of water to the bottom pan to create a steamy environment for the buns.

Bake the buns for about 20-25 minutes or until they are puffy and lightly browned.

Remove from the oven and cool on a wire rack before serving.

Food Lust People Love: By volume, these overnight rye buns are about half unbleached bread flour, that is to say, wheat, and half dark rye flour, which means they have plenty of flavor and a lovely texture. Lighter than all rye and chewier than white bread, these buns are the perfect combination. Eat them split open and spread with creamy butter!


These are great with a smear of butter.

Food Lust People Love: By volume, these overnight rye buns are about half unbleached bread flour, that is to say, wheat, and half dark rye flour, which means they have plenty of flavor and a lovely texture. Lighter than all rye and chewier than white bread, these buns are the perfect combination. Eat them split open and spread with creamy butter!


Enjoy!

This month my Bread Bakers group are sharing mostly recipes made with rye flour. Because of the pandemic, our host, Karen of Karen’s Kitchen Stories, has loosened the restrictions and all of our members can participate, even if they aren’t able to buy rye flour. Thanks, Karen! Check out the link list of recipes:

BreadBakers
#BreadBakers is a group of bread loving bakers who get together once a month to bake bread with a common ingredient or theme. You can see all our of lovely bread by following our Pinterest board right here. Links are also updated after each event on the Bread Bakers home page.

We take turns hosting each month and choosing the theme/ingredient.

Pin these Overnight Rye Buns!

Food Lust People Love: By volume, these overnight rye buns are about half unbleached bread flour, that is to say, wheat, and half dark rye flour, which means they have plenty of flavor and a lovely texture. Lighter than all rye and chewier than white bread, these buns are the perfect combination. Eat them split open and spread with creamy butter!
 .

Tuesday, January 14, 2020

Artisan Sprouted Spelt Boule #BreadBakers

Hearty and flavorful, this artisan sprouted spelt boule bakes up with a crunchy crust and an airy yet chewy crumb. It is very forgiving if you like making dough ahead (which adds so much character and taste!) and baking another day.

Food Lust People Love: Hearty and flavorful, this artisan sprouted spelt boule bakes up with a crunchy crust and an airy yet chewy crumb. It is very forgiving if you like making dough ahead (which adds so much character and taste!) and baking another day.


One of my favorite things about belonging to food blogger groups is learning about new ingredients or techniques. This month Bread Bakers’ host is Sue of Palatable Pastime and she chose sprouted flour as our theme.

I had never heard of sprouted flour but Sue provided a couple of links to clarify. Apparently sprouted flour is made by allowing grains to germinate aka sprout. The results are then dried and ground into flour. The thought is that sprouted flours are more nutritious, because, according to the Penn State Extension website: “Carbohydrates are converted into simple sugars, proteins are broken down into amino acids, and fats are broken into the component fatty acids. These conversions make the food easier for the plant and humans to digest.”

That said, more study is needed to determine if it’s healthier or actually more digestible than regular flour. What I can tell you is that the sprouted spelt makes a lovely nutty tasting loaf and I am looking forward to using it again in other baked goods. Not only that but the folks at The Kitchn agree with me! You can learn more about sprouted flours there as well.

Artisan Sprouted Spelt Boule

My recipe is adapted from one of the One Degree Organics website, which was also the brand of sprouted spelt flour I used. My first attempt was completely flat and clearly had too much liquid. Rather than dialing back on the water for the second go, I decided to add more sprouted flour. Take two resulted in a wet sticky dough that could hold its shape a bit better when kneaded for a bit after the first rise. The original recipe could work better for a focaccia rather than a boule.

Ingredients
1 1/2 cups or 355ml warm water
1 teaspoon sugar
1/4 teaspoon instant yeast
3 cups or 360g sprouted spelt flour
1 cup or 125g bread flour
1 1/4 teaspoons salt

Essential equipment:
5.5 qt or 5.3L Dutch oven with ovenproof lid
Dough scraper

Method
Stir the sugar into the water to dissolve it, then sprinkle the yeast in as well. It’ll just float on the top but that’s fine. Set aside for five or so minutes. The yeast should start getting foamy, which means it has been activated and is alive.

Meanwhile in a large bowl, combine the flours and salt. When the yeast has proved, pour the mixture into the flour bowl and mix well.


It’s going to be quite a soft dough. Just make sure everything is completely blended. Use a rubber spatula to scrape the sides of the bowl, making sure all the flour has been incorporated.


Cover the bowl with cling film or a damp teacloth. Let sit at room temperature for 8-12 hours. The longer the better, in my opinion. You can also pop the covered bowl in the refrigerator overnight, after the room temperature rise.

After the first rising time has elapsed, gently fold the dough over on itself in the bowl with a spatula and tip it out onto a well-floured work surface. Knead for several minutes, until the dough isn’t quite as sticky and you can form it, with the help of a dough scraper, into a ball.


Prepare a greased square of baking parchment on plate and transfer the ball onto it. The parchment isn’t strictly necessary but it will make transferring the risen dough to the Dutch oven easier later.


Cover with a loose towel or oiled cling film and let rise for 1-2 hours. If it’s cold at your house, like it is at mine right now, follow these instructions for proofing in the microwave. Because the rising environment is humid, you don’t have to cover the dough. Works a treat!

When your dough has almost doubled in size, preheat oven to 500°F or 260°C WITH THE COVERED DUTCH OVEN INSIDE.

It's such a soft dough that it spreads out as much as it does up!


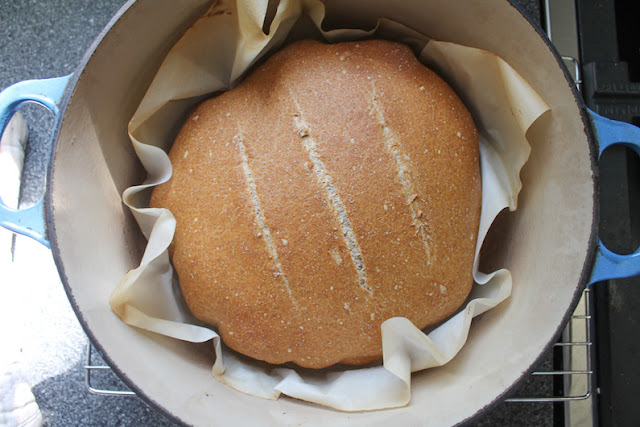
Once the Dutch oven is fully heated and the dough is done rising, hold the edges of the parchment paper and carefully place the loaf inside. Cut a few slashes in the dough to allow it to rise further as it bakes and to give it a decorative finish. (I really need a sharper knife. My bread lame has gone missing in the move.)


Depending on your oven, let the bread bake with the lid of the Dutch oven ON for about 20-25 minutes. Remove the lid and bake for another 10-15 minutes or until golden brown. If you are a thermometer-using baker, fully baked, the boule should have an internal temperature of about 190°F or 88°C.

Food Lust People Love: Hearty and flavorful, this artisan sprouted spelt boule bakes up with a crunchy crust and an airy yet chewy crumb. It is very forgiving if you like making dough ahead (which adds so much character and taste!) and baking another day.


Remove the boule from the oven and let it cool completely on a wire rack before slicing.

Food Lust People Love: Hearty and flavorful, this artisan sprouted spelt boule bakes up with a crunchy crust and an airy yet chewy crumb. It is very forgiving if you like making dough ahead (which adds so much character and taste!) and baking another day.


Enjoy!

Food Lust People Love: Hearty and flavorful, this artisan sprouted spelt boule bakes up with a crunchy crust and an airy yet chewy crumb. It is very forgiving if you like making dough ahead (which adds so much character and taste!) and baking another day.


Check all of the other sprouted flour recipes my Bread Baker friends are sharing today! Many thanks to Sue of Palatable Pastime for hosting!

#BreadBakers is a group of bread loving bakers who get together once a month to bake bread with a common ingredient or theme. You can see all of our lovely bread by following our Pinterest board right here. Links are also updated after each event on the BreadBakers home page. We take turns hosting each month and choosing the theme/ingredient.
BreadBakers

Pin this artisan sprouted spelt boule!

Food Lust People Love: Hearty and flavorful, this artisan sprouted spelt boule bakes up with a crunchy crust and an airy yet chewy crumb. It is very forgiving if you like making dough ahead (which adds so much character and taste!) and baking another day.
.

Tuesday, December 10, 2019

Sausage Jalapeño Cheese Kolaches #BreadBakers

These sausage jalapeño cheese kolaches are best made with quality beef franks, sliced fresh jalapeños and sharp cheese. They are the perfect filling for the soft, slightly sweet dough that surrounds them.

Food Lust People Love: These sausage jalapeño cheese kolaches are best made with quality beef franks, sliced fresh jalapeños and sharp cheese. They are the perfect filling for the soft, slightly sweet dough that surrounds them. This dough is a bit different from the one I made to fill with sweet apricots. It’s a little less enriched – no sour cream, for one – with a little less sugar per kolache. I adapted this recipe from one on The Brewer and the Baker.


Kolaches, as you might remember from my Bread Bakers post three and a half years ago, are breakfast treats that can be either savory or sweet. If you’d like to know more about how such a traditional Czechoslovakia baked good made its way to Texas, check out my apricot kolaches recipe.

I also mention in that post that my personal favorite kolac (<that’s the singular) is one filled with sausage, jalapeños and cheese. This month, at my instigation, my fellow Bread Bakers and I are sharing breakfast breads that are made the night before, so you can have freshly baked breakfast in the morning. True confessions: This theme was completely driven by my desire to make my favorite savory kolaches, since they rise overnight in the refrigerator.

Sausage Jalapeño Cheese Kolaches

This dough is a bit different from the one I made to fill with sweet apricots. It’s a little less enriched – no sour cream, for one – with a little less sugar per kolache. I adapted this recipe from one on The Brewer and the Baker.

Ingredients – to make 10 kolaches
For the dough:
1 package (2 1/4 tsp) active dry yeast
2 tablespoons warm water
1/2 cup or 120ml milk
2 tablespoons butter
1 large egg
1/4 cup or 50g sugar
1/2 teaspoon salt
 3 1/8 cups or 400g bread flour

For the filling:
1/2 cup or about 40g finely grated cheese
2-3 fresh jalapeños
5 good quality bun-length beef franks

For brushing the kolaches before baking:
2 tablespoons butter, melted and cooled

Method
Sprinkle the yeast over warm water in the bowl of your stand mixer along with 1 teaspoon of the sugar and 1 tablespoon of the flour. Let prove for 5 minutes. It should start to foam up and get bubbly. If it doesn’t, start over with new yeast.


Meanwhile, warm the milk and butter until the butter just melts. Set aside.

Turn the mixer to low and add the milk and butter mixture, egg, sugar, and salt. Beat until they are mixed thoroughly.

Add the flour gradually until you have a soft but kneadable dough.

Knead for 5 minutes by machine or 8-10 minutes by hand, until the dough isn’t quite as sticky as when you started. Add additional flour as necessary, but try not to over do it.  We want a soft dough. You may not use all the flour.


Cover with plastic wrap and let rest for about an hour in a warm place, or until the dough has doubled in size.

Cut the beef franks in two equal pieces. Slice the jalapeños into thin rounds.


When the dough has doubled, punch it down and divide it into 10 equal pieces and tuck them into balls. Mine were about 70+g each.


Using your clean hands, press each ball out into a rectangle. Add some grated cheese and a few jalapeño slices to the middle of each one. Place the half frank on top then use a spatula or dough scraper to fold each long side in.


Crimp and tuck to close the ends. Place the kolache in your lined pan, seam side down. Continue until all the kolaches are filled and formed.


Cover them with cling film and pop them in the refrigerator overnight.

In the morning, remove them from the refrigerator and then set your oven to preheat to 375°F or 190°C. Fill your kitchen sink about an inch deep with warm water and set the pan in it, being careful not to get any water in the pan.


When the oven has preheated, brush the kolaches with the melted butter and bake for 25-30 minutes or until the kolaches are golden brown.


Let the kolaches cool for 15-20 minutes then pull apart gently to serve. I love mine with some yellow mustard but you can eat them plain as well, as my husband did. To each his own.

Food Lust People Love: These sausage jalapeño cheese kolaches are best made with quality beef franks, sliced fresh jalapeños and sharp cheese. They are the perfect filling for the soft, slightly sweet dough that surrounds them. This dough is a bit different from the one I made to fill with sweet apricots. It’s a little less enriched – no sour cream, for one – with a little less sugar per kolache. I adapted this recipe from one on The Brewer and the Baker.


Enjoy!

Check out all the other overnight breakfast breads my fellow Bread Bakers are sharing today!
#BreadBakers is a group of bread loving bakers who get together once a month to bake bread with a common ingredient or theme. You can see all of our lovely bread by following our Pinterest board right here. Links are also updated after each event on the BreadBakers home page. We take turns hosting each month and choosing the theme/ingredient.

BreadBakers

Pin these Sausage Jalapeño Cheese Kolaches!

Food Lust People Love: These sausage jalapeño cheese kolaches are best made with quality beef franks, sliced fresh jalapeños and sharp cheese. They are the perfect filling for the soft, slightly sweet dough that surrounds them. This dough is a bit different from the one I made to fill with sweet apricots. It’s a little less enriched – no sour cream, for one – with a little less sugar per kolache. I adapted this recipe from one on The Brewer and the Baker.
 .