Showing posts with label cookies. Show all posts

Tuesday, November 17, 2015

Cream Cheese Cinnamon Roll Cookies #CreativeCookieExchange

Cream cheese cookie dough is filled with cinnamon and brown sugar, rolled up, sliced and baked till golden then drizzled with sweet cream cheese glaze.

Is there anything that smells better than a kitchen with something cinnamon baking in the oven? I’m pretty sure there isn’t! I have a quite a few recipes, sweet and savory, that call for cinnamon and it’s not uncommon for me to increase the amounts, especially in a sweet dish.

One of our first overseas posting after marriage was in Balikpapan, Indonesia where fragrant cinnamon sticks were cheap and easy to find. When we moved on to Paris, I made sure to pack loads of spices needed for curries and the like, pretty sure that they wouldn’t be as available. And so began my on-again-off-again quest for spices, especially quills of cinnamon bark, from the markets of southeast Asia to South America, to northern Africa and the Middle East, even in a little out-of-the-way Mom and Pop shop called Flores’ Spice Co. in Houston, Texas. It’s been sort of a personal mission and I am please to say that our current home, Dubai, has a fabulous spice souk too, just near the far bank of the Dubai Creek. Do put it on your list if you ever come to visit.

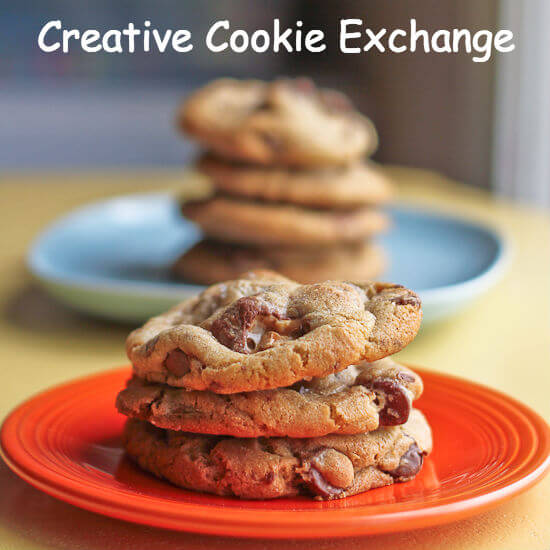
This month my Creative Cookie Exchange group is baking with cinnamon. These cinnamon roll cookies are great for when you’d like the flavors of a cinnamon roll without waiting for the dough to rise. That said, the rolled, filled dough keeps for several days well wrapped in the refrigerator or for a few weeks in the freezer. Just thaw, slice and bake when you are ready.

Make sure you scroll down to see the other great cinnamon recipes our fearless leader, Laura of The Spiced Life and the rest of the group have for you this month. Special thanks to Renee from Magnolia Days for handling the technical details and creating our link list.

This recipe was adapted from one on A Spicy Perspective.

Ingredients for 2 dozen cookies
For the cookie dough:
1 teaspoon vanilla extract
1/2 teaspoon dry active yeast
3/4 cup or 170g unsalted butter, at room temperature
2 oz or 57g cream cheese, at room temperature
1/2 cup or 100g sugar
2 cups or 250g all-purpose flour
1/2 teaspoon salt

For the filling:
1/4 cup or 50g dark brown sugar
1 tablespoon cinnamon
Pinch fine sea salt

For the cream cheese glaze:
1 1/4 oz or 35g cream cheese, at room temperature
1-2 tablespoons whole milk
1/2 teaspoon vanilla extract
1 cup or 125g powdered sugar

Method
Hydrate your dry yeast by mixing it with the teaspoon of vanilla extract. Without any warmth, it doesn't really activate but the slight yeasty flavor is still there.

Cream your butter and cream cheese with the sugar and vanilla/yeast until light and fluffy using handheld electric beaters or in the bowl of your stand mixer.

With the mixer on low, add in the salt and then the flour, a little at a time. Scrape down the bowl occasionally and mix until everything is well combined.


Flatten the dough and wrap it in cling film. Refrigerate at least half an hour.


Preheat your oven to 375°F or 190°C and line your baking sheet with baking parchment or a silicone mat.

Mix your brown sugar, cinnamon and the pinch of salt together, making sure to press out any lumps in the brown sugar.


Lightly flour a piece of wax paper and roll the dough into a 7x18 in or 18x46cm rectangle that is approximately 1/4 in or a little more than 1/2cm thick. I marked my lengths on the underside of my waxed paper with a permanent marker for easier measuring. Tidy the edges up a little by pushing inwards with the side of a blunt knife.


Sprinkle on the brown sugar/cinnamon mixture covering the dough completely on three sides but leaving the one long side farthest from you bare about 1 1/2 in or 3cm from the edge.


Starting on the long side closest to you, begin rolling the dough up tightly.


Use the waxed paper to make sure you get it rolling evenly all the way along.

Once you get to the other side, bring the waxed paper up from that edge and fold the naked dough over to form a seal with the dough roll.


Now roll the whole thing up in the waxed paper. Cut off the uneven end of the roll and discard. (Read: Eat raw.) Then cut the roll into 1/2 in or 1cm slices. (I sliced half and saved the other half for later, wrapping it tightly in cling film around the waxed paper and freezing.)

Remove the waxed paper from each slice and put them on your prepared baking sheet. Bake in your preheated oven for 12-15 minutes or until the edges start to brown .


Allow to cool completely before glazing.


To make the glaze
Use a fork to loosen the cream cheese by mixing it with one tablespoon milk and the vanilla extract.

Add in the powdered sugar a little at a time and stir well to combine. Add in a little more milk if you want a thinner glaze.


Once the cookies are completely cool, drizzle on the glaze or spread it on with a knife.


Enjoy!


Check out all the other fragrant cinnamon cookies we have for you today!


The Creative Cookie Exchange gets together once a month to bake cookies with a chosen theme or ingredient. We post on the first Tuesday after the 15th of each month.

You can also use us as a great resource for cookie recipes. Be sure to check out our Pinterest Board as well as our monthly posts, collected for you on The Spiced Life.

.

Tuesday, October 20, 2015

Peanut Butter Pumpkin Cookies #CreativeCookieExchange

Peanut butter and pumpkin combine beautifully for cake-y cookies chock full of chocolate chips or M&Ms. Great for parties and snacks this time of year!

I may have mentioned once or a thousand times before but I am not much of a sweet eater. Give me a large link of smoked sausage over a sweet slice of chocolate cake any day. New friends, that is ones I've made in the last four years since I started blogging, are always shocked by this revelation because I bake so much. I love to bake, it’s true! I just give it all away, mostly. When you consider the expensive hobbies some people enjoy, like collecting antiques, horseback riding or racing yachts – even quilting, have you priced quality fabric lately?! - this is relatively cheap. Some eggs, butter, flour, flavorings. I love the creative process of baking, plus there’s the added bonus of feeling benevolent when I give treats away. If you are looking for a hobby, this is a good one!

M&Ms vs Chocolate Chips
I’ve got another confession to make about these cookies in particular. I’ve discovered that I am not a fan of the seasonal M&Ms. I thought they would taste the same as other M&Ms but they really don’t. I think they are sweeter. (See paragraph 1.) The colors are great but next time I make these cookies, I’m going to stick to semi-sweet or dark chocolate chips, the only chocolate I actually like. If you like the seasonal ones, by all means, carry on. The cookies themselves were fluffy and cake-y and soft. And not overly sweet when I ate around the M&Ms. Yes, I did that thing.

Many thanks to Laura from The Spiced Life for organizing our Creative Cookie Exchange group and choosing this month’s theme: Celebrate the Pumpkin. Thanks also to Renee from Magnolia Days for putting together our link list of 12 pumpkin related cookies. Make sure you scroll down to check them out at the bottom of my post.

This recipe was adapted from one on the Bob’s Red Mill site.

Ingredients
1/4 cup or 65g crunchy peanut butter
1/4 cup or 60g unsalted butter at room temperature
1/2 cup, firmly packed, or 100g brown sugar
1/4 cup or 50g sugar
1 egg
1 teaspoon vanilla extract
1 cup or 125g flour
1 teaspoon baking soda
1/2 teaspoon salt
3/4 cup or 195g canned pumpkin puree (not pumpkin pie filling)
1 1/4 cups or 113g 5-minute oats
3/4 cup or 150g M&Ms (or sub chocolate chips – see paragraph 2 above) plus a handful extra for decorating (optional)

Method
Preheat your oven to 350°F or 180°C and prepare your baking sheet by lining it with parchment or a silicone baking mat.

In a large mixing bowl or the bowl of your stand mixer, cream the peanut butter, butter and sugars together until fluffy.

Scrape down the bowl with a rubber spatula. Add in your egg and vanilla and beat again.


Add in the pumpkin and beat again until combined.


Sift the flour, soda and salt directly into the same bowl. Beat again.


Finally, add the oats and M&Ms and stir well or use your beaters on a very slow speed to combine. You don’t want to break up the M&Ms.


Use a scoop or a spoon to drop balls of cookie dough onto your prepared cookie sheet.

Poke a few more M&Ms on the top of each for decoration, if desired.


Bake in your preheated oven for 12-14 minutes or until just browned. These cookies should be chewy and slightly under- rather than over-baked, if you are going to err on one side or the other. They turn out soft and cake-y and no one likes dry cake.

Allow to cool for a few minutes on the pan then remove the cookies and leave to cool completely on a wire rack.


Repeat the scooping/baking process until all the cookies are done. This makes about 2 dozen, depending on the size of your scoop. Mine is 2 tablespoons or 30ml and I got 27 cookies.


Enjoy!


Need a great resource for cookie recipes? Be sure to check out our Pinterest Board and our monthly posts (you can find all of them at The Spiced Life), on the first Tuesday after the 15th of each month!


.

Tuesday, September 22, 2015

Hawaiian Layer Bars #CreativeCookieExchange


A tropic twist of the classic layer bar, these chewy cookies are made with macadamia nuts, flaked coconut, dried pineapple and banana chips, baked on a crispy rough puff pastry base.

First, a confession: A couple of months back, when I read the theme for this month’s Creative Cookie Exchange – Layered Cookie Bars – I didn’t have a clue of what that meant. A quick search revealed deliciousness that I had clearly been missing all these years. Seven-layer bars, 10-layer bars, million layer bars! (That last one was an exaggeration, by the way.) They reminded me very much of Uncle Hector’s 100 Cookies with all the ingredient variations, but baked in layers instead of mixed together in a cookie dough. The bases varied widely as well: some crumb, some pastry, some cookie dough crusts.

I went to my baking cupboard and had a look through my potential ingredients. I have airtight plastic containers full of a variety of chips, dried fruits and nuts, all kinds and colors of chocolate and candies. I considered how many layers I could put together and it would have been impressive, although possibly still not one million. Instead, I decided to choose a theme, something tropical to celebrate the start of school and the end of summer holidays. And these Hawaiian layer bars were the result.

Ingredients
Rough puff pastry from this recipe or your own favorite
5 oz or 145g macadamia nuts
3 1/2 oz or 100g dried pineapple
3 1/2 oz or 100g sweetened flake coconut
3 1/2 oz or 100g sweetened banana chips
1 can (14 oz or 395g) sweetened condensed milk (not evaporated)

Method
Preheat your oven to 400°F or 200°C and prepare your 8x12in or 20x30cm pan by lining it with baking parchment.

Roll the pastry dough out as thin as you can.


Take your fitted parchment back out of the pan and transfer the pastry to the center of the parchment. Trim edges straight with a sharp knife. This helps puffing.


Fit the parchment with pastry back in the pan. Dock the base thoroughly with the tines of a fork.


Bake in your preheated oven for 10 minutes.

Remove the pan from the oven. The rough puff will have puffed somewhat in the middle so just use your fork to repeat the docking and it will deflate.

Reduce oven temperature to 350°F or 180°C.

Sprinkle on the layers. I wanted to see a little of everything on the top so I did layers but saved a little of each of the bottom layers to sprinkle again on the top.


Pour in the condensed milk, making sure to get some it all over and even into the sides and corners.


Bake again till golden, perhaps 20-25 minutes.


Enjoy!


I can't even start to tell you how chewy and delicious these were, a perfect blend on the crusty golden crust.


Check out all the lovely layered cookie bars we have for you this month! Many thanks to our organizer, Laura of The Spiced Life.


The Creative Cookie Exchange gets together once a month on the second Tuesday after the 15th to bake cookies with a common theme or ingredient. If you are a food blogger who would like to join us, please send Laura an email: TheSpiceLife(at)gmail(dot)com.

You can also just use us as a great resource for cookie recipes - be sure to check out our Pinterest Board and our monthly posts (you can find all of them at The Spiced Life).


For lagniappe - in southern Louisiana where I come from this means something extra, a little treat that's thrown in at the end.

Here's what to do with the rough puff scraps you cut off when making the layered cookie bars.


Cut the dough in short pieces and roll in cinnamon sugar. Lay out on a cookie sheet covered with parchment.


Bake with the base of the layer cookies above in your 400°F or 200°C oven.


Again, enjoy!


Tuesday, August 18, 2015

Gingham Picnic Cookies #CreativeCookieExchange

Perfect for a picnic-themed party or for taking on a picnic, these festive vanilla sugar cookies are decorated with royal icing and coconut and are actually quite easy to make, though the process takes time. My step-by-step photos show you how.

Back in the years of small children and birthday parties, we lived in places that either didn’t understand children’s birthday cakes as Disney-enthralled children imagine them or there simply weren't bakeries that could produce cakes like we wanted. So my girlfriends and I always made the cakes. Esmeralda from the Hunchback of Notre Dame, 101 Dalmatians, The Little Mermaid, a standup Barbie doll in a ball gown, just to name a few. Whatever my girls wanted, they got. One year our elder daughter wanted a picnic themed party so I baked a rectangular cake and decorated it green, like grass and topped the whole thing with a picnic scene, complete with gingham picnic blanket and tiny picnic fare. Instead of actually writing this post, I just spent way too much time looking for a photo of that cake and sadly managed to turn up one where we were only starting to decorate.

That's the birthday girl supervising and my chief partner in crime for all things crafty,
my friend Jacky, wielding the ruler. See my decorating tool box? This was serious business, folks!


This was in the days before digital cameras and I must confess that my system of organizing photos lacked, shall we say, a system. Or organization. Can anybody relate?

Nonetheless, that cake was the inspiration for these cookies because our theme for this month’s Creative Cookie Exchange is Pack for a Picnic Cookies. Now possibly The Spiced Life doyenne, Laura, our illustrious leader and chooser of themes, meant only cookies you could take on a picnic and in that these would also qualify. But picnic cookies meant a walk down memory lane for me with gingham and grass. And ants. Possibly the random caterpillar. Bugs aside, it felt good to go there.

As I mention in the first paragraph, these are not hard to make, but they do take time. Most of it is hands-off chilling in the fridge time though so don’t let that scare you off.

Ingredients
For the cookie dough:
1 cup or 227g unsalted butter, softened
1/2 cup or 100g sugar
2 teaspoons vanilla extract
1/4 teaspoon salt
2 1/2 cups or 315g flour
Red food coloring gel. Or your preferred color for gingham.

N.B. I use Wilton’s no taste red gel. <Amazon affiliate link. Liquid colorings add too much moisture to the dough so it’s best to avoid them. The amount depends on how dark you’d like your dough. Do keep in mind that the dough will darken as it chills.

For the grass border:
Royal icing (see recipe below)
1 cup or 85g sweetened flake coconut
Green food coloring (I used Wilton’s leaf green gel. <affiliate link) The amount depends on how dark you’d like your grass.

For the royal icing:
1 1/2 cups or 190g icing sugar
1 egg white or 2 1/4 teaspoons pasteurized egg whites or egg white substitute
1/2 teaspoon lemon juice
Optional: green food coloring (Coloring means it hides better under the grass.)

For ants or caterpillars:
Semi-sweet chocolate
Mini M&Ms

Method
Cream the butter and sugar with your electric mixer until fluffy and pale yellow. Add the vanilla extract and beat again.

Sift your flour and salt into the bowl gradually, beating well between additions and scraping down the sides of the bowl with a rubber spatula occasionally.


Turn half of the dough out onto a clean work surface and knead a couple of minutes. Shape it into a rough rectangle and wrap it in cling film and refrigerate.

Add red or other food coloring to the other half of the dough still in your mixer. Mix on low until the dough is a nice homogeneous color. If the color is to your liking, form the dough into a rough rectangle, wrap it in cling film and refrigerate it.

The two doughs before the first chill. 


Once the dough is firm enough to hold its shape well, use a folded plastic bag and a rolling pin to shape it into two more precise rectangles, tucking each into a corner of each bag and folding the sides over to keep the dough in when you roll it flat and even.

After the first chill and shaped into straighter rectangles. You can see how much darker that red has gotten.


Chill again for at least one hour.

Remove the rectangles of dough from the bags and trim any uneven edges. Cut each into strips as wide as the rectangles are thick. The goal is very long rectangular blocks as wide as they are tall. For you teachers and parents out there, think Cuisenaire rods.


On top of a piece of cling film, start assembling your gingham cookies by alternating white blocks with red blocks and building upwards to create a 3x3 block or 4x4 block pattern. Lightly press the blocks together as you stack them. I was able to make one with a 4x4 block pattern and one with a 3x3 block pattern and only had one long block left over.


This step is important. See how loosely the pieces are attached in the photo above, despite being pressed into place as each was added? We are going to fix that! Wrap the stacked blocks tightly in cling film then lightly tap them on your work surface so the blocks are pushed uniformly together, creating a square “log” of sorts. Do this on every side and then do the ends as well. Refrigerate for another 30 minutes or until you are ready to bake the cookies.

Meanwhile, you can make the royal icing and color the coconut.

To make the royal icing, use the whisk attachment of your stand mixer to beat the egg white and lemon juice until just a little foamy.

Sift in the powdered sugar and salt gradually. Continue mixing until the sugar is completely incorporated. Add some green food coloring at this point, if using, and mix well.

Keep it covered with cling film until ready to use or the royal icing will harden up.


To color the coconut, add it to a Ziploc bag along with a good 1/4 or 1/2 teaspoon of gel coloring. Shake and knead the bag until the coloring is more or less uniformly dispersed in the coconut. This will keep in the freezer for ages if you end up not using it all.

When you are ready to bake the cookies, preheat your oven to 350°F or 180°C and line a baking sheet with a silicone mat or baking parchment.

Unwrap one of your gingham “logs” and cut off the uneven ends. Now cut the logs into slices as wide as each square on the end.


Bake in your preheated oven for about 1-12 minutes or until the edges are just starting to brown.


Remove from the oven and cool on a wire rack. Continue until all the cookies are baked or freeze the balance of the dough, rolled tightly in cling film.


When the cookies are completely cool, fill a small plate with your colored coconut and pipe or spread royal icing on one side of each cookie.

Dip that side in the green coconut immediately and press down just a little so the coconut sticks.


And voilà! Now do the other sides.


Place back on your cooled silicone mat or baking parchment and leave till the royal icing sets. If you are in a hot climate like I am, you can pop these in the refrigerator to speed it up.


To make the ants, microwave some chocolate until it's just melted but not hot. It doesn’t take but a few squares for a few ants so use your judgment. Use a piping bag with a small tip to dot the cookies with ant-like shapes. Use dots of chocolate to hold down mini M&Ms and to make caterpillars with tiny legs.


Enjoy!

This first batch was from the 4x4 cookies. Sadly, I didn't take any photos of the 3x3. 

Here's our wonderful list of 14 picnic cookies this month:

Creative Cookie Exchange 2014
If you are a blogger and want to join in the fun, contact Laura at thespicedlife AT gmail DOT com and she will get you added to our Facebook group, where we discuss our cookies and share links.

You can also just use us as a great resource for cookie recipes--be sure to check out our Pinterest Board and our monthly posts (you can find all of them at The Spiced Life). You will be able to find them the first Tuesday after the 15th of each month!


.