Showing posts with label no bake dessert. Show all posts

Sunday, September 6, 2015

Creamy Coconut Popsicles

Two ingredients are all you need to make these creamy coconut popsicles: Sweetened condensed milk and coconut cream. Well, and freezing time! So easy and delicious!


This week my Sunday Supper group is anticipating Labor Day in the United States by sharing no-labor recipes, with plenty of make-ahead or simple-to-prepare dishes and drinks that will leave you plenty of time to relax and enjoy the holiday tomorrow! I had no idea what to share for this event until I remembered some coconut popsicles I made a couple of months back as an experiment that had turned out with gratifying success. So I made them again for real. 

I wanted to add actual fresh coconut to them but was discouraged by my younger daughter who prefers her ice cream without “bits” in it. So that coconut you see is just for show. With only two ingredients, both from cans, these creamy popsicles practically make themselves! Feel free to add fresh coconut to yours, if you can be bothered. They are absolutely coconutty, just sweet enough and perfect as is. And even the dog agrees.


Ingredients

1 can (13.5 oz or 400ml) unsweetened coconut cream – not milk!
1/2 can sweetened condensed milk  - 260g or 6 3/4 oz

Equipment needed:
Popsicle molds (or paper cups, popsicle sticks and cling film)
Deep freezer

Method
Pour or scoop the coconut cream into a large mixing bowl, preferably one with a spout. Whisk it until the cream is smooth and homogeneous.

Add in the condensed milk and whisk again.


Pour the liquid into your popsicle molds (or paper cups, then cover with cling film and insert a stick in the middle) and freeze until solid – this will take at least a couple of hours but overnight is even better.


When ready to serve, run the popsicle mold (or paper cup) under some warm water to release the popsicle.


Enjoy!


Whether you are celebrating Labor Day this weekend or just love the idea of no-labor recipes, this is the list for you!

Savory Snacks and Sides
Labor Free Main Dishes
Sweet Treats and Drinks


Tuesday, July 15, 2014

Coffee Ice Cream #IceCreamTuesday

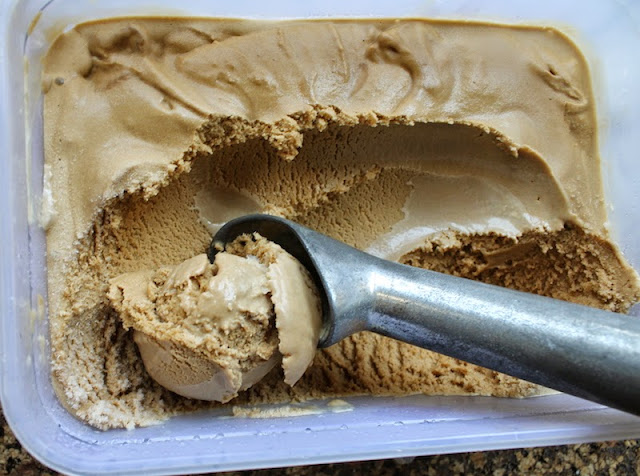
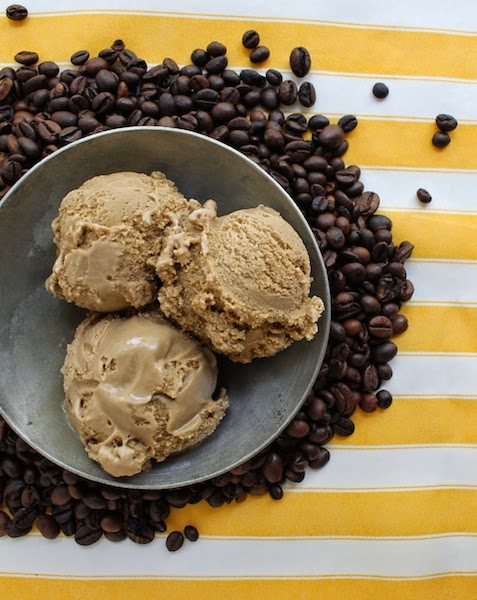
Coffee ice cream is the perfect blend of sweet and strong, especially this one from the master of all-things-coffee, Patricia McCausland-Gallo and her book, Passion for Coffee.
 
Food Lust People Love: Coffee ice cream is the perfect blend of sweet and strong, especially this one from the master of all-things-coffee, Patricia McCausland-Gallo and her book, Passion for Coffee.


The summer I was eight, my family moved from Trinidad to Caracas, Venezuela. We lived for a little while in a hotel while we waited for our rental house to be ready for move in. It became a ritual for my mom to take us for a treat each afternoon at a nearby pastelería that also served ice cream. She could get a café con leche and my sisters and I would get ice cream. I always chose coffee. Always. I am not much of a sweet eater, despite all the baking that goes on around here, but coffee ice cream is my all-time favorite.

Last week I shared a savory recipe - Rump Steak with Wine-Balsamic Coffee Glaze
from Patricia’s wonderful coffee-centric book with the promise of the coffee ice cream soon and here it is! 

Reprinted with permission. Metric conversions are my own. Any adaptations are in parentheses. The method is rewritten in my own words with some modifications.

Ingredients for 1 hefty pint or about 2 1/3 cups of ice cream
1 1/2 cups or 355ml heavy cream
1 1/2 cups or 355ml 2% milk
2/3 cup or 130g granulated sugar
1/4 cup or 50g brown sugar
3 egg yolks (I used four by accident.)
2 tablespoons instant coffee granules (I used espresso powder.)
1/8 teaspoon salt
1 teaspoon vanilla extract

Equipment needed:
Ice cream maker

Method
Whisk the cream, milk, brown sugar, white sugar, egg yolks, coffee, and salt together in a large heavy-bottomed pot, off the stove.


Put it on the stove and cook over the mixture over a medium heat, stirring constantly, until you are sure the brown sugar has dissolved and the mixture has thickened. This takes about seven or eight minutes.


Remove from the pot from the heat and stir in the vanilla extract.

Add ice and some water to a large bowl and set another bowl inside of it.

Strain your thickened mixture into the inside bowl and stir until it is cool.


Cover the surface of the mixture with cling film and refrigerate until it is completely cold.

Transfer your mixture to an ice cream maker and follow the manufacturer's instructions.


When the ice maker is done, put the ice cream into an airtight container and put it in the freezer.


Freeze to desired hardness and serve. For best consistency, freeze overnight.

Food Lust People Love: Coffee ice cream is the perfect blend of sweet and strong, especially this one from the master of all-things-coffee, Patricia McCausland-Gallo and her book, Passion for Coffee.


Enjoy!

Food Lust People Love: Coffee ice cream is the perfect blend of sweet and strong, especially this one from the master of all-things-coffee, Patricia McCausland-Gallo and her book, Passion for Coffee.


Pin this Coffee Ice Cream! 

Food Lust People Love: Coffee ice cream is the perfect blend of sweet and strong, especially this one from the master of all-things-coffee, Patricia McCausland-Gallo and her book, Passion for Coffee.


Or check out her inspired ice cream today. It's made with Crème Brûlée Stout!

Crème Brûlée Stout Ice Cream | Pastry Chef Online


Plus, my friend, Kirsten from Comfortably Domestic, has a low fat option today: Strawberry Colada Frozen Yogurt. Isn't the color just gorgeous?!

Strawberry Colada Frozen Yogurt | Comfortably Domestic


Tuesday, June 10, 2014

No-churn Brown Sugar Peach Ripple Ice Cream

Now that I’ve discovered an easy no-churn way of making creamy ice cream, my head is constantly buzzing with ideas for flavors. Peaches are all over the markets right now, so a seasonal double peach ice cream was top of the list.

Food Lust People Love: Peaches, brown sugar and honey cooked down to a delicious gooeyness, then folded into a sweet creamy no-churn ice cream base of whipping cream and sweetened condensed milk, along with fresh peaches, this divine concoction will be a hit at all your summer parties.


Years ago when we lived in Brazil, I asked my sister to bring me an ice cream maker when she came to visit. Ice cream was crazy expensive there and we missed it terribly because I just couldn’t bring myself to pay the price. Unfortunately, I didn’t think things through because, once I had the maker in my possession, I discovered that cream was the real culprit and it was going to cost me more to make my own than the expensive store-bought stuff cost. Deep sigh. When we moved to Houston, the ice cream maker came with us but it never got out of the box. Because: Blue Bell. If you live in Texas, you get to eat Blue Bell! Some of the very best ice cream in the country. But now that I’ve caught the ice cream making bug, thanks to my friend, Jenni, I started digging through our storage area over the washing machine and located said never-yet-used ice cream machine and hope to use it for the first time. Coconut ice cream, at the request of my younger daughter, is first on the list. Do you have an ice cream maker? What’s your favorite flavor?

Ingredients
3 medium peaches (about 1 lb or 450g total weight)
1/4 cup, firmly packed, or 50g brown sugar
1/4 cup or 60ml honey
Good pinch salt
1 teaspoon butter
1 2/3 cups or 400ml whipping cream
1/4 teaspoon cream of tartar
2/3 cup or 200g sweetened condensed milk
1 tablespoon vanilla
2 tablespoons aged rum (I used Ron Zacapa which is almost sweet, it is so mellow.)

Method
Cut the peaches in half and remove the pit. Cut them into pieces.


Put one chopped peach in a small pot with the sugar, honey and salt and heat to a slow boil over a medium flame. Stir frequently.


Cook at a slow boil until the peaches are very soft and the sauce thickens.


If you are a candy thermometer person, and I highly recommend you become one if you aren’t already, heat till about 225°F or °C.  Add the butter and stir while it melts. Set aside to cool. I poured mine into another bowl so it would cool faster then added the butter because I was in a rush to get this ice cream in the freezer.

In your stand mixer or with electric beaters, whisk the cream and cream of tartar until the cream thickens.


Add the condensed milk and whisk until stiff peaks form.

You can see that the cream is already pretty thick.


Add the vanilla and rum and whisk again.

Very stiff now!

Reserve some chopped peaches and peach sauce to add on top of the ice cream.  Ever so gently, fold in the rest of the fresh peaches and peach sauce. I spooned the sauce in all over the surface so it would be easier to fold in and not be completely lost in the folding.


Put the mixture in an airtight container, top with the reserved peaches and sauce and freeze for several hours for soft serve or overnight for firmer ice cream. I had guests coming for dinner so mine was on the softer side, as you can see from the photos.

Food Lust People Love: Peaches, brown sugar and honey cooked down to a delicious gooeyness, then folded into a sweet creamy no-churn ice cream base of whipping cream and sweetened condensed milk, along with fresh peaches, this divine concoction will be a hit at all your summer parties.


Enjoy!

Food Lust People Love: Peaches, brown sugar and honey cooked down to a delicious gooeyness, then folded into a sweet creamy no-churn ice cream base of whipping cream and sweetened condensed milk, along with fresh peaches, this divine concoction will be a hit at all your summer parties.

Food Lust People Love: Peaches, brown sugar and honey cooked down to a delicious gooeyness, then folded into a sweet creamy no-churn ice cream base of whipping cream and sweetened condensed milk, along with fresh peaches, this divine concoction will be a hit at all your summer parties.


Chief instigator ice cream maker, +Jenni Field is also making ice cream today! Have a look at her wonderful Speculoos Cookie Milk Ice Cream


Tuesday, March 25, 2014

Dark Chocolate Peanut Butter Squares #ChocPBDay


These rich chocolate peanut butter squares are like homemade peanut butter cups made easy, just a peanut butter and sugar base topped with dark chocolate. The chopped peanut butter-filled cookies are optional, but they add a nice crunch.  

     Today marks the initial celebration of the best day ever - it's Chocolate Peanut Butter Day! Hosted by Carla of Chocolate Moosey and Miriam of Overtime Cook, 31 bloggers are sharing favorite chocolate peanut butter recipes, ranging from cookies and bars to scones and muffins. Follow the hashtag #chocPBday on social media and join us with your favorite chocolate and peanut butter recipes. Looking for recipes all in one place? Follow our Pinterest board.

My very first real job, after I graduated from university, was my dream job, promoting a “product” I had benefited from since childhood and truly believed in, the Girl Scouts. In fact, I was a registered adult Girl Scout, working in the marketing and development department, which is a fancy way of saying promotion and fundraising. 

Among other responsibilities, my boss and I were in charge of the calendar and cookie sales for our Girl Scout council, based in Houston, but serving 26 Texas counties. As part of our promotion of the cookie sale my first year, we delivered boxes and boxes of cookies to Houston area chefs who had agreed to use them to create sweet recipes for an evening fundraising event.

Those days came back to me as I was making these chocolate peanut butter squares for Chocolate Peanut Butter Day and so I added some chopped Girl Scout peanut sandwich cookies to the tops. What’s better than peanut butter with chocolate on top? Peanut butter and chocolate with extra peanut butter cookies on top. They add a lovely crunch.

Ingredients
For the base:
1/4 cup or 50g brown sugar
1 2/3 cups or 200g icing sugar
1/3 cup or 75g unsalted butter
1 cup or 255g smooth peanut butter
1/2 teaspoon sea salt

For the topping:
10 1/2 oz or 300g dark chocolate
1 tablespoon unsalted butter
 3 oz or 100g peanut butter-filled cookies 

Method
Mix all the ingredients for the base together. When I’ve made this before, I used my stand mixer and got a more homogeneous dough but I am in a rented house this week so I had to do it by hand. It worked but was much more crumbley. It still presses down nicely into a base and tastes the same, so don’t let that bother you. Use a mixer if you have one or a spoon and then your hands, if you don’t. It's kind of like a peanut butter shortbread. I know, right?! Mmmm, peanut butter shortbread. 


Chop your peanut butter-filled cookies roughly, if using, and set aside.


Line your square pan (about 9 in x 9 in or 23cm x 23cm) with parchment paper or foil. Press the base out evenly into the bottom of the lined pan.


In a microwaveable bowl, melt your chocolate and butter with a few short zaps of 20-30 seconds each, stirring well in between. Pour the melted chocolate on to your base and spread it around evenly, all the way to the edges.


Sprinkle the chocolate with the chopped cookies and press them down gently into the chocolate.


Refrigerate the pan until the chocolate is almost set. Cut into small squares. Enjoy!


If you love chocolate and peanut butter like we love chocolate and peanut butter, you are going to want to check out every single one of these recipe links:


A huge thank you to our sponsors! Be sure to follow them on social media:


OXO: Website | Facebook | Twitter | Pinterest | Instagram | YouTube
King Arthur Flour: Website | Facebook | Twitter | Pinterest | Instagram
Peanut Butter & Co: Website | Facebook | Twitter | Pinterest| Instagram | YouTube


Three lucky winners will win one of the following:

Prize Pack #1: OXO Baking Tool Set: One 3-in-1 Egg Separator, One Bent Icing Knife, One Brownie Spatula, One Cake Tester, One Cookie Spatula, One Cupcake Icing Knife, One Cupcake Corer, One Egg Beater, One Stainless Steel Measuring Cups, One Stainless Steel Measuring Spoons, One Medium Cookie Scoop

Prize Pack #2: King Arthur Flour ingredients: One bag of all-purpose flour, one package of Guittard bittersweet chocolate disks, and one bottle of pure vanilla extract

Prize Pack #3: Peanut Butter and Co. package including: one Dark Chocolate Dreams 6-pack, One Variety 6-pack, and One 31 Days of Dark Chocolate Dreams cookbook

This giveaway is open to US residents only and winners will be picked from random draw.

Giveaway ends Monday March 31 at 11:59 PM. The winners will be notified via email and have 24 hours to respond. If not, the prize is forfeited and another winner will be chosen.

a Rafflecopter giveaway

***Disclaimer: This giveaway is being provided by OXO, King Arthur Flour and Peanut Butter & Co. #ChocPBDay bloggers have not received product or been compensated as a part of this giveaway.***


Saturday, June 30, 2012

White Chocolate Mousse Torte with Fresh Berries


Houston is HOT.  If you are familiar with the proverbial hinges of the gates of hell, we’ve got ‘em here.  Do not touch.  The only upside is the plethora of fresh berries and cherries that are in the grocery stores and markets right now.  We are eating raspberries straight out of the pint boxes like candy.  The other day, we bought 10 half pints for one dollar a piece and I wondered what to make with them.  That first group got eaten in what seemed like a blink, and we’ve gone back for more!  This time, I decided to make a frozen dessert.  Because, who can think about turning the oven on?  (Unless you have to for #MuffinMonday – the sacrifices I make! – another tasty muffin recipe coming to a blog near you soon.)

But on to the sane dessert which requires no oven, save the microwave.

Friday, June 24, 2011

Eton Mess Adapted


So this was from more than a year and a half ago, but still on my mind since I just made homemade meringues and they didn’t turn out very crunchy.
Eton Mess

It was Victoria’s last day of Christmas vacation and, despite it being Saturday, we decided to do a Sunday dinner around 2 p.m. since we would have to be at the airport around 6:40 in the evening. My small oven was already over-scheduled with a roast leg of lamb, roast potatoes and, waiting its turn in line, a Yorkshire pudding. We needed a dessert recipe that didn’t need baking! I remembered that I had some store-bought meringues in the freezer, as well as some blackberries, and we were off! This is adapted from Nigella Lawson’s Eton Mess recipe which calls for strawberries and pomegranate juice. I substituted my blackberries and just a splash of balsamic vinegar instead.

Ingredients
3 cups blackberries
Vanilla sugar – enough to sprinkle on the blackberries and lightly coat (You can use plain caster sugar if you don’t have vanilla sugar.)
1 teaspoon good balsamic vinegar
2 cups whipping cream
About 60-70 grams of tiny meringue nests

Method
Put blackberries into a bowl and add the sugar and vinegar, smash them slightly with a spoon and leave to macerate while you whip the cream.

Whip the cream in a large bowl until thick but still soft. Roughly crumble in most of the meringue nests - you will need chunks for texture as well as a little fine dust – leaving just a couple for topping.

Take out about quarter cupful of the blackberries, and gently fold the meringue cream and rest of the fruit mixture together. You don’t want it homogeneously red or purple, but just mixed so there is still some white whipped cream showing.

Arrange in berry bowls or wine glasses, and top each with some of the remaining macerated blackberries and crumbled meringues. Makes four or five servings, depending on the size of your glasses and how full you fill them. The perfect sweet (but not too sweet) ending to a perfect meal.