Showing posts with label sourdough recipes. Show all posts

Tuesday, October 12, 2021

Sourdough Tangzhong Bread #BreadBakers

This Sourdough Tangzhong Bread is flavorful with a wonderful texture, perfect for eating on its own or toasted with butter and jam. Start a day or two ahead of when you want to bake for the best flavor.

Food Lust People Love: This Sourdough Tangzhong Bread is flavorful with a wonderful texture, perfect for eating on its own or toasted with butter and jam. Start a day or two ahead of when you want to bake for the best flavor.

Like many of us, I took the lockdown days of this pandemic as an opportunity to create a sourdough starter. I did have one before we left Dubai but I am not a dedicated enough owner to try to transport it in an airplane. The more devoted among you will probably be horrified to hear that I tipped my unnamed starter out, washed the jar and didn’t even feel guilty. 

That said, I’ve been enjoying this one in a variety of recipes. You might want to try my sourdough pancakes or sourdough chocolate Bundt cake. Both delicious. Still haven’t named my starter yet though, just in case it needs to go at some point. Or I kill it. 

As for the tangzhong, I learned all about it when I made my first loaf with the method, a rye bread where it came in very handy to add structure and substance. When the flour you are using is low in gluten, like rye, knowing how to make a tangzhong is a very good thing! Making it in the microwave was such a breeze that I’ll never do it any other way now. 

N.B. An accurate thermometer is essential for this recipe. 

Sourdough Tangzhong Bread

This recipe is adapted from one on Food Geek. The author says his is not a recipe for beginners so I simplified it. While I didn’t get as airy a loaf as he did, we were super pleased with the flavor and texture. 

Ingredients for two round loaves
For the tangzhong:
1/2 cup or 64g bread flour
1 cup + 2 1/2 tablespoons or 275ml water

For the dough:
4 1/4 cups or 540g bread flour
1 1/3 cups or 170g whole-grain wheat flour
2 1/2 teaspoons salt
1 2/3 cups or 380ml water
Tangzhong 
3/4 cup or 170g sourdough starter

Method
Make tangzhong by mixing the flour and water with a whisk in a microwaveable bowl. 


Microwave on high until the mixture is above 149°F or 65°C. It took about 1 minute and 40 seconds in my 1000W microwave. Whisk halfway through then whisk again at the end. Your tangzhong will be thick and glossy. 


Set the tangzhong aside to cool to at least 86°F or 30°C.

To make the dough, add 4 1/4 cups or 531g bread flour, 172g whole-grain wheat flour, and 16g salt to the bowl of your stand mixer. 

Add 1 2/3 cups or 380ml of water to the bowl along with the cooled tangzhong.


Incorporate all the water into the flour mixture using your paddle beater or bread hook. Just keep mixing until there's no dry flour left. Cover the bowl with a little cling film or a damp towel and set it aside for 30 minutes. 


Add 170g of the sourdough starter on top of the dough and use the bread hook to incorporate it. 


Cover the bowl again with cling film or a damp towel and let it rest again for another 30 minutes. 

Rather than traditional kneading, the gluten strands are formed and stretched in this dough by performing three sets of coil folds spaced out by 30 minutes. I’m going to save us all a long explanation by including this YouTube video that shows you exactly what to do. Here's the link in case the video isn't working. https://youtu.be/6JQm2n4aVZc


You want to do this once, wait 30 minutes, do it again, wait 30 minutes, then do the final coil fold for a total of three times in all.

Cover the bowl again with cling film or a damp towel and set it somewhere warm for about an hour or until it has doubled in size. 


Put the bowl in a refrigerator for 24-48 hours. 

On the day you are ready to bake, remove the dough from the refrigerator and divide and shape the dough by cutting it in half with a bench scraper.


Shape each half into a ball. Stretch each side out and fold it up and over the ball until you’ve done that from all four sides. Pinch the ends together. 


Use the scraper to flip the ball over onto a square of baking parchment. Sprinkle on flour liberally and use the scraper to tuck the edges of the dough into a snug circle. Repeat for the other dough ball.


Transfer the dough balls on the baking parchment to your baking pan. 

Sprinkle the dough balls with extra flour and put the whole pan inside a plastic bag. To make sure it doesn’t stick to the dough balls, I like to blow it full of air and secure the opening with a clip. Set aside in a warm place to rise for about 1 hour.


About half way through the rising time, put an empty baking pan or iron skillet on the bottom rack and preheat your oven to 450°F or 232°C.

Carefully remove the baking pan from the plastic bag. Put the kettle on now because you are going to need one cup or 240ml boiling water when you put the loaves in the oven. 

Use a sharp knife or lame to score the dough. This will allow the loaves to rise and expand as they bake. 


When your oven is sufficiently preheated, put the bread pan on the middle rack of your oven and carefully pour about 1 cup or 240ml boiling water into the empty pan or skillet on the bottom rack. Quickly close the oven door. 

Bake the loaves for about 35-40 minutes or until they are golden and sound hollow when thumped.


Take the bread out and put it on a wire rack. Let the loaves cool completely before slicing. 

Food Lust People Love: This Sourdough Tangzhong Bread is flavorful with a wonderful texture, perfect for eating on its own or toasted with butter and jam. Start a day or two ahead of when you want to bake for the best flavor.

Enjoy!

This month my Bread Bakers are all sharing bread recipes using a tangzhong. Check out the links below! Many thanks to our host, Karen of Karen’s Kitchen Stories!

BreadBakers
#BreadBakers is a group of bread loving bakers who get together once a month to bake bread with a common ingredient or theme. Follow our Pinterest board right here. Links are also updated each month on this home page. We take turns hosting each month and choosing the theme/ingredient.

Pin this Sourdough Tangzhong Bread!

Food Lust People Love: This Sourdough Tangzhong Bread is flavorful with a wonderful texture, perfect for eating on its own or toasted with butter and jam. Start a day or two ahead of when you want to bake for the best flavor.

 .


Tuesday, April 13, 2021

Sourdough Sprouted Spelt Blini #BreadBakers

These sourdough sprout spelt blini are flavorful and fluffy, perfect to eat with sweet or savory toppings. We love them with cream cheese and salmon!

These sourdough sprout spelt blini are flavorful and fluffy, perfect to eat with sweet or savory toppings. We love them with cream cheese and salmon!

I must confess that I didn’t know much about blini beyond how to eat them so in researching this recipe, I learned a lot. For instance, blini were traditionally prepared at the end of winter to celebrate the birth of the new sun, the round blini representing the sun. The Orthodox church adopted the pagan tradition and Maslenitsa or pancake week is still celebrated today. 

Originally blini were made with a yeasted dough and baked in an oven. In fact, even though they are pan-fried like pancakes these days, even in Russia, the Russian verb used to describe their preparation is still “bake.”

Sourdough Sprouted Spelt Blini

My recipe was adapted from one on La Recette du Jour,  using wholegrain spelt instead of the traditional buckwheat. If you don't have spelt or buckwheat whole grain wheat would also work. 

Ingredients
1 1/4 cups or 300ml milk
1/2 teaspoon active dry yeast
1 tablespoon sugar
7 oz or 200g discard sourdough starter
2/3 cup or 80g plain flour
1 cup or 120g sprouted spelt flour
1/2 teaspoon salt
2 eggs
butter for the griddle 

Method
Warm the milk slightly and add in the yeast and sugar. When the yeast is activated (that is, when the milk gets foamy on top) add it to the sourdough starter in a large mixing bowl and whisk until blended. 

Add both the flours, stir again, cover with cling film or a plastic bag, and leave to double in size. This should take 1 – 1 1/2 hours at room temperature. (If it’s chilly where you live right now, put the covered bowl in your kitchen sink filled with warm water.) 


Separate the eggs and set the whites aside in a large clean bowl. Stir the yolks into the batter with the salt and leave for about another hour.


The batter should now be spongy and bubbly.


When you are ready to cook the blini, beat the egg whites to stiff peaks and fold them gently into the batter.


Heat your pan or griddle over a low heat and smear with a little butter. 

Once it’s hot, ladle on small dollops of batter, whatever size you want your blini to be. I used a small cookie scoop but still managed to get wonky shaped blini. Mine would probably be booed out of new sun celebration for not being round. 

Never mind. Just keep telling yourself that looks don’t matter. It’s all about the taste.

These sourdough sprout spelt blini are flavorful and fluffy, perfect to eat with sweet or savory toppings. We love them with cream cheese and salmon!

When bubbles start to form and the bottom is browned, carefully turn the blini over with a spatula to cook the other side. 

These sourdough sprout spelt blini are flavorful and fluffy, perfect to eat with sweet or savory toppings. We love them with cream cheese and salmon!

When both sides are cooked, put them on a warmed plate and cover loosely with foil to keep them warm. 

Serve them with butter and jam or topped with cured salmon, cream cheese and capers. 

These sourdough sprout spelt blini are flavorful and fluffy, perfect to eat with sweet or savory toppings. We love them with cream cheese and salmon!

Enjoy! 

This month my Bread Baker friends are sharing breads made with whole grain flour. Check out the recipes below. Many thanks to our host, Wendy of A Day in the Life on the Farm. 
BreadBakers

#BreadBakers is a group of bread loving bakers who get together once a month to bake bread with a common ingredient or theme. You can see all our lovely bread by following our Pinterest board right here. Links are also updated after each event on the #BreadBakershome page. We take turns hosting each month and choosing the theme/ingredient.


Pin these Sourdough Sprouted Spelt Blini!

These sourdough sprout spelt blini are flavorful and fluffy, perfect to eat with sweet or savory toppings. We love them with cream cheese and salmon!
 .


Tuesday, March 9, 2021

Easy Sourdough Pancakes #BreadBakers

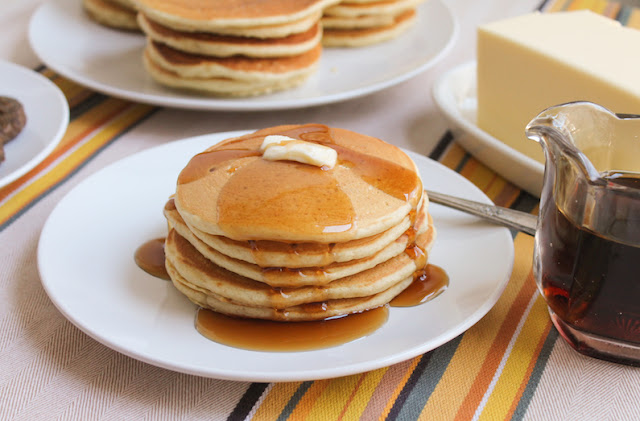
These easy sourdough pancakes use sourdough discard to add lots of flavor and baking powder and soda for rise so they can be cooked immediately. Serve with lashings of butter and syrup! 

Food Lust People Love: These easy sourdough pancakes use sourdough discard to add lots of flavor and baking powder and soda for rise so they can be cooked immediately. Serve with lashings of butter and syrup!

Like everyone who nurtures a sourdough starter, I’m always looking for tasty ways of using the discard or even fed starter. I’ve posted three of those recipes in the last year: Quattro Stagioni Sourdough Pizza, Cauliflower Sourdough Crumpets and even a rich chocolate Bundt cake. And I’ve made many more that never got shared. 

In short, we are friends of sourdough! Most of the recipes call for an overnight rise in the refrigerator or the addition of another rising agent like baking powder or yeast if you want to use the dough or batter right away. 

Easy Sourdough Pancakes

Since you use discard for this recipe, the sourdough flavor is mild but still discernible. These got two thumbs up each from my three taste testers. The batter makes about 2 dozen pancakes. If you want to serve all the pancakes at once, put your oven on warm and pop them in there on a baking pan as you make them. Keep them covered with foil.

Ingredients
2 cups or 250g all-purpose flour
2 teaspoons baking powder
1 teaspoon baking soda
2 tablespoons granulated sugar
1 teaspoon salt
1 cup or 227g sourdough starter
1 1/2 cups or 355ml milk
1 large egg
2 tablespoons canola or other light oil

To cook: 1-2 tablespoons canola or other light oil
Nonstick griddle or skillet

Method
In a large bowl, whisk together the flour, baking powder, baking soda, sugar and salt.


Add the sourdough starter, milk, egg and oil. Whisk again until just combined.


Heat your nonstick griddle over a medium flame then use a heatproof basting brush to brush a little oil evenly on the griddle. Use a small measuring cup to pour pancake batter on the hot griddle to create four pancakes about 4-4 1/2 in or 10-11 1/2 cm wide. 


Cook the pancakes on the first side until bubbles form on the top and start to pop, then carefully flip the pancakes over one by one.


Cook them on the second side for an additional 1-2 minutes or until the pancakes are cooked through and golden brown.

Food Lust People Love: These easy sourdough pancakes use sourdough discard to add lots of flavor and baking powder and soda for rise so they can be cooked immediately. Serve with lashings of butter and syrup!

Continue the process until all the pancakes are done. As mentioned above, unless you are serving them a stack at a time to the waiting hordes, you can put them on a pan in a warm oven covered with foil until you are ready to serve.

Serve the pancakes warm with butter and syrup. 

Food Lust People Love: These easy sourdough pancakes use sourdough discard to add lots of flavor and baking powder and soda for rise so they can be cooked immediately. Serve with lashings of butter and syrup!

Refrigerate leftovers, if any. They can be rewarmed in the microwave or toaster.

Enjoy! 

This month my Bread Baker friends are sharing griddle breads. Check them all out below. Many thanks to our host, Sneha of Sneha's Recipe.

BreadBakers

#BreadBakers is a group of bread loving bakers who get together once a month to bake bread with a common ingredient or theme. You can see all our lovely bread by following our Pinterest board right here. Links are also updated after each event on the #BreadBakershome page. We take turns hosting each month and choosing the theme/ingredient.

Pin these Easy Sourdough Pancakes!

Food Lust People Love: These easy sourdough pancakes use sourdough discard to add lots of flavor and baking powder and soda for rise so they can be cooked immediately. Serve with lashings of butter and syrup!

 .

Tuesday, February 9, 2021

Quattro Stagioni Sourdough Pizza #BreadBakers

Artichokes, tomato sauce, basil, mushrooms, ham and olives represent all four seasons in this Quattro Stagioni Sourdough Pizza, with fresh mozzarella.
 
Food Lust People Love: Artichokes, tomato sauce, basil, mushrooms, ham and olives represent all four seasons in this Quattro Stagioni Sourdough Pizza, with fresh mozzarella.

Over the years, we’ve enjoyed pizza in a lot of locations but our favorites are always thin flavorful crusts, baked in coal fired brick pizza ovens. Most of these were in Italian restaurants purporting to make authentic Neapolitan-style pizza. Unfortunately, that enviable crust is hard to recreate at home in a normal oven. 

I was intrigued by a recipe I read recently in Super Sourdough (<Amazon affiliate link) by James Morton. where he actually cooks the pizza in a super hot cast iron skillet on the stovetop, then pops it in the oven under the broiler to melt the cheese and finish it off. I couldn't wait to see if it was the crust of my dreams. 

Spoiler alert: It was! OMG. It was so good with amazing flavor and a wonderful crunchy chewiness. 

Artichokes represent spring, tomatoes and basil represent summer, mushrooms represent autumn and the ham or olives represent winter. We love both ham and olives so I refused to choose just one. It is winter right now after all so that’s how I justify emphasizing it with two ingredients. 

Quattro Stagioni Sourdough Pizza

It’s best to make your dough at least 24 hours before you plan to make pizza. This gives the sourdough starter plenty of time to work and for flavor to develop in the dough. The topping ingredients below are what are typical for a four seasons or quattro stagioni pizza. I’ve shared the amounts I used in parentheses as a guideline, but I know some people love their pizzas heaped with toppings and others prefer a sparser pie. You do you. 

Ingredients
For 3 dinner plate-sized pizzas:
3 1/4 cups or 413g strong white flour plus extra for dusting
1 teaspoon fine sea salt
9 fl oz or 266ml tepid water
1/2 cup or 120g fed sourdough starter
plenty of cornmeal or semolina, for dusting 
1 cup or 240ml of your favorite pizza sauce or make mine with the ingredients below. This makes 1 2/3 cups so you’ll have some leftover for other projects.

For the sauce:
3 garlic cloves
1 tablespoon good olive oil
1 can (14.5oz or 411g) petite diced tomatoes, no salt added 
1 tablespoon tomato paste 
1/2 teaspoon baking soda
sea salt to taste

For the quattro stagioni toppings:
canned artichoke hearts, drained and quartered (8 1/2 oz or 240g)
oil cured black olives (20 – about 2 oz or 60g)
fresh mushrooms (6 oz or 170g)
thin sliced smoked ham (7 oz or 200g)
fresh buffalo mozzarella balls (2 – 4 oz each)

For serving:
handful fresh basil leaves (I like to use the tiny ones that grow at the top of the stems. 
drizzle olive oil
crushed red pepper

Method
In a large bowl, mix the flour and salt together. Add the tepid water and the sourdough starter. 


Use a wooden spoon or a Danish dough whisk to combine everything into a wet and sticky dough. Cover the bowl with a damp towel or cling film and then leave it at room temperature for 6-8 hours.


Stretch it and fold it over several times during the rising time to develop the gluten. 


After the 6-8 hours, cover it again and put it in the refrigerator. James Morton says it can be left in the fridge for 3-4 days but it’s best used between 24 and 48 hours. 

Meanwhile, if you are making your own sauce, mince your garlic and place it in a small pot with the olive oil. Cook it gently, being careful not the let it color or, god forbid, burn. 

Pour the canned tomatoes in along with the tomato paste. 


Simmer for about 15-20 minutes, stirring occasionally. Add in the baking soda and stir well. It will bubble up as the baking soda reacts with and neutralizes some of the natural acid in the tomatoes. Taste the sauce and add a little fine sea salt, if needed. Remove the sauce from the stove and leave to cool. Store in an airtight container in the refrigerator until ready to assemble the pizzas. 

Next we’ll prep the toppings. Drain and quarter the canned artichoke hearts. Smash the olives with the broad side of a knife and discard the pits. 


Clean the mushrooms and cut off any hard stems. Slice the mushrooms. 


When you are ready to bake pizza, divide the dough into three equal pieces. My dough weighed 786g so each of the small pieces weighed 262g. If you don’t have a scale, just eyeball it but if you bake a lot, you’ll find an electronic scale very useful, I promise.


Preheat your broiler (grill) as hot as it goes with the oven door closed or as close to closed as possible, and then start heating a large cast-iron skillet on your stovetop.

I have a pizza peel but if you don’t, use a flat pan without sides (turn a pan over and use the back if you don’t have one without sides) and cover it liberally with cornmeal. Add one of dough balls and use your hands, and extra cornmeal, to stretch the dough into something resembling a roundish pizza crust. 


Add the tomato sauce and then the toppings. Artichokes in one quarter. 


Mushrooms and olives in two other quarters and finally, tear the ham into big bits and drape them in the fourth quarter. Jiggle the pizza peel or pan occasionally to see if the pizza can still move. If not, lift the sides and add more cornmeal till it shifts freely.


Carefully slide the pizza into your screaming hot cast iron skillet. My first pizza tried to fold under on one side so it turned out kind of a wonky shape but it still tasted delicious so who cares, right? 


Cook the pizza on the stovetop for a minute or two, checking the bottom of the crust occasionally by lifting it up. You want brown and crusty, even a little scorching in places but not burnt.

Use your clean hands to tear off pieces of the mozzarella and place them about on the pizza. Turn the stove off. 

Food Lust People Love: Artichokes, tomato sauce, basil, mushrooms, ham and olives represent all four seasons in this Quattro Stagioni Sourdough Pizza, with fresh mozzarella.

Using thick oven mitts, transfer the iron skillet to the oven and place it under the preheated broiler (grill.) Close the oven as much as possible and cook the pizza for a few minutes or until the mozzarella is melted and the top of the pizza is browning. 

Food Lust People Love: Artichokes, tomato sauce, basil, mushrooms, ham and olives represent all four seasons in this Quattro Stagioni Sourdough Pizza, with fresh mozzarella.

Remove the skillet from the oven and slide the pizza on a serving plate and hand it to the first lucky recipient. 

Food Lust People Love: Artichokes, tomato sauce, basil, mushrooms, ham and olives represent all four seasons in this Quattro Stagioni Sourdough Pizza, with fresh mozzarella.

Let them add some fresh basil leaves, a drizzle of good olive oil and some crushed red pepper, as desired, while you get on with cooking the other two pizzas, following the previous instructions again. 

As James Morton says, “It takes the sacrifice of one person to make the family’s pizza, but it’s so worth it. Between each pizza, get your surface back on the stove to heat up to frightening levels again before you slide your next pizza on top.”

Of course, if you have more than one cast iron skillet big enough, you can get this job done much more quickly than I did! 

Food Lust People Love: Artichokes, tomato sauce, basil, mushrooms, ham and olives represent all four seasons in this Quattro Stagioni Sourdough Pizza, with fresh mozzarella.

Enjoy! 

This month my Bread Bakers are all sharing pizza recipes. Check out the list of beauties below! Many thanks to our host, Karen of Karen’s Kitchen Stories
BreadBakers
#BreadBakers is a group of bread loving bakers who get together once a month to bake bread with a common ingredient or theme. You can see all our lovely bread by following our Pinterest board right here. Links are also updated after each event on the #BreadBakers home page. We take turns hosting each month and choosing the theme/ingredient.

Pin this Quattro Stagioni Sourdough Pizza!

Food Lust People Love: Artichokes, tomato sauce, basil, mushrooms, ham and olives represent all four seasons in this Quattro Stagioni Sourdough Pizza, with fresh mozzarella.
 .

Tuesday, September 8, 2020

Cauliflower Sourdough Crumpets #BreadBakers

These cauliflower sourdough crumpets are cooked in butter, which gives them wonderful golden outsides, perfectly complementing the tender insides made of sourdough starter and tiny cauliflower bits.

Food Lust People Love: These cauliflower sourdough crumpets are cooked in butter, which gives them wonderful golden outsides, perfectly complementing the tender insides made of sourdough starter and tiny cauliflower bits.

I’m always looking for easy recipes that use up sourdough starter discard so when I found this one on the King Arthur Flour website, I couldn’t wait to try it. Like every recipe I’ve made from the KAF website, it did not disappoint. But that got me thinking. What else could I add to the original to add flavor and nutrition without affecting the look of the crumpets?

And so these cauliflower sourdough crumpets were born. I made them one afternoon when my husband and I had somehow skipped lunch and it took the two of us mere minutes to demolish all five crumpets, with and without cheese. The flavor of the cauliflower is subtle but definitely there. In short, we loved them. I have a feeling they will be on regular rotation whenever I have sourdough starter to discard. 

Cauliflower Sourdough Crumpets

Many supermarkets carry ready-made cauliflower “rice” in the refrigerator section of their produce departments but it’s easy enough to make at home. Grate the cauliflower florets or pulse them in a food processor until they resemble small pieces, similar in size to short grain rice. This recipe is easily doubled but, as written below, it makes 5 crumpets.

Ingredients for five crumpets
1/2 cup or 70g cauliflower “rice”
1 cup or 227g sourdough starter (unfed/discard)
1 teaspoon sugar
1/2 teaspoon fine sea salt
3/8 teaspoon baking soda*
Butter for greasing English muffin rings and pan

*If your discard starter is particularly sour, you might want to increase the baking soda to 1/2 teaspoon.

Method
Steam your cauliflower “rice” for about three minutes and then press it to get rid of as much liquid as possible.


Put it in a large mixing bowl and set it aside to cool.

Add the sourdough starter to your cooled cauliflower, along with the sugar, salt and baking soda. Stir well to combine. The batter will start to bubble up almost immediately. 


Heat your nonstick griddle or large frying pan over medium-low heat. 

Lightly grease five English muffin rings (1" high and 4" across) and place as many as will fit flat on your pan. I cooked mine in two batches, three and two. Melt a pat of butter in each then use a pastry brush to cover the pan inside the rings with the butter. 


Divide the batter evenly among the buttered rings. I used a 1/4 cup measuring scoop to fill each ring up about halfway. 


Cook for about 5 minutes, until the tops are set and full of small holes. Run a knife around the edge of the rings and carefully lift them off. Use a spatula to turn the crumpets over and cook for another 3-4 minutes or until they are golden on the other side as well. 

Food Lust People Love: These cauliflower sourdough crumpets are cooked in butter, which gives them wonderful golden outsides, perfectly complementing the tender insides made of sourdough starter and tiny cauliflower bits.

Remove from the pan and keep warm while you repeat the process to cook the rest of the crumpets.

Serve the crumpets warm, spread with butter. They are also excellent with some grated cheddar on top, which really goes great with the cauliflower. 

Food Lust People Love: These cauliflower sourdough crumpets are cooked in butter, which gives them wonderful golden outsides, perfectly complementing the tender insides made of sourdough starter and tiny cauliflower bits.

Enjoy!

Food Lust People Love: These cauliflower sourdough crumpets are cooked in butter, which gives them wonderful golden outsides, perfectly complementing the tender insides made of sourdough starter and tiny cauliflower bits.

This month my Bread Bakers group is sharing breads made with vegetables. Many thanks to Renu of Cook with Renu for hosting! 

#BreadBakers is a group of bread loving bakers who get together once a month to bake bread with a common ingredient or theme. You can see all our lovely bread by following our Pinterest board right here. Links are also updated after each event on the #BreadBakers home page. We take turns hosting each month and choosing the theme/ingredient.

Pin these Cauliflower Sourdough Crumpets! 

Food Lust People Love: These cauliflower sourdough crumpets are cooked in butter, which gives them wonderful golden outsides, perfectly complementing the tender insides made of sourdough starter and tiny cauliflower bits.

 .

Tuesday, April 11, 2017

Il Pane di Matera #BreadBakers

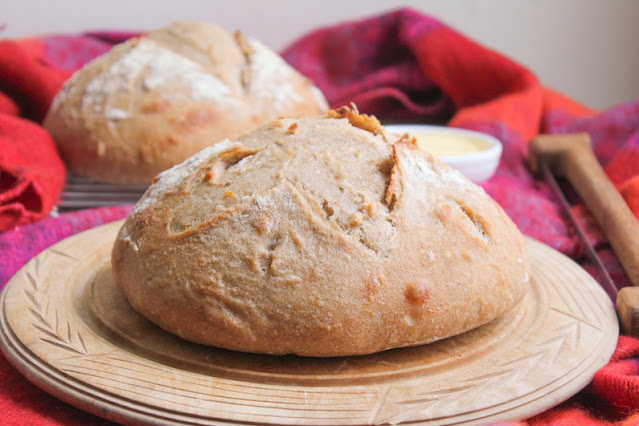
A wonderful crusty loaf made in the tradition of Matera bread, or il pane di Matera, from milled durum wheat and a sourdough starter.


Let me start off with a disclaimer. This loaf cannot officially be called il pane di Matera. Yeah, yeah, I know that’s what the title says. Hear me out. Pane de Matera is special, with specific requirements, including not just milled durum wheat (which I have used) but from 100% Lucanian milled semolina grain known as "Senatore Cappelli," which I have not. The water is also supposed come from a local source in the Matera area of Italy. Finally, it should begin with a piece of dough from the previous day’s loaf, with yeast made from a fresh fruit starter. I used a sourdough starter.

Such is the tradition and history behind this loaf that it was given the European Union Denomination of Protected Origin (DOP) which means, just like sparkling wine can’t be called Champagne unless it is produced in the Champagne region of France or random ham cannot be called Ibérico unless it comes from Black Iberian Pigs raised in the Iberian Peninsula region of Spain and Portugal, it must be produced the right way in the right place to be called Il Pane di Matera.

So while I’ve made a valiant attempt at producing my own version of il pane di Matera, and it’s a fabulous crusty loaf, it doesn’t officially qualify for the name. That said, you should make this guy. With all due respect to Italy, it reminds me of my favorite baguette tradition in France and that says a lot.

With the substandard help of Google Translate, I made my bread from this recipe in Italian. That was part of the fun!

Watch this video to see how to shape the dough.

Ingredients
150ml or 160g sourdough starter or 20g brewer’s yeast
3 3/4 cups or 600g Italian semolina durum wheat flour
2 teaspoons sea salt
warm water

Method
Mix your sourdough starter or brewer’s yeast with 6 3/4 oz or 200ml warm water and set aside.
In the bowl of your stand mixer, combine the flour and 1 1/4 cups or 300ml warm water and mix for a few minutes. Mine was too crumbly for the bread hook so I just kept mixing with the K cake beater.


Add in the yeast mixture and beat/knead for five minutes. At this point, I did change to the bread hook.


Add in the salt and knead another few minutes.

Put the dough in a bowl dusted with flour and cover it with cling film. Poke holes the film with a toothpick.


Leave to rise for two hours in a warm place.


Knead the dough on a lightly floured surface and put it back in the bowl, covered again for another two hours.

After those two hours are up, you can knead the dough, shape and bake. But at this point I strayed from the recipe I was working with and turned to another source I found online which said that traditionally the dough was left to rise overnight, then it was brought to the communal ovens in the morning to bake. So, after kneading again, I popped the dough in its covered bowl into the refrigerator. If you’d rather skip this step, preheat your oven to 220°F or 104°C, with a pizza stone on a middle shelf, if you have one, and proceed down one more paragraph.

The next morning, I removed the dough from the cold and left it to warm up again.


When it was no longer chilled, I preheated my to 220°F or 104°C with my pizza stone on a middle shelf.

Transfer the dough to a well-floured work surface and knead it. (As you can tell from the photos, mine was still quite slack compared to the dough in the video.

Form the dough into a ball, press a crease in it, and then fold the ball in half.


Flour a baking sheet and transfer the dough to it. Use a sharp knife to slice three cuts into the dough. (See YouTube link above for a visual on this.) According to a source online that may or may not be Wikipedia in Italian (I forget but I read it somewhere and made a note), the three cuts represent the Holy Trinity.


Place the baking sheet on the pizza stone and bake for 15 minutes. Raise the temperature of your oven to 350°F or 180°C and bake for more about 40-45 minutes more, or until the loaf is golden and it sounds hollow when tapped. About midway through, I also slid the loaf off of the baking pan and straight onto the pizza stone.

There were plenty of holes, but I was expecting the rest of the crumb to be more open. Next time, I'm going to let the dough rise just a bit after shaping and before putting it into the hot oven but overall I was extremely pleased, especially with the crusty outside and the enormous flavor.

Allow to cool completely before slicing.

Enjoy!


This month my Bread Bakers group are baking Italian breads and we have a fabulous line up for you. I can’t wait to travel all over Italy, loaf by loaf. Many thanks to our host, Anshie of Spice Roots for all of her hard work and this great theme.

BreadBakers
#BreadBakers is a group of bread loving bakers who get together once a month to bake bread with a common ingredient or theme. Follow our Pinterest board right here. Links are also updated each month on this home page.

We take turns hosting each month and choosing the theme/ingredient.
Pin this Pane di Matera!

 .