Showing posts with label sweet. Show all posts

Wednesday, October 14, 2015

Brussels Sprouts with Harissa, Honey and Lime #BloggerCLUE


Aromatic, spicy harissa, honey and tart lime juice perk up the flavor of pan-roasted Brussels sprouts for a great side dish or serve over rice for a vegetarian main course.

This month my Blogger C.L.U.E. assignment is Authentic Suburban Gourmet and our clue was Autumn flavors. I had such fun poking around in Lisa’s blog with its beautiful photographs that I was drooling a little before I even got to the descriptions! I went about my search a little differently this time. Rather than searching for “fall” or “Autumn” I used Lisa’s drop down archives list and browsed through all of her October recipes from the last few years. I was sorely tempted by the Fig & Honey Infused Goat Cheese Bites, Pear and Honey Crostini with Spicy Candied Pistachios, Fig Tarts with Honey Pistachio Brittle and her Roasted Pork with Port Infused Fig Chutney but finally, I was seduced by these divinely spicy sweet Brussels sprouts!

Lisa’s original recipe called for sriracha but after three Dubai supermarkets turned up no Vietnamese hot sauce, I decided that a regional substitution would work. Harissa, a paste made of chili peppers, garlic and other spices is common in this part of the world and I figured it was not far off from sriracha which is made from chili peppers and garlic as well, but thinned with vinegar. Like Lisa, we are fans of the much maligned Brussels sprout but this recipe might just win over some naysayers too.

Ingredients
1.1 lb or 500g Brussels sprouts
1 tablespoon harissa or to taste. Or make Lisa’s original recipe with sriracha!
3 tablespoons honey
1 tablespoon lime juice or to taste (I added just a bit more to make up for the vinegar in the sriracha.)
Salt
Olive oil for frying

Method
Trim the stem end of the sprouts and cut each one in half. Keep any loose leaves.


In a large bowl, whisk together the harissa, honey and lime juice. Taste and add more harissa or honey if you like. Set aside.


Lisa said to add about a quarter cup of olive oil to a large skillet but since I was using a non-stick pan, I just gave it a good drizzle of oil.

Panfry the halved Brussels sprouts and the loose leaves until deep golden brown and season with a sprinkle of salt during the cooking process.


Transfer the sprouts to the bowl with the harissa, honey and lime sauce. Toss to coat. Taste and add a little more salt, if necessary.


Enjoy!


Here's the list of our Blogger C.L.U.E. participants this month:

.

Sunday, August 9, 2015

Cherry Lemon Jam

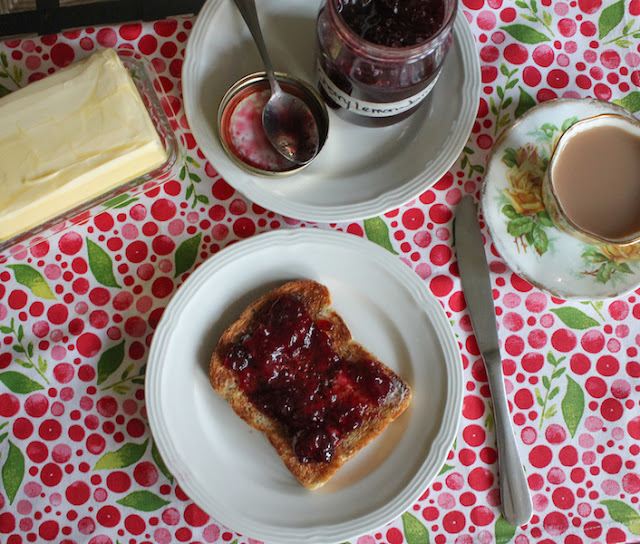
Cherry lemon jam is made with juicy summer cherries and fresh lemon, cooked down with lemon zest and sugar. It's the perfect jammy marriage of sweet and sharp, as delicious on a piece of buttered toast as spooned over cold vanilla ice cream or stirred into a pot of natural yogurt.

Food Lust People Love: Cherry lemon jam is made with juicy summer cherries and fresh lemon, cooked down with lemon zest and sugar. It's the perfect jammy marriage of sweet and sharp, as delicious on a piece of buttered toast as spooned over cold vanilla ice cream or stirred into a pot of natural yogurt.


One of my pet peeves is waste. That’s not to say that I don’t throw out my share of things in the refrigerator that somehow manage to work their way to the back, get forgotten, and grow legs on occasion, but it makes me sad when that happens. Especially when it’s something I really love to eat.

Here in Dubai, where temperatures rarely fall below an average low winter temperature of 57°F or 14°C, growing cherries, which require a chill time of 700-800 hours in order to flower and produce fruit, is just not an option. So all of the cherries that appear in our supermarkets are flown in at great expense from countries that enjoy near or freezing temperatures in winter.

As you might guess, those costs are passed on to consumers and cherries are crazy expensive to buy here. So one of my favorite summer rituals is buying and eating my not inconsiderable weight in cherries when I am in the States on holiday.

As I packed up to head back to Dubai this summer – and if you follow me on Instagram you know I mean that quite literally – I still had a big bowl of cherries on the kitchen counter. There was just no way I could leave those behind! So I got out the cherry pitter and went to work. Jamming is so much more satisfying than packing suitcases!

Food Lust People Love: Cherry lemon jam is made with juicy summer cherries and fresh lemon, cooked down with lemon zest and sugar. It's the perfect jammy marriage of sweet and sharp, as delicious on a piece of buttered toast as spooned over cold vanilla ice cream or stirred into a pot of natural yogurt.

Jam making is really easy, with the right tools.
A digital scale and a thermometer are going to simplify the process. One of the secrets to easy fruit jam, that is jam that sets, is to add something acidic, like lemons which have natural pectin, and to cook the fruit with an appropriate amount of sugar until it reaches a temperature of 220°F or 105°C.

Since the amount of sugar depends on the weight of your cooked fruit, I’d like to suggest you buy a digital kitchen scale. < Amazon affiliate link to the one I use, but, honestly, any scale which can toggle between metric and imperial measures will do, giving you the freedom to use recipes from all over the world. (You can measure by volume but weighing is a lot less messy.)

If you don’t have one, may I suggest you get a thermometer as well? < Once again, that's an affiliate link to mine - costs about $14 and I use it ALL THE TIME. A thermometer takes the stress and worry of “will it set?” completely out of the jam making equation. Reaching the proper temperature hasn't failed me yet.

Ingredients
A bunch of cherries (mine weighed 2 lbs 5 oz or 1050g unpitted, with stems, 2 lbs 1 1/2 oz or 950g without pits and stems)
2 small lemons (about one per pound or half kilo of other fruit)
2 tablespoons lemon juice
3/4 teaspoon salt
Sugar - an amount equivalent to 3/4 the weight of your cooked cherries and lemons and their juice – this batch was 2 lbs 2 1/2 oz or 978g – so I used 3 1/2 cups or 734g sugar

Method
Sterilize your jars and lids and put them at the ready, metal teaspoon in each, canning funnel perched in one, before you begin. Sterilize your ladle as well. The amounts given above made two pint jars and one half pint.


Pit your cherries and put them in a large non-reactive pot. (If you have a scale, go ahead and weigh the empty pot first and make a note of the weight for later.) Grate in the zest of your two lemons.

Cut the peels and pith (the white stuff) off of your lemons with a sharp knife. Remove all the seeds and chop the flesh into small chunks.

Scrape the chopped lemons and any juice on the cutting board, into the cherry pot.


Add the extra two tablespoons of lemon juice into the pot.

Cook the pitted cherries and lemons, covered, over a medium flame for about 15 or 20 minutes, until they have released some juice and the cherries have softened.

Use a potato masher to mash them lightly, leaving some cherries whole.

Measure your cooked fruit, juices and all, by volume or weight and then do a little math. Add 3/4 that amount of sugar, along with the salt.

My calculation looked like this:
Pot weighs 1300g empty.
With cooked cherries and lemon, it weighs 2278g.  2278-1300 = 978g.
Weight of cooked fruit and juice = 978g x .75 = 734g or about 3 1/2 cups sugar to add

Cook the fruit, sugar and salt over a medium to high heat, uncovered, till the mixture starts to thicken. Stir frequently and set your thermometer in the pot. Cook quickly until the temperature reaches setting point for jam: 220°F or 105°C.


Quickly ladle the hot, sweet jam into your prepared jars and screw the lids on as tightly as you can manage.

Turn the jars upside down and leave to cool. The scalding cooked fruit further sterilizes the jars and as the jam cools, a suction forms and the lids are firmly sealed. The little circles on the lids should pop in and keep the jam safe for consumption for many months. If any of the seals don’t create a sufficient vacuum and the circles don’t pop in, store those jars in the refrigerator.


Enjoy!

Food Lust People Love: Cherry lemon jam is made with juicy summer cherries and fresh lemon, cooked down with lemon zest and sugar. It's the perfect jammy marriage of sweet and sharp, as delicious on a piece of buttered toast as spooned over cold vanilla ice cream or stirred into a pot of natural yogurt.


This week I am delighted to be hosting Sunday Supper with my friend and fellow blogger, Heather from Hezzi-D’s Books and Cooks. It’s our goal to encourage everyone to Save Summer Harvest with a number of methods, and in keeping with the mission of Sunday Supper, to enjoy the bounty of summer around your family table for months to come.

Canning
Dehydrating
Fermentation
Freezing
Infusing
Pickling
Preserving in oil or butter

Food Lust People Love: Cherry lemon jam is made with juicy summer cherries and fresh lemon, cooked down with lemon zest and sugar. It's the perfect jammy marriage of sweet and sharp, as delicious on a piece of buttered toast as spooned over cold vanilla ice cream or stirred into a pot of natural yogurt.


.

Wednesday, July 29, 2015

Spicy Tahini Palmiers @NeighborFoodie


Ready rolled puff pastry spread with tahini, chilies and garlic and baked till crispy make great nibbles, perfect for a shower, birthday or even a cocktail party.

Today we are celebrating our fellow blogger and sweet friend Courtney of NeighborFood who will shortly be welcoming her ”little mister.” Since we can’t actually get together, Nancy from gotta get baked has organized a virtual baby shower, which doesn’t have gifts but certainly has a lot of good food to welcome the sweet baby boy and send best wishes to his eager parents. Make sure to scroll down to see the link list to all the party food! And if you want to follow Courtney for delicious dishes and upcoming baby news, do like her blog Facebook page or follow her on Instagram.

These puff pastry palmiers are so easy to make, and so delicious. I could have eaten the whole plate!

Ingredients
1/4 cup or 60g tahini
1 fresh red chili pepper
1 clove garlic
1/2 teaspoon paprika
1/4 teaspoon salt
1 sheet ready rolled puff pastry, thawed.

Method
Chop chili finely. You can deseed first if you’d like to reduce the amount of spiciness. Put tahini, chopped chili, garlic, paprika and salt in a small bowl. Stir well.


Unroll your thawed puff pastry on top of a large piece of cling film.

Spread your paste evenly over the pastry, making sure to go all the way to edges.


Use the cling film underneath to help you fold the bottom in to the middle.


Now fold the top in to the middle.


Now fold the bottom over the top side as if you are closing a long book.


Use the cling film under the roll to tightly cover it and refrigerate for at least 30 minutes.

Preheat oven to 400°F or 200°C.

Unwrap the roll and cut it in half. Rewrap one half and put it back in the refrigerator. Cut the other half in half inch or 1 cm slices with a sharp knife.

Lay the slices on a baking pan lined with parchment or a non-stick silicone mat. Leave room between them for puffing and spreading.


Bake for 10-12 minutes in your preheated oven on one side and then flip and bake 5-6 minutes more on the other, or until golden and crispy. Cool on a wire rack.


Repeat the process with the second half of the roll. This makes about 20 spicy tahini palmiers.


Enjoy!

Check out all the divine food we are bringing along to Courtney's virtual baby shower!


.

Monday, May 18, 2015

Creamy Camel Milk Caramel


Cooked in the traditional long slow simmering way of dulce de leche or cajeta, this rich caramel is made with camel’s milk, said to be a healthy alternative to cow’s milk and better tolerated by folks with allergies. Here's one fact: It is deliciously creamy. 

I have been known to do a little happy dance when the farmer’s market in Houston still has some goat’s milk left because usually all of their bottles are spoken for, by regular customers. But sometimes I get lucky. And one of my favorite things about living in Singapore was the goat farm where I could go and buy the milk directly from the, ahem, producers. Homemade soft cheese made with goat’s milk is the best. When we moved to Dubai a couple of years ago, I discovered that one could buy camel’s milk in the grocery store, which intrigued me but somehow I never got around to buying any.

Then, a couple of weeks ago, at the first birthday celebration of Food e Mag dxb, an online magazine to which I’ve been a contributor (It’s gorgeous! Do go have a look!) I met a Dubai-based cookbook author who has a weekly show on local talk radio. I regularly listen to Suzanne Husseini  on 103.8 FM Thursday mornings from 10 a.m. – noon, because her topic is one of my favorites, food! Since the party was on a Wednesday evening, nosy parker that I am, I had to ask what the focus would be for the next day’s show. And because she’s a sweet person, Suzanne didn’t tell me to buzz off. She said it would be camel milk.

That's Suzanne in the hat, and me, on the right, with our Food e Mag dxb's editors Debbie Rogers and Ishita B Saha.. 

I learned so much from that show! Do you know that the farmer cannot separate the camels from their calves, as we do to cows, or they’ll stop producing milk? Also, the top producers only make between 5 and 20 liters a day vs. 40 liters from top producing cows. Camels are not mature enough to be mated until they are four years old and they carry their babies for more than 13 months before giving birth. Compare that to cows that can mate at 13-15 months old and have a gestation of nine and a half months. Or goats that can be bred at seven months old and that give birth after only five months! So, why would a farmer choose to raise camels for milk? It will come as no surprise to learn that camels are uniquely suited to the dry environment here and, while they don’t produce as much milk, they also don’t need as much water as other dairy animals would.

Camelicious
Camel milk doesn’t coagulate as easily as goat or cow milk so I decided that cheese would not be my first foray into using it. Instead, I decided to try making cajeta – that sticky sweet caramelized condensed milk usually made with goat’s milk. Or if bought in a can as dulce de leche, cow’s milk. Make this on a slow day when you are going to be home for a few hours anyway because it has to cook long and low. Mine took almost three hours.

Adapted from this recipe on Pati’s Mexican Table.

Ingredients – yields about 1 1/4 cups or 300ml creamy camel milk caramel
4 1/4 cups or 1 liter camel milk
3/4 cup or 175g demerara sugar
1  1/2 teaspoons  vanilla extract
1/4 teaspoon baking soda
1/2 teaspoon flakey salt or 1/4 teaspoon fine sea salt or to taste

Method
Pour your sugar, vanilla and baking soda into a large thick-bottomed pot with the milk and heat gently over a medium flame, stirring until all the sugar is dissolved.


Let it come to a slow boil and then turn it right down, or add a diffuser under the pot. I had other things going on at home that day and I was afraid the milk might scorch so I used the diffuser.

These are great for making sure the rice at the bottom of the pot doesn't burn either. 

If you are a thermometer-using type, I kept one in the pot and the temperature stayed between 165-180°F or 74-82°C.

Cook slowly, stirring occasionally, until the milk reduces by at least half and starts to turn a warm golden color.


Keep a closer eye on it now and stir more often. The camel milk caramel is done when a spoon pulled through the liquid shows the bottom of the pot for a few brief moments before running together again. It should be a deep golden color.


Put a metal teaspoon in a clean jar and pour the caramel in. Remove the spoon and seal tightly.

Still pourable

The caramel will thicken considerably when refrigerated and will keep for several months.

Cold, it's pretty stiff.
This is great over ice cream or spread on bread or simply eaten with a spoon. Tomorrow I'll be sharing an Egyptian cookie recipe using it as well.

Enjoy!

Update: Here are the basbousa using the camel milk caramel!


Monday, February 23, 2015

Pecan Caramel Chocolate Muffins #MuffinMonday

The second in my candy bar series, made with Frey’s Caramel and Pecan milk chocolate, this sweet muffin has big dollops of caramel, just folded through the batter, leaving sweet golden streaks, and more than its fair share of toasted pecans. 

So I’m baking with my chocolate bar stash again. I take them out of the storage box and fan them out like playing cards, then choose one to recreate in muffin form, adding more of the key ingredients.  I almost did maple-walnut but my walnut supply is low. So now you have that one to look forward to, if I don’t get to white chocolate-lemon first. Or dark chocolate with chili. I know, I know. But I’m having fun!

Ingredients
Also contains hazelnuts. Why?
1 cup or 115g whole pecans, toasted
1 Frey Pecan & Caramel bar (3 1/2 oz or 100g)
2 cups or 250g flour
3/4 cup or 150g sugar
2 teaspoons baking powder
1/2 teaspoon salt
2 eggs
3/4 cup or 180ml milk
1/4 cup or 60g butter, melted and cooled
1 teaspoon vanilla extract
1/3 cup or 80ml caramel - plus extra for drizzling on baked muffins, optional

Method
Preheat your oven to 350°F or 180°C and either grease a 12-cup muffin tin or line it with paper muffin cups.

Chop your chocolate bar with a knife and put aside 12 chunks for decorating the tops of the muffins. Set aside 12 of the prettiest pecans and chop the rest up to add into the muffin batter.


In a large bowl, stir together your flour, sugar, baking powder and salt.


In another smaller bowl, whisk together your eggs, milk, melted butter and vanilla. Fold your wet ingredients into your dry ones.  Stop when there is still quite a bit of flour still unmixed.

Fold in the larger pile of the chopped chocolate bar and the chopped pile of pecans.


Drop the caramel in spoonfuls all over the top of the batter.

Fold it in, trying not to stir too hard. You want to see big golden streaks of caramel in the batter still.


Divide the batter between your prepared muffin cups.

Top each with a piece of chocolate and a pecan.


Bake in the preheated oven for about 20 minutes or until a toothpick stuck in the middle comes out clean.


Allow to cool for a few minutes in the pan and then remove to a wire rack to cool completely.

Once cool, drizzle on a little more caramel if desired.


Enjoy!


The Candy Bar Series


1. Dark Chocolate Toasted Sesame Muffins using Lindt Dark Chocolate Roasted Sesame


3. White Chocolate Lemon Muffins using Movenpick Swiss Chocolate White Lemon

.

Sunday, December 14, 2014

Rhubarb Syrup


This bright pink rhubarb syrup is great in cocktail, drizzled over ice cream and pound cake or even spooned over crepes. 

Rhubarb syrup is easy to make and it goes down even easier in a cocktail. Best of all, when refrigerated, it preserves the beauty and flavor of rhubarb much longer than the cut stalks could stay fresh.

Ingredients to yield about 2/3 cup or 155ml of syrup (This recipe can be easily doubled.)
2 cups, loosely packed, or 230g chopped rhubarb
1/2 cup or 100g sugar
1/2 cup or 120ml water
Pinch salt

Method
Combine the rhubarb, sugar, water and salt in a pot and bring to a boil.

Lower the heat and simmer for about 20 minutes, stirring occasionally, until the fruit is soft and the liquid has thickened slightly.


Set a fine-meshed strainer or a coarse strainer lined with cheesecloth over a large measuring cup.

Pour the rhubarb into the strainer and allow the syrup to drip down into the bowl.

You can press the solids with a rubber spatula to squeeze more liquid out or just leave it some place cool for an hour or two to make sure it has dripped completely.


Decant your syrup into a clean bottle and store it in the refrigerator.

I fold the leftover rhubarb solids through some whipped cream, adding raspberries for more color and a drizzle of the syrup for a lovely rhubarb raspberry fool. You can also spread it on toast.


The syrup has many uses but my favorite is a rhubarb fool cocktail with a drizzle of cream and orange zest.


Enjoy!