Tuesday, June 9, 2015

Chickpea Moroccan Bread #BreadBakers


Cumin, kalongi and chickpeas add a lovely spicy heartiness to these tender, fluffy flatbreads. They are fabulous on their own or will happily accompany most any savory meal.

I am sure it happens in every family. A new favorite recipe is somehow discovered and is made again and again. Then, over time, it is forgotten until a conversation sparks a memory and you think, “Hey, remember that baked Camembert dish we used to make?”  We loved that dish! And you need to make it again. This month’s Bread Bakers theme, yeasty flatbreads, had that effect on me. I scoured the internet for inspiration and even found several recipes I would have loved to adapt and share, then I suddenly remember this one and had to make it again.

It’s been more than 15 years since Jamie Oliver’s second book, The Naked Chef Takes Off* was published but I still refer to it very occasionally for a couple of recipes, including the one he calls Chickpea Moroccan Flatbread. I have no idea whether actual Moroccans would recognize the recipe or make anything similar but I can tell you that it’s delicious. Over the years I’ve adapted it slightly, sometimes also adding fresh chopped chilies along with the chickpeas, varying the spices or brushing the finished flatbreads with melted butter. I can highly recommend those modifications. This bread is quick to make, needing only one rise, and adapts beautifully to whatever you want to throw in it.

Ingredients
4 cups or 500g strong bread flour plus extra for dusting
1 1/4- 1 1/2 cups or 300-360ml tepid water
1 (1/4 oz or 7g) sachet dried yeast
1 tablespoon sugar
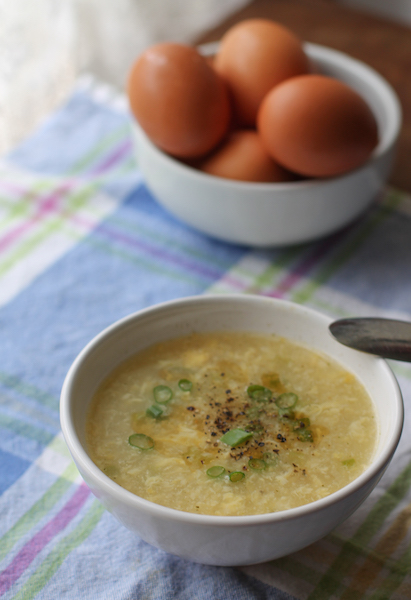
1 cup or 130g cooked chickpeas (I use drained and rinsed canned ones most often but you can cook your own.)
2 teaspoons fine sea salt
1 1/2 teaspoons whole cumin
1 1/2 teaspoons kalongi (also know as nigella seeds) Jamie’s version calls for coriander.
1 teaspoon canola or other light oil
1/4 cup or 60g butter, melted and cooled

Method
Combine your yeast and sugar and add in about half a cup or 120ml of the tepid water. Leave to prove while you get on with the recipe. You are looking for the mixture to bubble up and become foamy. If it does not, your yeast is dead. Buy some new yeast and start over.


Mash your chickpeas roughly with a fork. No need to remove the skins.


Add your flour and salt to a large mixing bowl and make a well in the middle.

Pour the yeast mixture into the well. Sprinkle on your cumin and nigella seeds then add in the mashed chickpeas.


Start mixing the flour and chickpeas into the yeasty water in the middle, a little at a time, until you have a sticky dough. Add the rest of the water a little at a time, mixing more flour in as you go, until you have a homogenous dough.


Knead the dough on a lightly floured surface until it is stretchy and springy, dusting with a little more flour as necessary. Form the dough into a smooth ball.

Oil the inside of a large bowl with the canola oil and put the dough ball inside. Slash the top with a lame or sharp knife to allow the dough to rise with ease.

Cover it with some cling film or a towel and put it in a warm, draft free place for at least half an hour.


When you are ready to griddle your chickpea flatbreads, punch the risen dough down and cut it into seven or eight pieces.


Start heating your iron griddle or heavy duty skillet and, on a lightly floured surface, roll the first ball out thinly with a rolling pin.


When the griddle is hot, lay the rolled dough on it, being careful not to touch the griddle and burn yourself. Cook on one side until little brown spots and bubbles appear and the dough releases itself from the griddle.

Turn and griddle on the other side until done.

This takes just a couple of minutes on each side.

Meanwhile, roll out the next dough ball into a circle in readiness.

Remove the cooked flatbread to a plate and brush both sides with the melted butter. Keep warm while you cook the rest.


Add the next flatbread to the hot griddle and repeat process until all the flatbreads are cooked and brushed with butter.


Enjoy!


BreadBakers

Many thanks to our Bread Bakers host this month, Mireille of The Schizo Chef. I am delighted to be making one of my old favorite recipes to share for this fun yeasty flatbread event! Have a look at all the other wonderful flatbreads we’ve got for you today!


#BreadBakers is a group of bread loving bakers who get together once a month to bake bread with a common ingredient or theme. Follow our Pinterest board right here.

Links are also updated each month on this home page. We take turns hosting each month and choosing the theme/ingredient. If you are a food blogger and would like to join us, just send an email with your blog URL to foodlustpeoplelove@gmail.com


* Affiliate link


Wednesday, June 3, 2015

Egg Drop Soup #FoodieExtravaganza


This simple nutrition-packed soup is full of the goodness of chicken stock and fragrant ginger with the added flavor and protein of eggs. It’s great as both a starter and a main meal and will cure what ails you.

This month my Foodie Extravaganza group is celebrating the humble egg, a great source of protein in a little self-contained package. Eggs may well be one of the most versatile of all ingredients, working well in savory as well as sweet dishes, adding rise to baked goods, richness to sauces and cohesiveness to mixtures like meatloaves, quiches and nut pies. Many thanks to our host this month, Wendy from A Day in the Life on the Farm, where hens roam free and the eggs are always fresh!

Eggs, unwashed, can be stored at room temperature because nature protects them with a natural film that keeps out bacteria. Washed eggs, like most of the ones we buy in a grocery store, should be kept in a refrigerator.

Ingredients - Serves four as an appetizer or two for a light dinner
For the soup base
4 cups or 945ml chicken stock (Substitute vegetable stock for a vegetarian soup.)
2 tablespoons cornstarch
1 thumb-sized piece of fresh ginger
3-4 spring onions, white bulb ends only

For the egg drop:
3 large eggs
1 teaspoon cornstarch
1 teaspoon sesame oil

Optional add-ons:
Cooked rice
Corn niblets

To serve:
Soy sauce to taste
Drizzle sesame oil
3-4 spring onions, green tops only
Sprinkle fresh ground black pepper

Method
Slice your ginger into five or six thick pieces. Cut your green onions and separate the mostly green bits from the mostly white bits.


Heat your chicken broth with the ginger over medium heat so it comes to a boil slowly, allowing the ginger time to steep. Once it comes to a boil, turn it down a little, add in the white onion tops and let it gently cook for about 10 minutes.


Fish out the ginger pieces. Make a slurry out of a little cold water and the cornstarch and add it in slowly, while whisking quickly. Cook for a few minutes until the soup starts to thicken.

Meanwhile, whisk your eggs with the teaspoon of cornstarch. Add in the sesame oil and whisk again.


Stir the hot soup to get it moving in a circle and then slowly, slowly add the egg in the smallest stream you can manage, so it starts cooking as soon as it hits the hot broth, making ribbons of egg.

Stop and start the pouring, stirring gently in a circular fashion between pourings and allowing the soup to heat up again, until all the egg is in the pot.


Serve the soup in bowls with soy sauce, sesame oil, a sprinkle of the green onion tops and some freshly ground black pepper.


Additional note:
It’s not traditional at all, but I added in a small can of steamed (not creamed!) corn at the end and served the soup over a little hot cooked rice for an even more filling meal. The photos do not reflect this last minute decision but I can tell you that it was a good one.

Enjoy!


Are you a fan of the incredible edible egg? Check out the great egg-centric dishes we have for you today!


Foodie Extravaganza is where we celebrate obscure food holidays or cook and bake together with the same ingredient or theme each month. This month we celebrate National Egg Day on June 3rd by serving up egg dishes of all kinds.

Posting day is always the first Wednesday of each month. If you are a blogger and would like to participate in the next Foodie Extravaganza, just go to our Facebook page to join. We would love to have you!

Follow our Foodie Extravaganza Pinterest board for past events and more deliciousness!


Friday, May 29, 2015

Almond Plum Tarte Tatin #FridayPieDay

This plum tart, baked upside down with caramelized sugar and slivered almonds then flipped, is perfect summer fare, for when stoned fruit is in season. Any fruit can be used in a tarte Tatin, although apples are traditional. Try it with apricots or peaches as well as plums. 

A couple of months ago my friend Heather from girlichef decided she was going to designate the last Friday of the month as Friday Pie Day and I vowed to join her. Then the last Friday in March came and went and I completely forgot. And I did have something to share in April (You are looking at it!) but other real life commitments got in the way. Despite being on the road, on my way to our younger daughter’s graduation from Rhode Island School of Design today, I just had to participate this month. Because, as Heather says, life needs more pie!

Ingredients
1 cup or 200g sugar
2 tablespoons water
8 ripe plums (about 1 lb 6.5 oz or 640g)
Good pinch salt
1/4 cup or 55g unsalted butter
8.5 oz or 240g block puff pastry
1/4 cup or 20g slivered almonds plus a little extra for sprinkling after, if desired.

Method
Preheat your oven to 350°F or 180°C.

Halve the plums and remove the stones.

Put the plums in a bowl and sprinkle them with the remaining sugar and salt, mix, and leave to sit while you get on with caramelizing the sugar.


A note about the pan: I use one that goes from stovetop to oven so I can caramelize the sugar, add the butter and then add the fruit and pastry all in one. If you do not have such a pan, simply pour the caramelized sugar into a baking pan and continue as per the instructions.

In a pan, simmer half the sugar with a couple of tablespoons of water until a golden caramel has formed.


Stir in the butter.


(Here’s where you pour the sauce into a tart pan, preferably non-stick, if your stovetop pan won’t go safely into a hot oven.)

Sprinkle the almonds on the caramelized sugar.


Put the plums on top, round side down, and spread them out to cover the base of the pan.


Roll out the pastry until it is just slightly larger than your pan.

Cover the plums with the pastry, pushing it right into the sides of the pan. Cut two or three slits in the top to let the steam out. I was just messing around so I stuck a few scraps on top of the pastry but since we are turning this over to serve, they won’t even show.


Place the tart in the oven for around 25 to 35 minutes until pastry is puffed and golden brown and the syrup is bubbling up.


When the tart is baked, allow it too cool for about 10 minutes.

Put a large serving plate with sides on top of the pan and turn the tart upside down onto it. The deliciously sticky plummy syrup will come out over the pastry so a plate with sides is essential. Sprinkle on some more slivered almonds, if desired.


Serve nice slices with ice cream, thick pouring cream or a dollop of crème fraîche.


Enjoy!


FridayPieDay is the brilliant invention of Heather from girlichef.

I am pleased to start joining her on the last Friday of each month for pie and crust recipes, techniques, tools of the trade, and other inspiration.

For more information and recipes, please check out her #FRIDAYPIEDAY page!