Showing posts with label Mozzarella. Show all posts

Friday, November 18, 2016

Mediterranean Eggplant Poppers #FishFridayFoodies

Mediterranean eggplant poppers combine the lovely flavors of za’atar, roasted eggplant, mozzarella and tomatoes for a great appetizer your guests will love. They are even more special topped with shrimp.


When I have the time, I like to head to the big hypermarket not too far from my house and wander around the fresh produce section looking for inspiration. They carry an amazing selection of fruit and vegetables from near and far, all shiny, bright, colorful and clearly full of nutrition and vitamins.

Just a couple of days ago, I came across the loveliest little eggplants there. I shifted through them looking for the smallest ones, trying to select ones of similar size, with good stems still attached. Right there, in my head, I made up this recipe. Like this: What goes with eggplant? Garlic and tomatoes. What goes with garlic and tomatoes? Mozzarella, of course. And because today I am joining the Fish Friday Foodies in sharing appetizers, I decided to top the whole lot with some seasoned shrimp.

And that is the weird and wonderful way my brain works.

Ingredients
8 small eggplants
2 cloves garlic
Generous handful parsley, plus more to garnish, if desired
olive oil
salt
pepper
2 teaspoons za’atar
1 ball fresh mozzarella (about 4.4 oz or 125g)
4-5 grape tomatoes
16 cooked medium-sized shrimp

Method
Preheat your oven to 400°F or 200°C.

Scrub the little eggplants clean then cut them in half, trying to split the stem as well. Scoop out the insides, chop and set aside. I use a melon baller for the scooping. Put them in a baking pan.


Mince the garlic cloves and chop the parsley finely.

Cook the eggplant insides in a small pan with a good drizzle olive oil, sprinkle of salt and pepper plus one teaspoon of the za’atar. When all of the water has cooked out of the eggplant and it’s browning, add in the garlic and cook for a couple more minutes.


Tip in the parsley and cook for another 30 seconds or so, until the parsley wilts. Taste the filling and add more salt, if necessary. Remove from the heat.


Cut the mozzarella ball into thin circles. Fit them into the eggplant halves. Add the filling, dividing it between the eggplants.


Slice the grape tomatoes and put one slice on top of the filling. Drizzle on some olive oil.


Roast in your preheated oven for about 15 minutes or until the eggplants start to slump a little and are browned around the edges. Some leakage happens but when you scrape those bits up with a metal spatula, you get to eat them. Score! Make sure you are in the kitchen alone when these come out of the oven and you won't even have to share that bonus.

Meanwhile, dry your shrimp and put them in a small bowl. Drizzle them with a little olive oil and toss them around to coat. Add the last teaspoon of za’atar and toss again.

Note: There are various za'atar recipes. I prefer what's known as Lebanese za'atar but you can use your favorite.

Ignore the little tails on the shrimp. I did remove those before I put the shrimp on the eggplant poppers.


Remove the baking pan from the oven and top each eggplant with one shrimp. Pop the pan back in the oven for another five minutes to warm the shrimp through.


Serve warm, sprinkled with a little more chopped parsley, if desired.

For a vegetarian option, skip the shrimp step. We love shrimp but these Mediterranean Eggplant Poppers are fabulous even without them. And they are just as pretty. Here they are pre-shrimp.


Update: Just ate a leftover eggplant popper straight out of the refrigerator. They are even good cold.

Enjoy!


Many thanks to this month’s Fish Friday Foodie host, Wendy from A Day in the Life on the Farm. If you are looking for creative holiday appetizers or first courses with seafood, you’ve come to the right place!


Pin it! 

 .

Sunday, July 24, 2016

Perfect Lentil Burgers

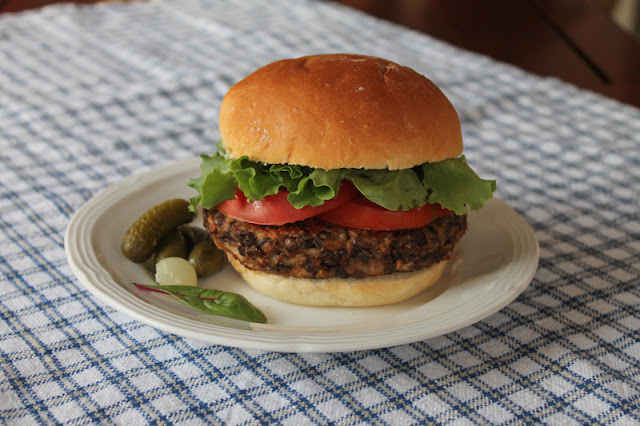
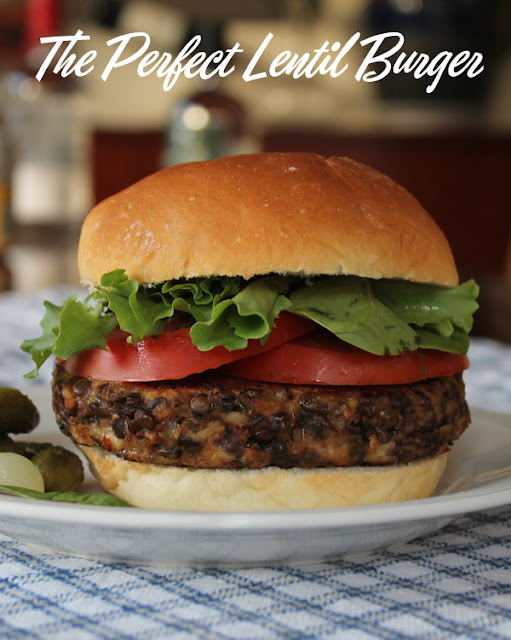
The perfect lentil burgers have two secret ingredients, mozzarella cheese for fat and moisture and smoked paprika to mimic a little charbroiled flavor. Truly, you will not miss the meat. 

Food Lust People Love: The perfect lentil burgers have two secret ingredients, mozzarella cheese for fat and moisture and smoked paprika to mimic a little charbroiled flavor. Truly, you will not miss the meat.
Nobody likes a dry burger is one of my mottos. This goes for chicken and beef but it goes double for vegetarian patties. A little fat that won’t evaporate off when cooking is key. I first made these lentil burgers using bread I had baked with thick mozzarella slices in the dough.

The whole family declared them the perfect lentil burgers. The problem was, how to recreate them without having to bake that bread again each time, lovely though it was.


I took apart the bread recipe, figured out about how much mozzarella must have been in the number of slices I used for the first perfect lentil burgers and then added that into the new patty mix with plain whole grain sandwich bread. Much to our delight, it worked. I’ve made these lentil burgers many times since and they are always one of the first things my younger daughter asks for when she comes home. Hope you enjoy them!

Perfect Lentil Burgers

One note about the main ingredient, Puy lentils: You don't have to use green lentils actually grown in the Puy region of France because those can be pricey. I do recommend that you source the (almost) identical French lentils grown in other regions of France. They hold their shape much better than any other lentil I've tried, most of which go from not quite cooked to too mushy in a heartbeat. The French lentils will make a much better burger.

Ingredients – for four patties (about 7oz or 200g each – a substantial patty!)
4 slices whole grain sandwich bread
1/4 medium purple onion
2 eggs
3 1/2 oz or 100g mozzarella, grated
1/2 teaspoon smoked paprika
1/4-1/2 teaspoon cayenne (I also use more. We like things spicy.)
Fine sea salt
Freshly ground black pepper
Fine sea salt
1 cup or 210g uncooked (or about 2 1/2 cups or 485g cooked/rinsed) Puy lentils
(If you are cooking them, boil with 1/2 teaspoon baking soda till tender. Drain and rinse.)
1 tablespoon extra virgin olive oil and more for pan

To serve:
4 buns
Sliced tomatoes
Lettuce
Sliced onions
Your favorite condiments – mayo, mustard, ketchup, etc. We like mayo with a little garlic and lemon juice added too.

Method
Toast the slices of bread and cut them into cubes. Chop the onion up.

Process the toast cubes and the onion until the bread is in crumbs. Add the eggs and process until well combined.


Tip the mixture out into a bowl. Add the grated mozzarella and mix well.  Add the smoked paprika, cayenne, a generous sprinkle sea salt and a few good grinds of black pepper. Mix well.


Add the rinsed, drained lentils and the extra virgin olive oil. Mix well.


Form into four patties.

Food Lust People Love: The perfect lentil burgers have two secret ingredients, mozzarella cheese for fat and moisture and smoked paprika to mimic a little charbroiled flavor. Truly, you will not miss the meat.


Pan fry in non-stick pan or griddle with an extra drizzle of olive oil until golden on both sides, about 6-7 minutes a side should do it.

Food Lust People Love: The perfect lentil burgers have two secret ingredients, mozzarella cheese for fat and moisture and smoked paprika to mimic a little charbroiled flavor. Truly, you will not miss the meat.


Serve with sliced tomatoes, onions and lettuce on a hamburger bun. You wanna put more cheese, you surely can but it's not necessary. We never do.

Food Lust People Love: The perfect lentil burgers have two secret ingredients, mozzarella cheese for fat and moisture and smoked paprika to mimic a little charbroiled flavor. Truly, you will not miss the meat.


Enjoy!

This week Sunday Supper is sharing a plethora of creative hamburger and hot dog recipes that you are going to love! Many thanks to our host Christie of  A Kitchen Hoor's Adventures and our event manager Shelby of Grumpy's Honeybunch for all of their hard work.

All American Burgers & Dogs
Cluck Burgers
Worldly Burgers & Dogs
Where's the Beef Burgers
Where's the Bun Burger
Dessert Burger
How to

Pin the Perfect Lentil Burgers!


Food Lust People Love: The perfect lentil burgers have two secret ingredients, mozzarella cheese for fat and moisture and smoked paprika to mimic a little charbroiled flavor. Truly, you will not miss the meat.

.


Sunday, September 21, 2014

Cheesy Potato Chard Bake


This casserole of potatoes, chard and two cheeses is a great vegetarian main course option. It’s deliciously rich so it’s very filling and, best of all, you can easily double or treble the ingredients to feed a crowd. Add a green salad, tomato salad or some grilled asparagus to round out the meal.

Last spring I was in Providence visiting my girls and, as usual, they invited their friends over for dinner. I miss a full house now that they are living away but those evenings make up for it a little bit. Such a delightful group of young people, almost all students or recent graduates of Rhode Island School of Design! We had taken advantage of the farmers’ market that morning and had a couple of big bunches of fresh chard and some locally made goat cheese in hand, so we adapted a recipe from Bountiful for creamed Swiss chard that is supposed to be served over baked potatoes, and made it into a casserole. It turned out gorgeously! One of the talented friends (Debora V. Fulop!) who helped to cook the meal has promised to illustrate some of the steps, since we didn’t take many photos and as soon as she gets around to it, I’ll share that recipe. Right now Deb is busy designing jewelry but she also takes commissions for other illustration and design work.

Meanwhile, this version is much healthier, with no cream in sight. I did use a mix of feta and mozzarella that makes this just as fulfilling to eat.

This week, our Sunday Supper group is celebrating the official start of autumn in the northern hemisphere with cozy dishes that fit the season. As temperatures start to cool down and you are looking for comfort food, it doesn’t get more comforting, in my opinion, than something made with potatoes and melted cheese. Make sure you scroll on down to see all the beautiful seasonal recipes we have for you today and find out how to join Sunday Supper on our mission to get folks back around the family table.

Ingredients
3 1/2 oz or 100g (without the hard stems) Swiss chard or other local greens - Kale also works great!
1 lb 6 oz or 635g new potatoes
2 cloves garlic
About 4 1/2 oz or 125g feta (I like to use sheep's milk feta for stronger flavor.)
About 4 1/2 oz or 125g fresh mozzarella
Olive oil
Black pepper – freshly ground
Cayenne pepper or paprika- optional

Method
Preheat your oven to 350°F or 180°C.

Cut the new potatoes into chunks and chop your garlic. (If you can't find new potatoes, by all means, use regular ones but peel them first. I even peeled some of my new potatoes because they had some funny bits.)

Wash your Swiss chard or other greens really well and cut out and discard any hard middle stems. Chop the leaves roughly.

Slice the mozzarella and crumble the feta. Set aside.

In an ovenproof pan that is big enough to hold all of the potatoes, sauté the garlic with a good drizzle of olive oil. Add the potato chunks into the garlic pan and cook for a few minutes, stirring them around so they are coated with the olive oil. Drizzle in a little more olive oil, if the pan is too dry.


Add the Swiss chard, cover the pot and allow the chard to wilt.


Sprinkle everything with some generous grinds of fresh black pepper and stir the pot so that the chard and potatoes are evenly distributed.

Top with the crumbled feta and sliced mozzarella.


Sprinkle with a little bit of cayenne or paprika for color, if desired. Drizzle with olive oil.

Bake, uncovered, in your preheated oven until the potatoes are tender and the cheesy top is golden and bubbling. Mine took about 30 minutes.


Enjoy!

Many thanks to our host for this week’s Fabulous Fall Foods Sunday Supper, Coleen of The Redhead Baker and, her host mentor, Conni of The Foodie Army Wife. Is summer still hanging on where you live or are you ready to celebrate autumn with seasonal fruit and vegetables and warming dishes for cold nights?

Appetizers and Drinks
Soups, Stews, Chili, and Casserole
Salads and Side Dishes
Main Dishes
Desserts and Baked Goods

*This is an Amazon affiliate link. I earn some small change if you buy through this link, at no extra cost to you.

Thursday, August 7, 2014

Homemade Spinach and Cheese Ravioli

Homemade spinach and cheese ravioli do take a little time but making your own pasta dough is right up there on the satisfaction scale with baking bread. You know what’s in it. It’s fresh and the taste is far superior to store-bought. Best of all, it’s surprisingly easy.

Food Lust People Love: Homemade spinach and cheese ravioli do take a little time but making your own pasta dough is right up there on the satisfaction scale with baking bread. You know what’s in it. It’s fresh and the taste is far superior to store-bought. Best of all, it’s surprisingly easy.

You might notice, if you stopped by earlier, that I am posting twice today. And that’s because, despite my prior Sunday Supper commitment (I’m hosting for the very first time, guys! So excited about this week’s theme: Saving Summer!) I couldn’t turn down a request from my fellow blogger Colleen from Souffle Bombay to talk about cookbooks and what they mean to me.

I am a card-carrying, silver-plated, officially stamped, internationally certified member of The Cookbook Junkies. And that’s the truth. But today, at Colleen’s request, I am going to tell you about one special cookbook, in my case, it’s the Good Housekeeping Illustrated Cookbook, 1980 edition. It was given to me and my husband for our very first married Christmas, back in 1986, by my mother-in-law.

My husband thumbed its pages more than I did that first year. He was working offshore so, on his time off, he was househusband, cooking meals and doing laundry while I was at work. I’d often get phone calls with random questions, like “What exactly is a Dutch oven and do we have one?” and I’d know he was planning dinner, hunched over that big book with its four-color photographs of Every Single Dish (no kidding) and making his shopping list. He made a pretty mean lasagna back in those days!

It was the only cookbook I took with me when we first moved overseas in 1987. In the days long before the internet and handy Google searches, it was my lifeline to classic recipes with tips on hostessing, how to fold fancy napkins or calculate food and drink amounts for party guests and, before too long, baby showers. With each move we have made over the years, and no matter how many cookbooks I’ve since collected, Old Faithful was the one cookbook that came in the suitcase. I didn’t dare put Good Housekeeping in the shipment! What if it went missing? And, of course, I’d need it before the shipment could arrive six weeks later anyway.

I have made recipes from its grease-stained leaves more times than I can count so it broke my heart when it started to fall apart. Its pages were spattered with dishes and desserts and gravies from family meals too numerous to count. Sticky baby fingerprints got ever increasingly bigger as our daughters grew into capable young women and became competent on their own in the kitchen. But far from outlasting its usefulness, and despite its own shattered spine, our Good Housekeeping still formed the backbone of the kitchen repertoire.

The great book was probably close to 20 years old when I first searched online for that same 1980 edition and bought a stranger’s less-used spare. I knew it was only a matter of time till the original would have to be retired.

And then it suddenly occurred to me that my daughters would need their own copies when they moved away from home! Otherwise, how would they make their daddy’s pancakes and waffles? Or our family’s apple pie? Not to mention the basic yellow cake that celebrated so many early birthdays! Boxed cake mix? Pfft. Couldn’t find those most places we’d lived, even if I'd wanted to. I found two more copies online and held them dear until it was time to write the inscriptions in the front covers and send them, and their girls, out into the world.

In due time, the original cookbook was indeed retired and is now up high in a safe cupboard, carefully inscribed newlywed Christmas message intact, its same edition stand-in doing the same remarkable job in my kitchen.

It’s still the only cookbook that comes in my suitcase when we move.

Homemade Spinach and Cheese Ravioli 

Whenever my daughters are home, we make ravioli with the fresh pasta recipe in our most dependable cookbook. If friends are around, everyone gets into the act. I took these photos a couple of years back and never have posted them or this recipe. But this seemed like the perfect time to share. Pasta making should be a group affair, dare I even say, celebration. Just try to ignore the cluttered counter, okay?

Ingredients
For the pasta dough:
2 1/4 to 2 1/2 cups or 280- 315g flour (plus extra for rolling out the pasta)
2 eggs
1 egg yolk
1 tablespoon olive oil or salad oil
1 teaspoon salt

For the ravioli filling:
3 oz or 85g grated mozzarella
3 oz or 85g cream cheese
1 3/4 oz or 50g freshly grated Parmesan
4 1/4 oz or 120g frozen spinach, thawed and drained
1 egg
Few grinds fresh black pepper

Method
In large bowl, combine 1 cup or 125g flour, 1/3 cup or 80ml water and remaining dough ingredients. With mixer at slow speed, beat for two minutes, occasionally scraping bowl with a rubber spatula.

Using a wooden spoon, stir in enough of remaining flour to make a soft dough.

Turn out onto floured surface and knead until smooth and elastic, about 10 minutes. Wrap in cling film and let stand 30 minutes.


While the dough rests, we can get on to the ravioli filling. It couldn’t be simpler. Mix all the ingredients together well in a mixing bowl. Set aside.


Once the dough has rested, cut off a small piece about the size of a tennis ball or perhaps just a little smaller. Wrap the dough again with the cling film.

Flour it well and use a rolling pin or a pasta roller to roll it out quite thinly to the size of your ravioli plaque.


Flour your ravioli plaque liberally and lay the sheet of pasta on top. Fill each hole with about a teaspoon of the filling.

Food Lust People Love: Homemade spinach and cheese ravioli do take a little time but making your own pasta dough is right up there on the satisfaction scale with baking bread. You know what’s in it. It’s fresh and the taste is far superior to store-bought. Best of all, it’s surprisingly easy.


Cut another piece of dough off of the big ball and, following the same instructions, roll it out to the size of your ravioli plaque.

Use a pastry brush to wet the pasta on the plaque between the spoons of filling.

Food Lust People Love: Homemade spinach and cheese ravioli do take a little time but making your own pasta dough is right up there on the satisfaction scale with baking bread. You know what’s in it. It’s fresh and the taste is far superior to store-bought. Best of all, it’s surprisingly easy.

Carefully, starting at one end, lay the second sheet of pasta on top of the filled one, sticking the two sheets together and pressing out the air as you go along.


Turn the ravioli plaque over and let the filled pasta drop out onto your countertop. If it sticks, just gently pry it off.


Trim the ravioli around the edges and cut them apart.

Food Lust People Love: Homemade spinach and cheese ravioli do take a little time but making your own pasta dough is right up there on the satisfaction scale with baking bread. You know what’s in it. It’s fresh and the taste is far superior to store-bought. Best of all, it’s surprisingly easy.


Set them aside on a plate lined with cling film and flour.

Food Lust People Love: Homemade spinach and cheese ravioli do take a little time but making your own pasta dough is right up there on the satisfaction scale with baking bread. You know what’s in it. It’s fresh and the taste is far superior to store-bought. Best of all, it’s surprisingly easy.


Continue the process until all the ravioli are rolled out, filled and cut apart. If you can get an assembly line going, it goes much faster. And it's much more fun!


Bribe the workers, if you must.

The ravioli can be stored in the refrigerator, covered with cling film or even frozen until you are ready to boil them.

To cook, boil water with salt and a little olive oil in a large pot, as you would for regular pasta and lower the ravioli in gently. Fresh pasta only takes a few minutes to cook.

Food Lust People Love: Homemade spinach and cheese ravioli do take a little time but making your own pasta dough is right up there on the satisfaction scale with baking bread. You know what’s in it. It’s fresh and the taste is far superior to store-bought. Best of all, it’s surprisingly easy.
See that? It's my biggest Calphalon pot.


Serve with the sauce of your choice.

It is my pleasure to introduce you to my fellow Cookbooks & Calphalon bloggers who have chosen recipes from or inspired by a cookbook that means a lot to them and are sharing their food stories.

Baking


Cooking


Drinks

Pin it!

Food Lust People Love: Homemade spinach and cheese ravioli do take a little time but making your own pasta dough is right up there on the satisfaction scale with baking bread. You know what’s in it. It’s fresh and the taste is far superior to store-bought. Best of all, it’s surprisingly easy.

.

Tuesday, July 1, 2014

Crusty Caprese Loaf for #TwelveLoaves

All the gorgeousness of my favorite summer salad, baked into a lovely crusty loaf, with basil proofed in the dough, mozzarella tucked inside and, finally, a smattering of colorful little tomatoes roasting on top. 

It’s summertime and that means plentiful, flavorful tomatoes and long and leggy overgrown basil. Which makes this the perfect season for making Caprese salad. And crusty Caprese bread. This month Twelve Loaves is celebrating summer fun! We’ve got nine great recipes for you and hope you will be inspired to turn that stove or oven on, despite the heat.

What’s your favorite taste of summer? Aside from the cherries and homegrown tomatoes, mine has got to be fresh purple hull peas, which are really a type of bean. They are hard to come by most of the year but my farmers’ market in Houston has them during the summer and they are divine. A fresh bean is NOTHING like its dried cousin. If you’ve never tried them, start looking for them now. Well, right after you bake some bread, okay?

Ingredients
1/4 oz or 7g active dry yeast
1 1/2 cups or 355ml tepid water
1 teaspoon sugar
12 oz or 2 3/4 cups or 345g flour plus extra for kneading
3 oz or 3/4 cup or 85g wholemeal flour
1 teaspoon salt
11 cherry/grape tomatoes, approximate weight  4 1/4 oz or 120g
7 oz or 200g mozzarella
2g or about 10 medium-sized leaves fresh basil plus more for garnish, if desired
Olive oil

Method
Put 1/4 cup or about 30g of flour into your large mixing bowl with the sugar and yeast. Add the tepid water and stir well. Allow to proof for 10 minutes. If the yeast gets foamy, it’s all good.

Meanwhile roll your basil leaves up really tightly and slice thinly. Fancy chefs call this chiffonade and you can too.

When the yeast mixture is ready, add in the basil and stir.


Add in the rest of the flours and the salt.  Mix until well combined and you have a soft dough.

If you are using a stand mixer, change to the bread hook and knead. You may have to add a little more flour. Otherwise, remove from the mixer and knead by hand until smooth and stretchy.

Form into a nice round ball. Drizzle a little olive oil in your bowl and roll the ball around until coated with oil.


Cover the bowl and put in a warm place for a couple of hours. You can continue the process at this point or you can let it rest overnight in the refrigerator for added flavor.


If you put the dough in the refrigerator overnight (like I did) remove it and allow it to come to room temperature before proceeding.

Meanwhile you can cut your mozzarella into thick slices.


Punch down the dough and form it into a nice circle again. Put it in a greased pan.

Use a sharp knife to cut deep slits in the dough and tuck a slice of mozzarella into each.


Pierce a hole with that same sharp knife in each small tomato and push them into the dough.


Cover with a mixing bowl and put in a warm place to rise for about an hour. Set your timer for 45 minutes and preheat your oven to 375°F or 190°C when it rings.

Bake the loaf, uncovered, in your preheated oven for about 25-30 minutes or when the internal temperature of the loaf reaches 180°F or 82°C.

If you want a crusty loaf, turn the oven off and leave the bread in it for 10 more minutes. Otherwise, remove from the oven and allow to cool.


Remove from the loaf from the pan and cool completely on a rack. If you can wait that long to slice it.


Enjoy!


Check out all the beautiful summer breads we’ve been making for you!


  • Blueberry and Japanese Yuzu Citrus Muffins from Kim at NinjaBaking.com
  • Citrus Pecan Quick Bread from Renee at Magnolia Days
  • Courgette, Feta, Honey and Sesame Seeds Pull-apart Bread from Luisa at Rise of the Sourdough Preacher
  • Crusty Caprese Loaf from Stacy at Food Lust People Love
  • Fruit and Veggie Quick Bread from Felice at All That’s Left Are the Crumbs
  • Gluten Free Berry Bread from Sherron at Simply Gourmet
  • Grilled Naan Bread from Reneé at Kudos Kitchen by Reneé
  • Iron Skillet Pizza by Karen from Karen’s Kitchen Stories
  • Upside Down Banana Bread from Holly at A Baker's House 


  • Would you like to join us this month? Choose a recipe featuring the flavors of summer! Whatever you bake (yeasted, quick bread, crackers, muffins, grissini, braids, flatbreads, etc.) have fun and let's have a delicious month of seasonal bread. Let's get baking!

    If you’d like to add your recipe to the collection with the Linky Tool this month, here’s what you need to do!

    1. When you post your Twelve Loaves bread on your blog, make sure that you mention the Twelve Loaves challenge in your blog post; this helps us to get more members as well as share everyone's posts. Please make sure that your bread is inspired by the theme!

    2. Please link your post to the linky tool at the bottom of my blog. It must be a bread baked to this month’s Twelve Loaves theme – Summer Fun.

    3. Have your Twelve Loaves bread that you baked this July 2014, posted on your blog by July 31, 2014.

    #TwelveLoaves is a monthly bread baking party created by Lora from Cake Duchess.


    Thursday, July 18, 2013

    Rough Puff Tomato and Olive Tart


    Hands up, who has been to Paris?  Who’d like to go?  And what is one of the number one destination for tourists in Paris.  The Louvre, of course.  Well, guess what?  I saw some treasures from the Louvre today.  In Abu Dhabi.  Yes, that’s right.   Right here in the Sandpit.  Apparently, a new Louvre is being built, and it is scheduled to open in 2015.  The plans look fabulous and there is already a small museum to introduce the bigger one to come, full of painted treasures by the likes of Picasso, Gauguin, Klee, Magritte, Mondrian and Twombly, as well as sculptures, ceramics, metalwork, tapestry and even a fascinating mobile by Alexander Calder.  Appropriate to the educational mission of the Louvre Abu Dhabi - bridging and connecting cultures - two ancient religious texts, the Koran and the Pentateuch, sit side by side in one protective glass case.  Entrance to the current exhibit - Birth of a Museum - is free, along with the narrated audio guide.  Now I can’t wait for the whole Louvre Abu Dhabi to open.  It’s going to be a beautiful place filled with beautiful things.

    And now you know why I am late in posting this recipe.   Let us tarry no longer.  We have tart to bake!

    Ingredients
    1 rectangle rough puff pastry dough from this recipe
    7 oz or 200g large grape or tiny Roma tomatoes
    2 spring onions
    2 cloves garlic
    4 1/2 oz or 125g (drained) fresh mozzarella
    3 1/2 oz or 100g feta
    15 whole black olives
    2 eggs lightly beaten
    Sprinkle cayenne – optional

    Method
    Preheat your oven to 400°F or 200°C.

    Roll out your chilled rough puff pastry, with a floured rolling pin on a lightly floured surface.


    Laying your tart pan on top, cut a circle out of the dough with a sharp knife.


    Transfer the circle of dough to the tart pan.


    Fold the top under to neaten the edge.


    Use a fork to dock the bottom and sides of the dough.


    Pop this back in the refrigerator while you prepare the rest of the ingredients.

    (Stack the leftover dough and wrap in cling film and freeze for later use. Don’t make it into a ball or you will lose your layers.)


    Thinly slice your garlic, chop your green onions and crumble your feta cheese.

    Pit your black olives and halve them and then halve the little tomatoes.   In a small mixing bowl, lightly beat the eggs.

    Okay, now, in a larger mixing bowl, add in your tomatoes, olives, green onions, garlic and the beaten eggs.  Stir to mix.

    Fold in the feta.


    Pour the mixture into your tart pan.

     I like to straighten out the tomatoes and olives and make the rounded sides face up, because I think it’s prettier that way, but if you don’t care, skip this step.  The flavor will be just as lovely.  Probably.


    Now slice the fresh mozzarella into little pieces and poke them in and around the tomatoes and olives.


    Sprinkle with a little cayenne pepper if desired.


    If your tart pan has a removable bottom, you’ll want to put it on top of another pan before putting it in the oven.  This will make it easier to remove from the oven when hot.

    Bake for 40-45 minutes or until the crust is nicely golden and the cheese on top is too.


    Allow to cool for a few minutes and then remove the tart pan.  Slice into pieces.


    Enjoy!