Showing posts with label cheese. Show all posts

Sunday, April 4, 2021

Ham and Spinach Quiche

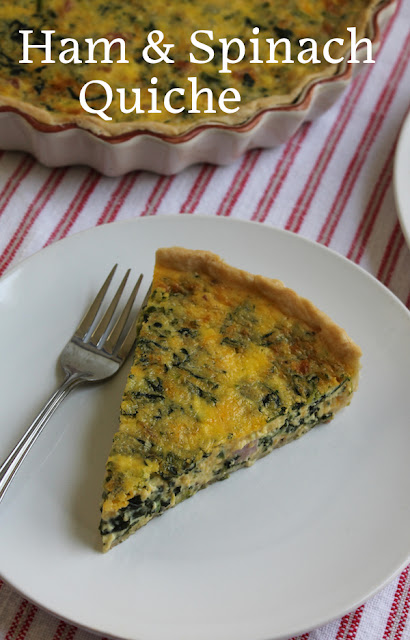
This ham and spinach quiche is a lovely dish for brunch, lunch or dinner, with cubes of leftover ham, spinach and loads of extra sharp cheddar cheese. 

Food Lust People Love: his ham and spinach quiche is a lovely dish for brunch, lunch or dinner, with cubes of leftover ham, spinach and loads of extra sharp cheddar cheese.

If you are trying to use up leftovers, you can’t beat baking quiche. Quiche is like an omelet: You can put anything and everything in it. If you have lots of leftovers, you might also want to check out my Omelets with Super Powers post.

Creating a quiche in two or three easy steps:
1. Choose a cheese (Cheddar, blue, Brie, Camembert, Gouda, Emmental, Swiss, etc.)
2. Choose a vegetable (Broccoli, tomato, cauliflower, asparagus, potato, onion, etc. Quick cooking vegetables can be added raw, for instance, tomatoes. Others, like broccoli and asparagus, should be parboiled. Still others, like potatoes or carrots, should be fully cooked.)
3. (Optional) Choose a cooked “meat” (Ham, bacon, chicken, beef, lamb, fish, shrimp, etc.)

Then, of course, you will add eggs, milk and cream.  Your quantities of everything will depend on the width and depth of your pie plate or quiche pan. 

The pie crust recipe I use is here. It is versatile and works just as well with savory and sweet fillings. It is the pie crust of my quiches, as well as my banana cream pie and apple rhubarb strawberry pie and pecan pie and so on. I am asked for the recipe often, but I cannot take credit. I come by it honestly: The Good Housekeeping Illustrated Cookbook, 1980 edition, Zoe Coulson, ed.  

This cookbook was a gift from my mother-in-law on our first married Christmas in 1986 and it has been so well-used (read: falling apart) that I am on my THIRD copy now, purchased on Ebay. I had to have the same edition! Perhaps later editions have all the same recipes. I’ll never know. But in the 1980 edition, I know where everything is.  

I could wax eloquent about the Before You Cook section, amply used by my newlywed husband to cook wonderful meals for me upon his return from offshore, with its illustrations of kitchen tools and pots and pans and equipment, essential for a newbie. Or the Color Index with photographs of every one of the more than 900 recipes. Or the illustrated, step-by-step instructions.

Suffice to say, this book is one of only two we have taken in the luggage to every new overseas posting in 35 years of marriage. The second book is a binder of photocopied and handwritten recipes I have amassed over the years from friends and family.  

Ham and Spinach Quiche

My quiche pan was a wedding gift and I’ve used it more times than I can count over the last 35 years. It measures 10.5 in or 27cm across and is 1.5 in or 4cm deep. The ingredient amounts below fill it to perfection. You can also bake this in a normal pie plate. 

Ingredients
1 unbaked pie crust (I use this recipe.)
6 oz or 170g leftover baked ham 
4 1/2 ounces or 127g extra sharp cheddar, grated
3 1/2 oz or 100g frozen spinach (thawed, then drained)
4 eggs
3/4 cup or 180ml cream 
1/2 cup or 120ml milk
1/2 teaspoon fine sea salt
freshly ground black pepper  

Method
Preheat your oven to 400°F or 200°C and fit your pie crust into your pie plate or quiche pan. Dock it with the pointy end of a knife or the tines of a fork. 


If your ham is in one big piece, cut it into smaller pieces. I think cubes are always fun but you can just chop it up. 


In a large mixing bowl, whisk together the eggs, cream and milk. Fold in the ham, cheese and spinach along with the salt. 


Give the mixture a few good grinds of black pepper and stir again. 

Pour this mixture into your pie crust and bake for 10 minutes in your preheated oven. My oven doesn't heat evenly so I like to put my quiche pan on another larger pan to make rotating it in the oven easier. 

Food Lust People Love: his ham and spinach quiche is a lovely dish for brunch, lunch or dinner, with cubes of leftover ham, spinach and loads of extra sharp cheddar cheese.

After the initial 10 minutes, turn the temperature down to 350°F or 180°C and bake for an additional 25-30 minutes or until an inserted knife comes out clean. If your oven doesn't heat evenly, gently turn the pan around about three quarters of the way through the cooking time. 

Remove the pan from the oven and leave the quiche to cool for about 10 minutes before cutting it into slices to serve. 

Food Lust People Love: his ham and spinach quiche is a lovely dish for brunch, lunch or dinner, with cubes of leftover ham, spinach and loads of extra sharp cheddar cheese.

I usually serve each slice of quiche with a tomato salad or even a green salad on the side but truly, it is a meal all by itself. 

Food Lust People Love: his ham and spinach quiche is a lovely dish for brunch, lunch or dinner, with cubes of leftover ham, spinach and loads of extra sharp cheddar cheese.

Enjoy! 

Today is Easter Sunday and if you are reading this early in the day, you probably haven’t eaten your Easter dinner yet (I mean, if you do celebrate) but my Sunday FunDay friends and I are thinking ahead! At the instigation of our host, Wendy from A Day in the Life on the Farm, we are sharing recipes designed to use up your Easter dinner leftovers! Check out all the recipes below.


We are a group of food bloggers who believe that Sunday should be a family fun day, so every Sunday we share recipes that will help you to enjoy your day. If you're a blogger interested in joining us, just visit our Facebook group and request to join.


Pin this Ham and Spinach Quiche!

Food Lust People Love: his ham and spinach quiche is a lovely dish for brunch, lunch or dinner, with cubes of leftover ham, spinach and loads of extra sharp cheddar cheese.

 .

Thursday, November 16, 2017

Chili Cheese Corn Dog Bundt #BundtBakers

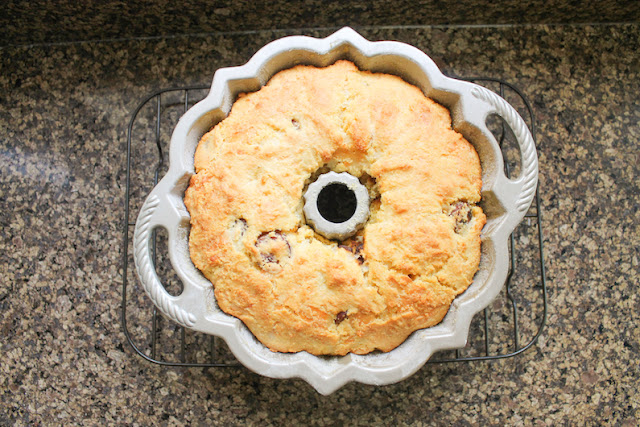
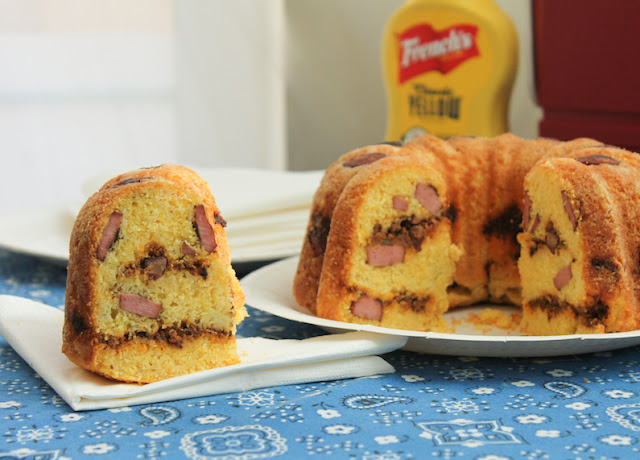
Hot dogs and spicy beef chili are baked up in a cheesy cornbread batter to create a savory chili cheese corn dog Bundt you can slice up and serve at your next party.

Food Lust People Love: Hot dogs and spicy beef chili are baked up in a cheesy cornbread batter to create a savory chili cheese corn dog Bundt you can slice up and serve at your next party.

One special treat I loved as a child were the fried corn dogs only sold at ball games in the concession stand. They vied for favorite status with Frito Pie, that is, Fritos served covered in chili, and nachos, crispy tortillas smothered with melted cheese food product. I have no idea if any actual cheese is involved in the making of that sauce but it is fabulous. I would go to a football or baseball game just for the food.

When our host of this month’s Bundt Bakers event decided on tailgating Bundts as our theme, I knew I wanted to create a Bundt that had elements of my favorite ballpark snacks. I started with my mom’s homemade cornbread recipe – it’s the best and I really should share that sometime soon – then I added the rest. Talk about good!


Chili Cheese Corn Dog Bundt


This would be great to take along to any tailgating party or neighborhood potluck.

Ingredients for a 6-cup Bundt pan
1 cup or 180g yellow cornmeal , plus extra for the Bundt pan
1 cup or 125g all-purpose flour, plus extra for the Bundt pan
2 tablespoons sugar
4 teaspoons baking powder
1/2 teaspoon salt
3/4 cup or 180ml milk
3/4 cup or 200g chili - homemade or otherwise. Mine was from this recipe.
3 1/2 oz or 100g extra sharp mature cheddar
3 hot dogs (I used Oscar Meyer because that’s what I can buy here. Use your favorite brand.)
1 large egg
1/4 cup or 60ml canola oil, plus extra for greasing the pan

Method
Preheat oven to 350°F or 180°C and liberally grease and flour your 6-cup Bundt pan. I used a combination of flour and cornmeal for mine.

Slice the hot dogs into thick circles and fry them gently for a few minutes in a nonstick skillet. This removes some of their moisture. Set aside to cool.


In a large bowl, combine cornmeal, flour, sugar, baking powder and salt. Add in the cheddar cheese and sliced hot dogs, stirring well. I set aside 8 slices to put on the bottom of the Bundt pan before adding the batter. They came out pretty cute so you might want to do the same.


In another bowl, beat together the milk, egg and oil. Beat until fairly smooth, about one minute.

Fold the dry ingredients into the wet and stir until they are well combine.


If desired, put slices of hot dog around the bottom of your greased and floured Bundt pan. Spoon one third of the batter into the Bundt pan. Spoon half of the chili on top.


Top with the second third of the batter. Add the rest of the chili. Top with the last of the batter. In other words, it goes 1. batter 2. chili 3. batter 4. chili 5. batter.


Bake in the preheated oven for 30-35 minutes or until it's lightly browned on top and pulling away from the sides slightly.

Food Lust People Love: Hot dogs and spicy beef chili are baked up in a cheesy cornbread batter to create a savory chili cheese corn dog Bundt you can slice up and serve at your next party.


Remove from the oven and let to cool for a few minutes. Turn the Bundt out onto a rack to cool for another 15 minutes before slicing to serve.

Food Lust People Love: Hot dogs and spicy beef chili are baked up in a cheesy cornbread batter to create a savory chili cheese corn dog Bundt you can slice up and serve at your next party.

Enjoy!

Food Lust People Love: Hot dogs and spicy beef chili are baked up in a cheesy cornbread batter to create a savory chili cheese corn dog Bundt you can slice up and serve at your next party.


Every month my Bundt Bakers group gets together to bring you creative treats baked in Bundt pans. Sometimes they are savory, most times they are sweet, but they are always delicious. Check out this month’s list below. Many thanks to our host Sue of Palatable Pastime for coming up with this fun theme and all her behind the scene work.

BundtBakers  

#BundtBakers is a group of Bundt loving bakers who get together once a month to bake Bundts with a common ingredient or theme. Follow our Pinterest board right here. Links are also updated each month on the BundtBakers home page.

Pin it!

Food Lust People Love: Hot dogs and spicy beef chili are baked up in a cheesy cornbread batter to create a savory chili cheese corn dog Bundt you can slice up and serve at your next party.
.

Sunday, October 1, 2017

Spicy Beef Cheesy Corn Taco Muffins

Love tacos but need for them to be more portable, less messy to eat? Make my spicy beef cheesy corn taco muffins. These savory muffins are made with spicy canned tomatoes and cornmeal. They turn leftover ground beef seasoned with taco spices into a great mobile breakfast, brunch or lunch option.

Food Lust People Love: Spicy Beef Cheesy Corn Taco Muffins - These cheesy muffins made with spicy canned tomatoes and cornmeal turn leftover ground beef seasoned with taco spices into a great breakfast or brunch option.

The weekend I made these muffins was a get-‘er-done sort of weekend. We ran errands and crossed to-dos off the list that had been languishing there for ages. On day two of the weekend – that would be Saturday here – a song came on that reminded my dear husband of one of our favorite restaurants in Houston, Texas. “Let’s go to El Jardín for dinner!” he says. “You are a cruel, cruel man,” I responded. What we wouldn’t give to be able to eat at El Jardín anytime!

When my elder sister first started working in Houston, using her relatively freshly earned law degree, her office was just down the road from what would become our favorite Mexican restaurant, in a part of town that is not the most upscale, if you know what I mean. But the margaritas are inexpensive before evening dinner service and the food is deliciously prepared and served with a smile. The décor is cheerful, with brightly painted wooden chairs with straw-covered seats, colorful tile-topped tables and lots of tissue paper flowers and banners of papel picado, those decoratively snipped Mexican folk art tissue squares.

Even when we are in Houston, El Jardín is still a hike from our home but we make a point of going there whenever we get the chance.

So, the short end to this long story is that we had to have Mexican food for the dinner that night. Had to. That’s all. It wasn’t El Jardín but tacos with all the fixings were the best I could do on short notice, after two long days of getting ‘er done.

When you brown more than 500g (1.1 lb) of ground beef for tacos and you have only two people for dinner, you are going to have leftovers. These muffins are the perfect use for the leftover spicy beef, extending your Mexican meal through breakfast or brunch or even lunch the next day.

Leftover taco meat? Make Spicy Beef Cheesy Corn Taco Muffins!

Think of them as portable tacos. No leftover meat? Next time, make extra, just so you can make these muffins. You won’t be sorry.

Ingredients
1 cup or 150g fine yellow cornmeal 1/2
1/2 cup or 65g flour
1/2 teaspoon baking soda
1 teaspoon salt
1 cup or 225g sour cream
1 1/4 cups or 10 oz or 280g Ro-Tel tomatoes and green chilies
2 eggs
1/2 cup or 120ml canola or other light oil
7 oz or 200g (about 1 1/2 cups) leftover seasoned ground beef for tacos
8 oz or 225g extra sharp cheddar or half cheddar and half Monterrey Jack cheese

Method
Preheat your oven to 375°F or 190°C and grease your muffin pan liberally with non-stick spray or butter.

Grate your cheese, if not already grated. Put a handful or so aside to top the muffins before baking.

Measure your cornmeal, flour, salt, baking soda and grated cheddar into a large mixing bowl and mix well.


Measure the sour cream and oil into a small mixing bowl. Add the eggs and the can of Ro-Tel tomatoes – juice and all. Whisk to combine.


Fold your wet ingredients into your dry ones until just mixed.


Set a little of the seasoned ground beef aside for topping the muffins before baking and fold the rest into the batter.


Divide the batter between the prepared muffin cups.


Sprinkle the top with the reserved cheese and beef.

Food Lust People Love: Spicy Beef Cheesy Corn Taco Muffins - These cheesy muffins made with spicy canned tomatoes and cornmeal turn leftover ground beef seasoned with taco spices into a great breakfast or brunch option.

Bake for 20-25 minutes or until you can see that the sides are turning golden brown.

Food Lust People Love: Spicy Beef Cheesy Corn Taco Muffins - These cheesy muffins made with spicy canned tomatoes and cornmeal turn leftover ground beef seasoned with taco spices into a great breakfast or brunch option.

Remove from the oven and allow to cool for a few minutes.  Remove from the pan, loosening gently with a knife if necessary, and cool further on a wire rack.

Food Lust People Love: Spicy Beef Cheesy Corn Taco Muffins - These cheesy muffins made with spicy canned tomatoes and cornmeal turn leftover ground beef seasoned with taco spices into a great breakfast or brunch option.

Enjoy!

Food Lust People Love: Spicy Beef Cheesy Corn Taco Muffins - These cheesy muffins made with spicy canned tomatoes and cornmeal turn leftover ground beef seasoned with taco spices into a great breakfast or brunch option.

Like spicy foods with a Mexican flair? You might want to try my chicken and black bean enchiladas with homemade enchilada sauce, my easy breakfast Chilaquiles Rojos con Huevos Revueltos – Tortillas with Salsa and Scrambled Eggs or my Sopa Seca de Fideo - Spicy Mexican Noodles. All three are delicious and will satisfy your spicy cravings.

And if you love tacos as much as we do, you are going to be a huge fan of this week's Sunday Supper. Check out all the delicious taco recipes we are sharing today. Many thanks to our event manager Em Beitel for all of her hard work.

Breakfast, Dessert, and Alternative Tacos

Lunch and Dinner Tacos


Pin it! 

Food Lust People Love: Spicy Beef Cheesy Corn Taco Muffins - These cheesy muffins made with spicy canned tomatoes and cornmeal turn leftover ground beef seasoned with taco spices into a great breakfast or brunch option.
 .

Sunday, November 6, 2016

Cheesy Jalapeño Corn Casserole

If you are a fan of cheese and spice and corn, you are going to love this cheesy jalapeño corn casserole. The whole dish is great, but that golden top is the absolute best part.


I must confess that in my family we have a standard set of sides that must be made for Thanksgiving and Christmas and this cheesy jalapeño corn casserole isn't on that list. Not because it’s not perfectly spicy, cheesy and delicious. No, it's because that list was set in stone many years ago and no one is allowed to alter it. In fact. lest we forget, the list is kept at the front of my recipe binder, in a little pocket. Along with the turkey and stuffing, we must have rich creamed potatoes, sticky sweet potatoes, maque choux, green beans with baby new potatoes and, of course, my aunt's best pecan pie for dessert. Is it only my family that is so set in our ways?

If your family is not as persnickety about the holiday menu, you’ll want to add this casserole to your line up. Never mind, if they are. Just make it for a Sunday Supper.

Ingredients
2 tablespoons butter
1 fresh jalapeño or part thereof- depending on your heat tolerance - minced
2 tablespoons onion, minced
1 clove garlic, minced
2 tablespoons all-purpose flour
1 teaspoon dry mustard powder
3/4 teaspoon salt
1/2 teaspoon black pepper
3 cups grated sharp cheddar cheese, about 12 oz or 340g
4 cups or 540g fresh or frozen corn kernels
2 eggs
1 cup or 240ml milk

Method
Use one tablespoon of the butter to sauté the onion, garlic and jalapeño in a small saucepan, over a very low heat, just until softened, about 5-7 minutes. The onion doesn’t need to color, just soften. Remove from the heat and leave to cool.

Preheat oven to 350°F or 180°C and use the other tablespoon of butter to grease your casserole dish.

Toss together cheese, flour, mustard powder, salt and pepper in a medium bowl. Add in the corn and mix well. Set aside.


Beat the eggs and whisk in the milk and the sautéed vegetables.


Pour milk/egg mixture in the corn/cheese mixture; stir well to blend evenly.


Pour the combined mixture into your buttered casserole dish. It looks a bit dry on the top but don't worry, the egg and cheese will rise up and created a beautiful almost soufflé like texture throughout.


Bake in your preheated oven for about 35-40 minutes or until puffy and golden on top. The middle should be ever so slightly jiggly when you take it out and will firm up as it cools.


Enjoy!


Check out all the other special tasty side dishes our Sunday Supper tastemakers are sharing today! Many thanks to this week's host, Caroline of Caroline's Cooking and our event manager, Renee of Renee's Kitchen Adventures for all of their hard word.

Fruity Side Dishes

Other Side Dishes

Potato Side Dishes

Vegetable Side Dishes


.

Sunday, February 28, 2016

Cauliflower Cheese Pie with Grated Potato Crust

A crispy potato crust is filled with all the comfort food goodness of cauliflower and cheese, making this the perfect pie for a still chilly February evening. Or anytime really.

When I was growing up, one of my favorite ways to eat cooked cauliflower was with a side of mayonnaise in which to dip it. I got some funny looks outside my home, where mayo and cauliflower was normal, a given. I thought everyone ate it that way. That winning combo was rivaled on my plate only by cauliflower with cheese sauce. I remember one special family occasion – not sure if it was Christmas or Thanksgiving or possibly even Easter – but there was a platter of cauliflower and broccoli arranged most artistically by my youngest aunt, all smothered in thick cheese sauce. I could have eaten the whole thing by myself but had to share. More’s the pity.

I discovered as I began to travel and learn about other cultures and traditional recipes that the British make a dish called cauliflower cheese for special occasions as well. The cauliflower is steamed or boiled whole then drained. A cheese sauce is created by making a béchamel or white sauce to which sharp cheddar is added, perhaps with a little dried mustard powder. This is poured over the whole cauliflower, some breadcrumbs are often sprinkled on top and then the whole thing is baked until golden brown and bubbling. Heaven, I tell you! It's one of my husband's favorite dishes so it's on regular rotation at our house.

Which brings me to today’s cauliflower cheese pie. It combines my love of cauliflower and cheese, with his baked British favorite and bonus, puts it all in a crunchy potato crust. Hope you love it as much as we do.

Make sure to scroll down to the bottom where my Sunday Supper friends are sharing All The Pies, sweet and savory, with many thanks to our host today, Erica of The Crumby Cupcake.

This recipe is adapted from "Moosewood Cookbook" by Mollie Katzen.

Ingredients
For the crust:
Drizzle olive oil for greasing 9in or 23cm pie plate and brushing crust during baking
1 egg white, lightly beaten
1lb 10oz or 740g potatoes
1 small onion (2 1/3 oz or 65g)
1/2 teaspoon salt

For the filling:
1 medium-sized cauliflower (Mine weighed about 2lbs 3oz or 980g.)
1 tablespoon butter
1 medium onion (about 3 oz or 85g)
3 cloves garlic
1 hot chili pepper - optional but recommended
1/2 teaspoon salt
Freshly ground black pepper
Several sprigs fresh thyme
1 1/4 cup (packed) or 100g cheddar cheese
2 large eggs
1 egg yolk
1/4 cup milk
2 teaspoons cornstarch
Paprika or cayenne for the top

Method
Preheat the oven to 400°F 200°C. Grease a 9in or 23cm pie plate with a drizzle of olive oil.

Grate the cheese and set it aside. (I used my food processor but you can do it by hand, of course.)

Whisk your egg white with the salt and a good few grinds of fresh black pepper. Peel and grate your potatoes. (Once again, I used the food processor.) Squeeze the liquid out and stir the grated potatoes into the egg white immediately to stop them from discoloring.


Grate your onion and add it to the potato mixture, stirring well to combine.


Pour the grated potato mixture into the prepared pie plate and use your fingers to pat it down evenly to make a crust. It's going to seem quite wet, despite your squeezing the liquid out of the potatoes but don't worry. The moisture bakes away and the crust does get crunchy in the hot oven.


Bake the crust for 30 minutes in your preheated oven, then brush just up to the brown edge with a little olive oil (about 1 teaspoon) and bake for 10 more minutes.

Remove the crust from the oven and turn the temperature down to 375°F or 190°C.

While the crust is in the oven, you can get on with the filling. Remove the leaves and hard stem from the head of cauliflower and cut the florets into bite-sized pieces.


Chop your onion, mince the garlic and pepper and strip the leaves off of the fresh thyme sprigs. Save one sprig for garnish, if desired.


Melt the butter in a large skillet. Add the onion, garlic, chili pepper, salt and thyme with a few good grinds of fresh black pepper, and sauté over medium heat for about 5 minutes.


Add the cauliflower, stir, and cover. Cook until tender, stirring occasionally - about 8 to 10 minutes.


When the baked crust is ready, sprinkle half the grated cheese onto it.


Spoon the sautéed vegetables on top, then top with the remaining cheese.


Beat the eggs, egg yolk, milk and cornstarch together making sure the cornstarch has dissolved and pour this over the top.

Dust lightly with paprika or cayenne.


Bake for 35 to 40 minutes or until set. If you feel the edges are getting too brown before the pie is cooked through, cover them with some foil.

Serve hot or warm.


Enjoy!


I've got a bunch of pies I'm sure you'll love here:
Elle's Fresh Blueberry Pie
Sausage Apple Onion Tart
Brown Sugar Nectarine Tart
and these special Portuguese custard tarts, baked in honor of our Sunday Supper leader, Isabel, just to name a few.

But make sure you don't miss this fabulous link list to the #SundaySupper Pies: Sweet & Savory!

Sweet As Pie
Mealtime Pie


.

Monday, January 25, 2016

Gouda Herb Muffins for Derkje #MuffinMonday


Loads of cheese, fresh herbs and a bit of spicy cayenne pepper make these savory muffins rich and flavorful. 

Every Monday I get together with a lovely group of ladies for Bible study. We come from many countries and varied backgrounds but we enjoy our time together trying to learn whatever God wants us to learn, whether from the Bible or each other.  And, with such a diverse group, as you can imagine, there is so much we can learn from one another. The last couple of weeks we’ve been joined by someone special, the mother of one of our little group, who has been visiting since the holidays. As you might have guessed from my title, her name is Derkje.

As I left our meeting last week, she leaned over and almost whispered, “Do you have a recipe for a savory muffin? Perhaps with cheese?”  Well, I have plenty! But most of them make 12 muffins and our dear Derkje recently lost her husband, love of her life and best friend of more than 60 years. Even though they freeze well, 12 muffins is an overwhelming number and I didn’t want to discourage her from the outset with a large batch she’d never end up baking. So I worked out a recipe for just six, baked them up, and passed them over with the printed notes. I wanted to use a cheese that was readily available where Derkje lives in the Netherlands so I made them with Gouda, but you can substitute any aged cheese you have. A nice cheddar would work just as well.

At today’s meeting, I told her that I’d be sharing the recipe with the rest of you for Muffin Monday but, not to worry, I wouldn’t use her name. Derkje replied that she would be delighted if I would. It’s a name that was given to her by her father and she is very proud of it. Isn’t that lovely? She heads home tomorrow and we are going to miss her lively contribution to our group.

Ingredients
8 1/2 oz or 240g Gouda cheese
Small handful mixed fresh herbs of your choice (green onions, thyme, basil, parsley, coriander, rosemary, etc.)
1 cup or 125g flour (or 125g + 1 tablespoon self-rising flour)
1 1/2 teaspoons baking powder (Omit if using self-rising flour.)
1/4 teaspoon salt
1/4 teaspoon cayenne powder (Derkje says use more! And I agree!)
1/2 cup or 120ml milk
1 egg
1/4 cup or 60ml canola or other light oil

Method
Preheat your oven to 350°F or 180°C and generously grease your 6-cup muffin pan.  I would suggest putting the batter into a greased tin rather than muffin cups because the cheese in these makes them bake up lovely and browned and crunchy all over.  You’d miss that in a paper cup. I used non-stick cooking spray but you can use butter or a little more oil.

Grate your cheese, setting aside a generous handful for adding to the top before baking.

Pull the leaves off of any herbs with woody stems, then mince your herbs, saving a few tiny sprigs or leaves for decoration, if desired.


In a large mixing bowl, whisk together your dry ingredients, including the cayenne pepper.

Then stir in the big pile of Gouda, making sure all the bits are well coated with flour. Add in herbs and mix well.


In a separate bowl, whisk the egg, milk, and oil together.

Pour milk mixture into dry ingredients and fold until it is just combined.


Spoon the batter into your very well greased muffin pan.

Top with the reserved cheese and decorate with a herby leaf or two.


Bake in your preheated oven for 20-25 minutes or until they are looking browned and crispy and delicious and you can’t wait another second to eat them.


BUT, allow the muffins to cool for a few minutes then use a non-pointy knife to loosen/remove them from the muffin pan.


Enjoy!

Check out all the other great recipes my Muffin Monday bakers are sharing today!


#MuffinMonday is a group of muffin loving bakers who get together once a month to bake muffins. You can see all our of lovely muffins by following our Pinterest board.

Updated links for all of our past events and more information about Muffin Monday, can be found on our home page.


.